
Concrete Pad Drainage: A Practical Homeowner’s Guide


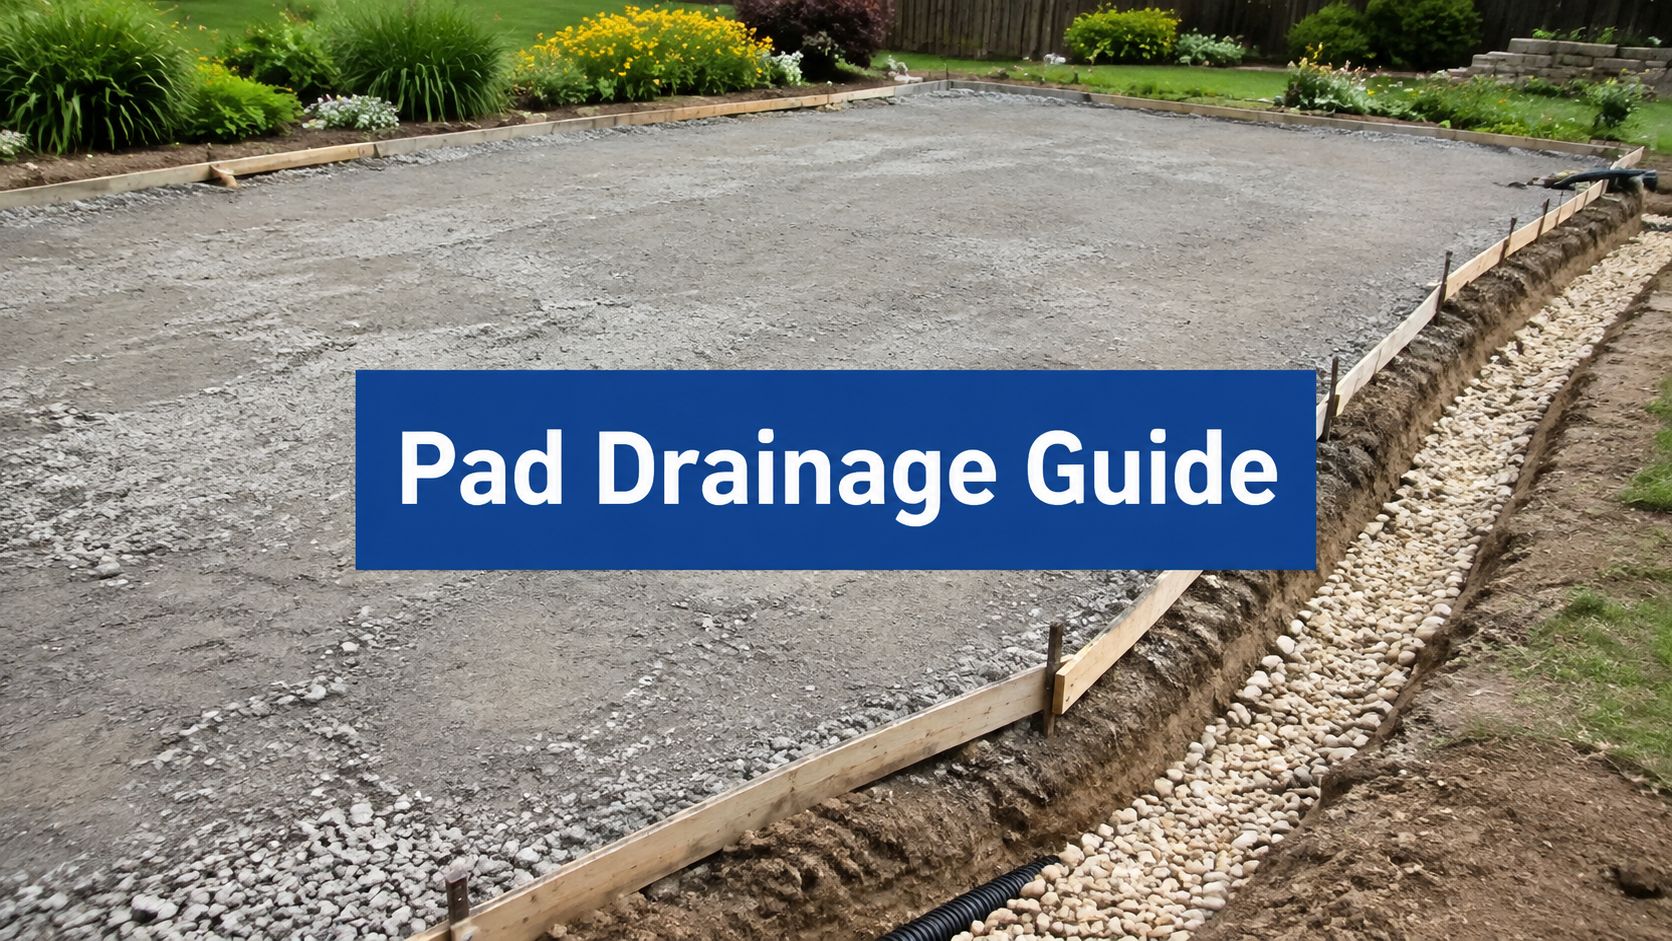
A concrete pad looks simple from the street. Then the first hard rain hits, water sits at the edge, and the next storm starts washing soil out from under the slab. That's when most homeowners realize the problem wasn't the finish on top, it was the way the whole site was set up underneath.
For concrete pad drainage, the right question isn't, “Did the crew slope the slab?” It's, “Did the pad, base, drain, and outlet all work together?” On a lot with tight side yards, fence lines, garage aprons, or a shed pad tucked near a property edge, the site often decides the drainage plan before the concrete truck ever shows up.
Why Concrete Pad Drainage Is a Site Problem, Not a Slab Problem
A good pad can still fail if the yard around it sends water back toward the edge. I see that all the time on shed pads, garage slabs, patio tie-ins, and barn add-ons. The concrete may be straight and smooth, but if the surrounding grade, the base, or the outlet is wrong, water stays where it shouldn't and the damage starts underneath.
The plain rule to keep in mind is a minimum 2% slope, which is about 1/4 inch per foot. Multiple industry sources also describe 1% longitudinal fall and 2% crossfall as a practical minimum for paving that has to shed water efficiently (concrete block paving drainage guidance). That number matters, but it doesn't solve everything by itself.
Practical rule: if water can't move away from the slab edge, the surface slope on the pad won't save the project.
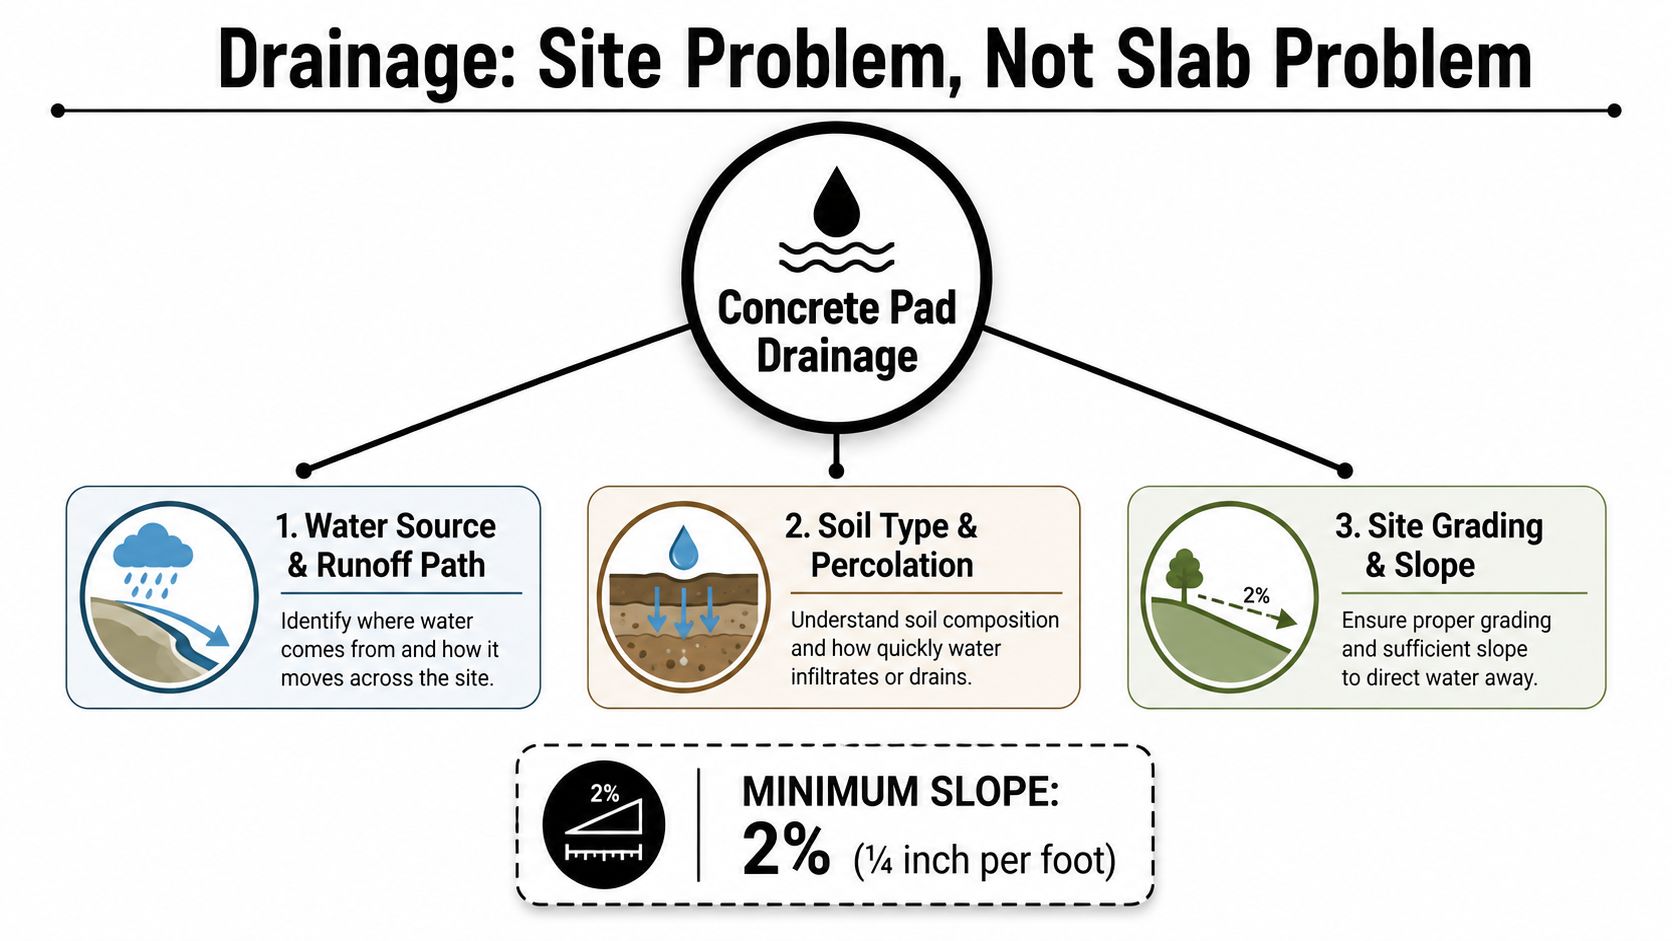
Think in terms of a four-piece system. The pad sheds water, the base keeps it from sitting and pumping, the drain intercepts the problem water, and the outlet gets it to daylight or an approved discharge point. If even one piece is weak, the whole setup can struggle.
That's why I don't treat drainage as a finishing detail. It's a site-performance issue, the same way you'd treat grading, excavation, or compacted stone. If you're comparing shed foundations contractors near me, gravel shed foundation contractors near me, or garage foundation contractors, ask how they handle the site as a whole, not just the concrete pour.
If you like learning the planning side of projects like this, the same kind of systems thinking shows up in Ace Aviation Aerospace Academy training programs, where sequence and precision matter just as much as the final result. On a pad, that same mindset keeps water moving the right way.
Reading the Site Before You Dig
The best drainage decisions start before the first shovel hits the ground. A good walkthrough tells you where water is entering, where it wants to travel, and where it gets trapped. On a residential lot, that's usually visible within a few minutes if you know what to look for.
What a quick site check should reveal
Start with the roof runoff, driveway runoff, and the neighboring grades. If downspouts dump near the pad, or a higher lot sends water across the fence line, the slab edge is usually just the place where the problem shows up first. Utility locates matter too, because once you start trenching for a drain or regrading around a shed foundation, a missed line can turn a simple job into a repair call.
A homeowner can do a solid first pass with a raincoat, a shovel, and a notepad. Look for these signs:
- Water source: roof lines, hardscapes, and uphill lawn areas that feed the pad.
- Runoff path: the direction water travels after it leaves those sources.
- Low spots: places where puddles stay after the rest of the yard dries out.
- Soil behavior: areas that stay soft, slick, or muddy longer than the rest of the site.
- Neighboring grades: fences, retaining edges, or property lines that block a normal slope away.
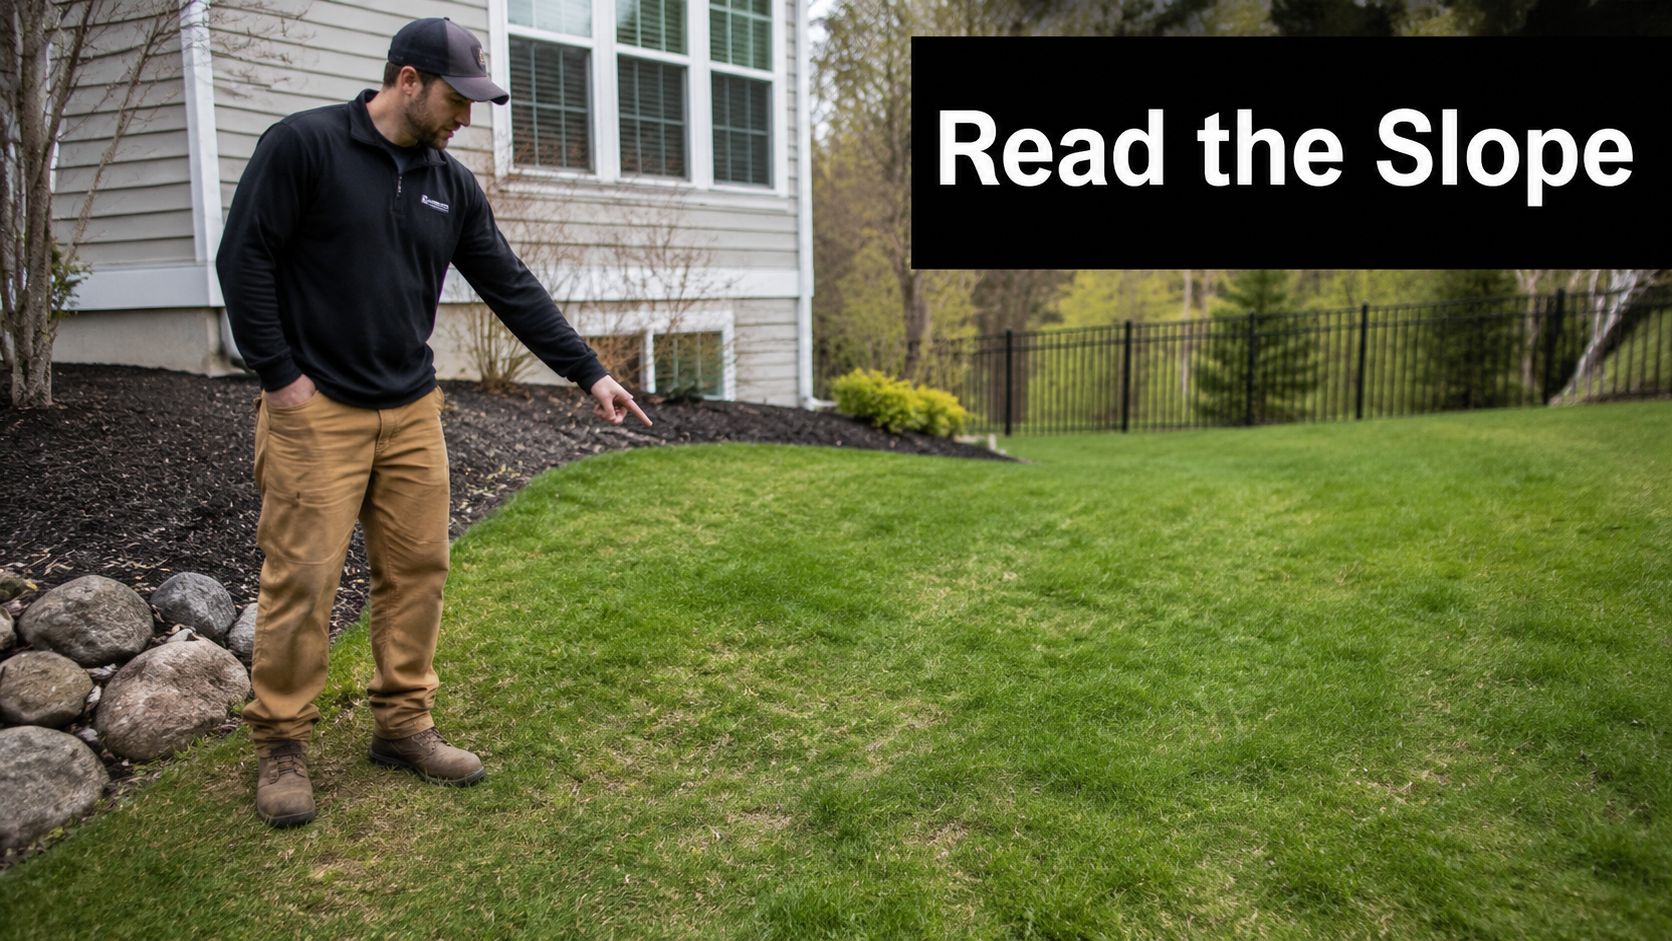
Walk the lot during or right after rain if you can. That's when the water tells the truth.
This is also where base prep starts to matter. A pad sitting on weak, wet, or poorly compacted subgrade can look fine on day one and still fail later. On a 4×8 shed with foundation, a 10×10 storage shed, or a larger base for storage shed layout, the soil underneath has to support drainage as much as structure.
For homeowners comparing options, beginner backyard landscaping tips can help you think through grade changes, but drainage around a slab is more than a landscaping job. If the water source is coming from neighboring grade, roof runoff, or a low corner, the fix has to match that source, not just cover it up.
The short version is this. Before you ask for a quote on a shed foundation, gazebo foundation, or concrete foundation for garage, know where water starts, where it's getting stuck, and whether the site gives you enough room to slope away from the structure.
Base Preparation and Subgrade That Actually Drain
On a recent shed pad job, the crew stripped the top layer, set the base, and still found water sitting at the edge the next morning because the subgrade held a shallow pocket. That kind of failure starts below the slab, where nobody sees it until the first wet season. Topsoil holds moisture, soft subgrade moves under load, and fine fill can trap water instead of letting it pass. The slab reveals the problem rather than creating it.
Why the base matters as much as the pipe
Historical pavement guidance has been clear for a long time. FHWA guidance calls for drainage layers to remove 50% of drainable water within 2 hours, with permeability of at least 1,000 ft/day and a minimum 4-inch base thickness (FHWA drainage guidance). That is highway practice, but the same logic applies to residential concrete pads. Water has to move through the base, not sit in it.
Open-graded stone drains better than sediment-rich fill because it leaves space for water to move. Clean crushed stone also gives you a better working surface for compaction and helps keep the pad edge from softening after repeated storms. If you are comparing a French drain, a perimeter drain, a surface drain, a trench drain, or a catch basin, the base is part of the answer in every case. Poor soil underneath can still keep a slab wet, which is why soil stabilization methods for weak subgrade matter before the concrete goes in.
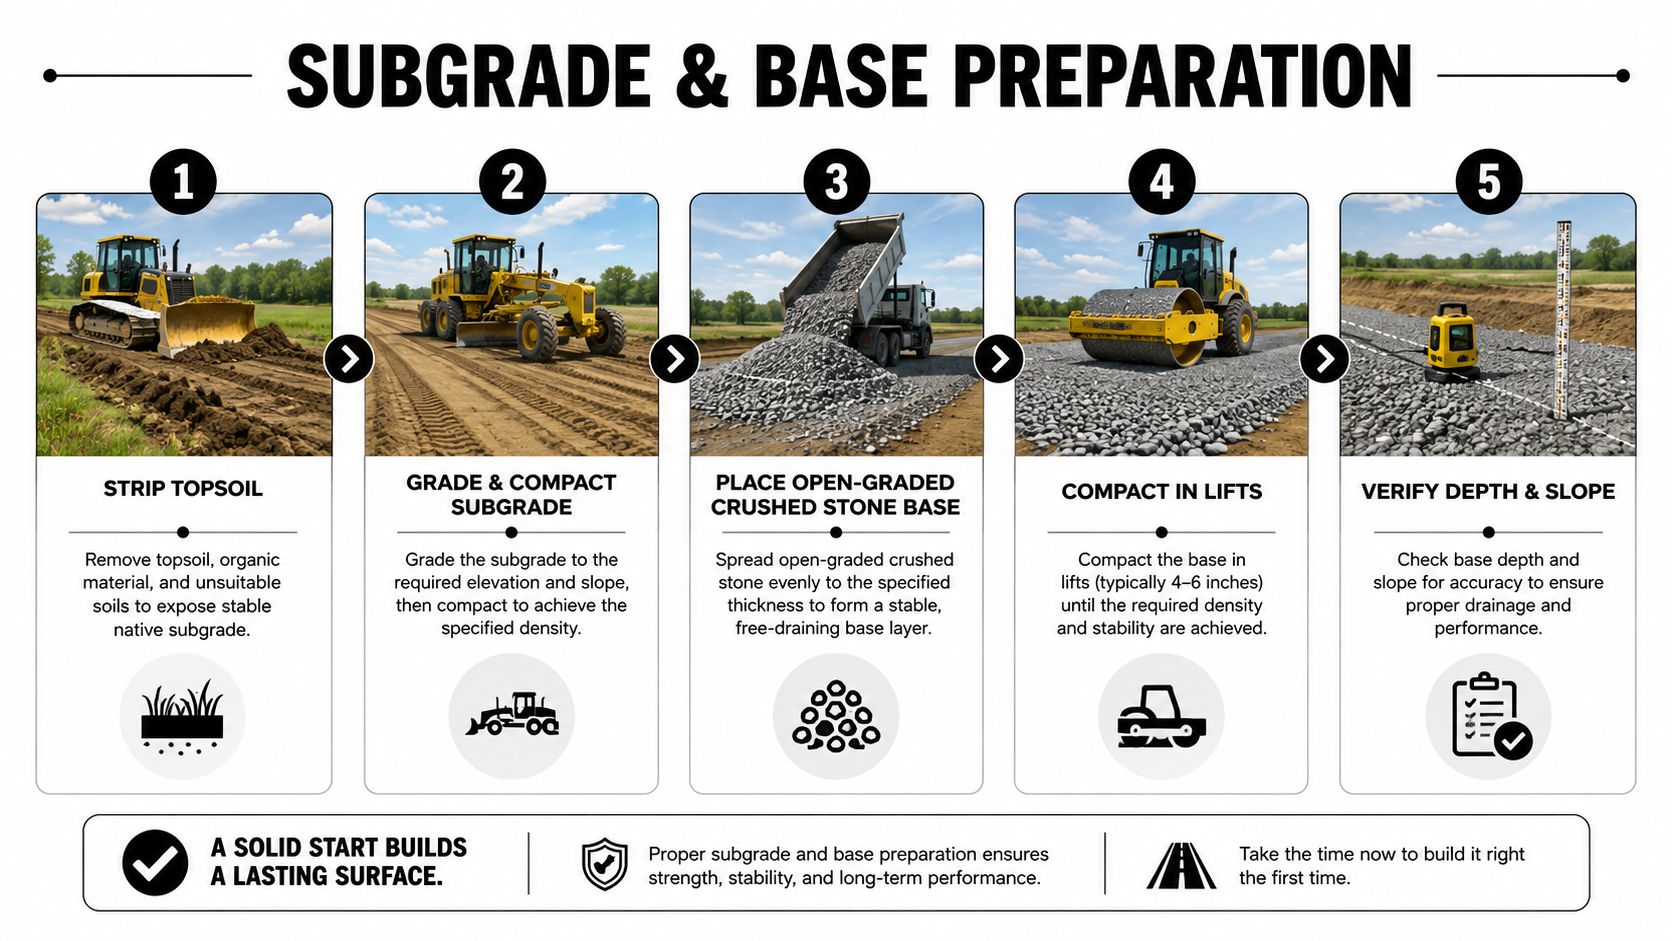
Crews usually follow a simple sequence on a clean install.
- Strip organic topsoil and debris.
- Grade and compact the subgrade.
- Place an open-graded crushed-stone base.
- Compact in lifts so the material locks together.
- Verify depth and slope before concrete goes in.
Good base work is invisible later, but it is what stops the pad from sinking into a drainage problem.
If you want a second reference for how soil and base issues show up in real site work, the internal guide at https://shedpads.com/soil-stabilization-methods/ is a useful companion. It lines up with what crews do when a shed foundation gravel base keeps settling or a garage apron starts holding water near the edge.
One more point from the field. A weak base does not always fail immediately. It often starts with tiny settlement at the edge, then the slope reverses, then water lingers, then the pad edge begins to pump. That is why the base layer under a concrete pad is doing as much drainage work as any pipe you install later.
Drain Options Matched to the Water Source
A French drain handles water moving through soil toward the pad, but it will not catch roof runoff hitting the slab edge. That is the first split I look for on site, because drain choice changes fast once you know whether the water is traveling below grade or across the surface. A good layout matches the source, the grade, and where the water can leave the lot.
Choose by problem, not by preference
If roof runoff or sheet flow from a yard is pushing toward the concrete, a surface drain or trench drain usually gives the cleanest result. If the water is seeping through the soil, a French drain or perimeter drain fits better. For a broad, shallow low spot in a driveway or other hardscape, a catch basin often works better than trying to force all the water to follow the finish grade. That choice matters on concrete pad drainage jobs, and concrete slab drain guidance can help when the slab has already started to hold water.
| Drain Type | Best For | Typical Use | Limitation |
|---|---|---|---|
| French drain | Subsurface water moving through soil | Side yards, damp edges, soft low areas | Poor fit if the actual problem is surface runoff |
| Perimeter drain | Water collecting along the slab edge | Sheds, garages, foundations, tight lots | Needs a verified outlet |
| Surface drain | Runoff coming across finished grade | Door thresholds, patio tie-ins, shallow overland flow | Will not address subsurface seepage |
| Trench drain | Fast-moving water on hard surfaces | Garage aprons, drive lanes, narrow transitions | Needs careful finishing and outlet planning |
| Catch basin | Larger paved low spots | Driveways, wide pads, collection points | Can clog if maintenance gets ignored |
If you are comparing concrete foundations, garage footings and foundations, or a shed foundation kit approach, keep the water source in view. A drain line can look busy and still miss the problem if the source is wrong. That is one reason some homeowners search for Aim Set Win client results after a pad starts ponding and they want to see how similar sites were handled.
A garage foundation contractors crew dealing with driveway runoff usually does not solve that with a French drain alone. Surface water has to be intercepted before it reaches the slab edge, and that often means a trench drain or another surface collection point. If the soil stays wet after storms and the edge feels soft, a perimeter solution may be the better fit.
The useful habit is simple. Match the drain to the water path, then confirm there is a real outlet for the line. That keeps you from spending money on a system that looks correct on paper but misses the water on your lot.
Installing a Drain That Actually Discharges Somewhere
A drain without an outlet is just an underground pond. That's the mistake crews get called back for most often. The pipe is there, the gravel is there, but the system never gets the water to a place where it can leave the site.
Install order matters
Perforated footing drains belong outside the footings, below the bottom of the slab or crawlspace floor, with perforations down, in a gravel trench with at least 6 inches above and 2 inches below of washed gravel or stone (Building America footing drain guidance). The same logic works for many pad drainage layouts. The pipe has to sit in the right place before the trench gets closed up.
The install sequence is straightforward, but skipping steps causes most of the failures I see:
- Excavate to a consistent depth: uneven trenches leave dead spots where water can linger.
- Compact the subgrade: soft soil under a drain settles and changes the slope.
- Place the aggregate base: clean stone keeps the drain channel open.
- Set the perforated pipe with perforations down: that helps collect water from the trench.
- Backfill with clean 1/2 to 1 inch gravel: better than sediment-heavy fill.
- Test the line before covering: if it doesn't move water now, it won't work better after backfill.
A drain line should be easy to explain. If nobody can tell you where it exits, it's not finished.
The outlet needs to daylight to a ditch, storm system, or other approved discharge point. If the pipe ends in a low spot, all you've built is a hidden reservoir. That's why regrading the site should come before drain installation whenever possible, because a drain can't fix water that's still being driven toward the pad from above.
For homeowners looking at options from shed foundations near me to garage foundation contractors near me, drainage often ties into the same conversation as excavation and site prep. The internal photo and project examples at Aim Set Win client results are a good reminder that clean drainage work depends on neat trenching, careful layout, and a verified outlet, not just the right pipe.
When the project connects to a municipal storm system, permits may come into play. A good crew will tell you that before the trench is open. If the outlet is uncertain, the line should stop until the discharge plan is clear.
Frost, Soils, Permits, and What Changes the Design
Not every lot wants the same drainage layout. Frost, soil type, and local code can all change where the drain sits and how it discharges. That's especially true in places with seasonal freeze-thaw cycling, because water that sits in the wrong place turns into expansion, movement, and edge damage.
The International Residential Code foundation-drainage rules require drainage tiles, gravel or crushed stone drains, perforated pipe, or other approved systems to be installed at or below the top of the footing or below the bottom of the slab, and the system has to discharge by gravity or mechanical means into an approved drainage system (IRC foundation drainage). In plain terms, the drain can't just sit wherever it's convenient. It has to be placed where it can intercept water and then move that water out.
Soil changes the decision too. Sandy or well-drained ground may need less intervention than heavy clay or mixed fill. In some cases, a certified hydrologist, soil scientist, or engineer can determine that drain tile may be omitted on well-drained ground, but that's a site-specific call, not a guess.
For homeowners in Pennsylvania, Maryland, Delaware, and New Jersey, the biggest practical takeaway is simple. The same shed pad or garage slab detail doesn't work on every lot. A shed foundation in dense clay, a patio near a walkout, and a barn shed on sandy ground can all need different drainage solutions, even if the pad size looks similar from the outside.
Permits matter too. If the job includes a new discharge point, storm connection, or significant regrading, local approval may be needed. Skipping that step can create trouble later, especially if you sell the property and the drainage system has to be explained to a buyer or inspector.
If frost, soil, or lot layout is forcing the design, don't fight the site. Change the drainage plan to match it.
The right move is to treat the pad like part of a larger system. That means checking the frost-sensitive areas, looking at the soil under and around the slab, and making sure the outlet is legal and realistic before the work starts. On a constrained lot, the best design is often the one that adapts cleanly instead of pretending the site is level and open when it isn't.
Maintenance, Troubleshooting, and When to Call a Pro
A drainage system doesn't need constant attention, but it does need a quick check. Twice a year is enough for most homeowners, and after a big storm is the best time to catch problems early. If you've invested in a shed foundation, garage slab, or patio pad, a ten-minute inspection can save a lot of repair work later.
What to check on a routine walkaround
Start with the easy stuff. Clear debris from grate inlets, look at where downspouts are sending water, and check the outlet for blockage or erosion. If the surrounding grade has settled, water may now be running back toward the slab edge even if the drain itself is fine.
A simple seasonal list works well:
- Grates and inlets: remove leaves, mud, and grass clippings.
- Outlets: make sure water is exiting freely and not backing up.
- Pad edges: watch for new low spots or soft soil after rain.
- Downspouts: confirm they're not dumping next to the structure.
- Traffic areas: look for crushed pipe where vehicles cross the line.
If water is ponding at the slab edge, the first question is whether the grade reversed. If yes, regrading may fix it faster than adding more pipe. If downspouts are still discharging next to the pad, extend them before you blame the drain line. And if a pipe has been crushed under vehicle traffic, the trench has to be opened and repaired, not patched from the surface.
Recurring settlement is a red flag. So is water against the structure, especially if you can see soil washing out or the edge starting to undermine. Those are the moments to stop troubleshooting and bring in a crew that handles excavation near me work, drainage corrections, and concrete repairs as one system.
A calm, clear quote should explain which drain goes where and why. It should also tell you whether the fix is surface grading, a trench drain, a perimeter drain, a catch basin, or a combination. That's the difference between buying a number and buying a real solution.
For homeowners in Pennsylvania, Maryland, Delaware, and New Jersey, Firm Foundations builds and repairs concrete foundations, garage footings and foundations, shed foundation gravel base work, and other drainage-sensitive pads with the site in mind. Since 2011, the team has focused on layouts that move water away from the structure instead of hiding the problem under the slab.
If you're weighing a shed foundations near me search, comparing garage foundation contractors, or trying to decide whether your gazebo foundation needs regrading or a drain, start with the site, not the slab. The four parts have to work together, pad, base, drain, outlet, and the slope benchmark worth remembering is 2%, or about 1/4 inch per foot.
If you've got ponding at a shed pad, a garage apron that traps water, or a site that won't let you slope the slab the easy way, Firm Foundations can look at the grade, the base, and the outlet before the next storm makes it worse. Visit Firm Foundations to request a free, transparent quote and get a drainage plan that matches your site, your structure, and your lot.