
How to Pour Concrete Foundation



A muddy yard, a string line, and a delivery truck on the calendar can make a shed or garage project feel almost finished before the work has really begun. The concrete may take only part of a morning to place, but the excavation, drainage, reinforcement, forming, and curing determine whether that slab stays level through Mid-Atlantic winters.
If you're researching how to pour a concrete foundation, start with the system beneath the surface. Whether you need a shed foundation, a base for a storage shed, a gazebo foundation, garage footings and foundations, or a concrete foundation for a house, the right answer depends on soil, water, frost exposure, structure weight, and local requirements. A smooth finish can't rescue a slab placed over soft fill.
What a Concrete Foundation Actually Has to Do
A wet November yard, a marked footprint, and a concrete truck on the schedule can make a shed or garage project look nearly complete. On a recent Lancaster County shed pad, the four-inch slab was sound. The failure was the two inches of topsoil left beneath the stone, which held water through winter. The pour was not the weak link. The support beneath it was.
A foundation carries the structure, manages moisture, and limits movement from frost. That work depends on the soil, drainage path, support layers, and concrete acting as one planned assembly. A shed pad, garage base, patio, or barn floor may have different loads, but none can compensate for unstable ground with a smoother finish or a stronger mix.
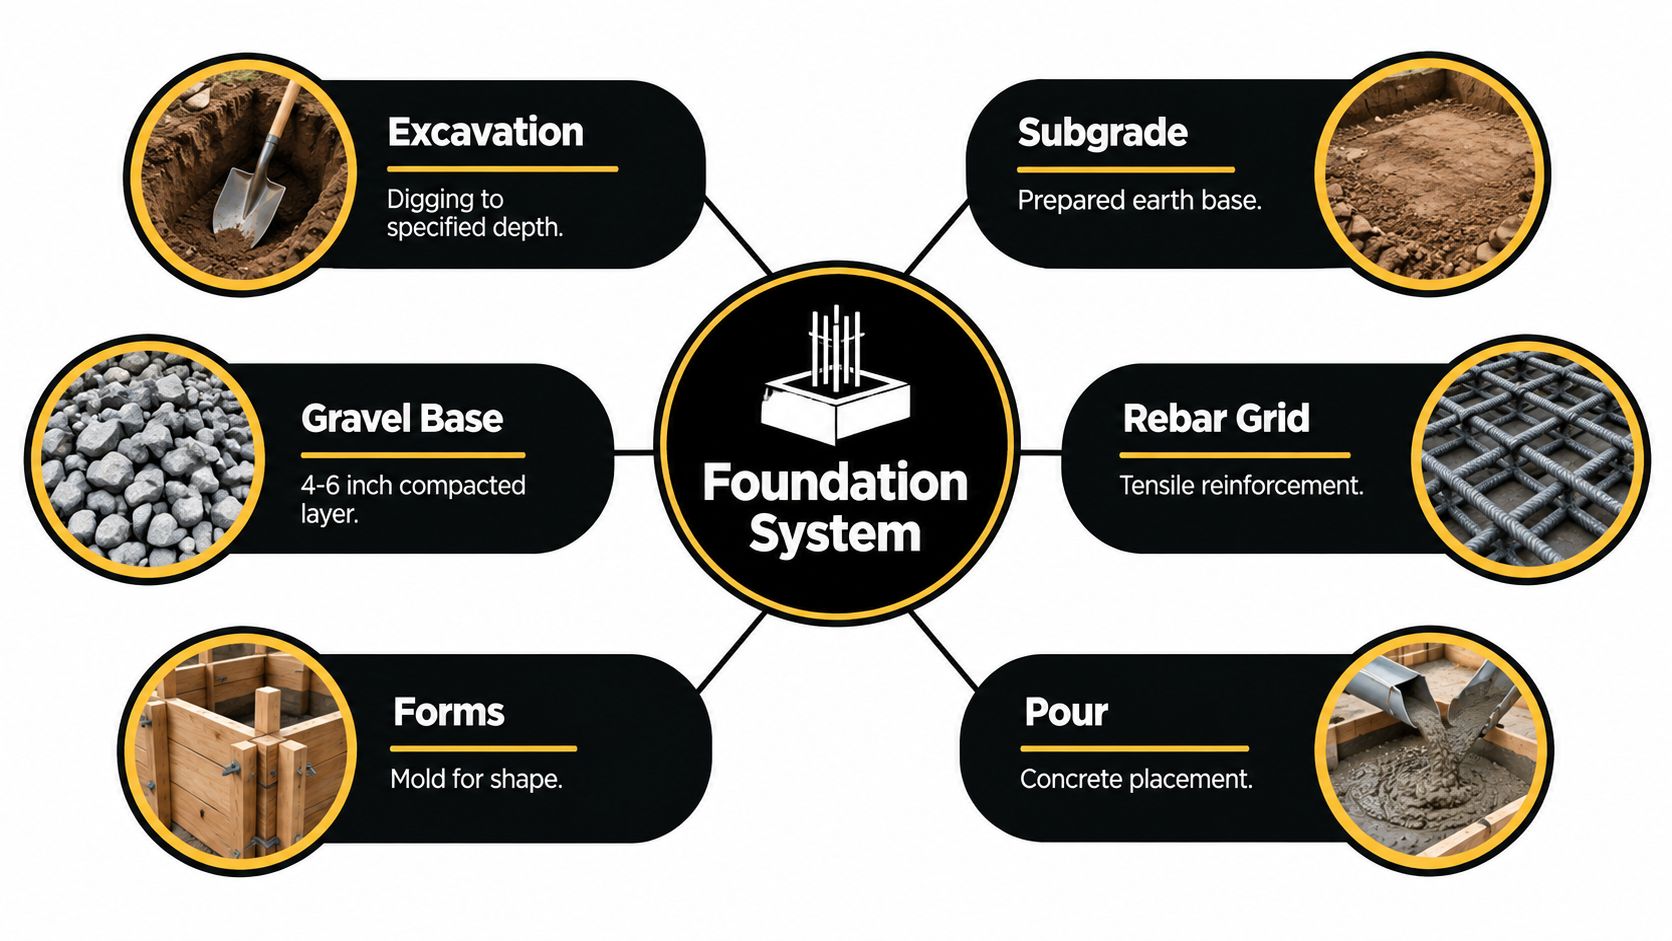
The four jobs of the foundation
- Carry the structure: A slab or footing spreads the building load across prepared ground, reducing the chance that weak areas will settle under concentrated loads.
- Control water: Grading, aggregate, vapor protection, and drainage direct runoff and ground moisture away from the slab and the structure.
- Separate framing from soil: Concrete and properly detailed barriers help shield wood, metal, stored materials, and finished interiors from ground moisture.
- Survive seasonal movement: Frost-susceptible soil, freezing temperatures, and available water can cause heaving and cracking. The U.S. Department of Energy explains why footings may need to extend below local frost penetration unless approved soil or insulation conditions apply. DOE guidance on frost-protected foundations and drainage
The pour is only the middle of that work. Before concrete arrives, the site needs stable support and a route for water to escape. After placement, the concrete must be protected from premature drying, freezing, and sharp temperature changes. Concrete gains strength through hydration, the chemical reaction between cement and water. A hard surface does not prove that the slab has reached reliable structural strength.
Practical rule: If the underground conditions are wrong, stronger concrete will not solve the problem.
That rule applies when comparing shed foundations near me, gravel shed foundation contractors near me, or garage foundation contractors near me. Choose the foundation type that suits the site, soil, drainage, frost exposure, and building load, rather than using more concrete alone.
Preparing the Site, Subgrade, and Forms
A foundation can look square and still fail if it sits on topsoil, loose fill, or trapped water. Confirm the structure dimensions, setbacks, access route, drainage path, and intended loads before excavation. Call 811 so underground utilities can be located, then establish the footprint with stakes, batter boards, and string lines.
Check both diagonals before digging and again after setting the forms. Equal diagonal measurements confirm a rectangular pad is square, which matters when a prefab shed, garage frame, or anchor layout must fit accurately.
Remove what cannot support the slab
Strip away topsoil, roots, vegetation, and other organic material. They decay and leave voids beneath the concrete. Excavate soft spots farther than the general cut and replace them with suitable granular fill. Burying weak soil under a thicker layer of stone only hides the problem.
The exposed subgrade should be uniform, stable, and able to drain. Mid-Atlantic clay can retain water and deform under construction traffic. Loose or previously disturbed fill may settle after the building is occupied. A compacted stone base improves support when the underlying soil and the water outlet are addressed together.
The NRMCA guidance on subgrade preparation, vapor retarders, forms, and reinforcement emphasizes a base that supports construction traffic without rutting. It also cautions against placing concrete on frozen ground or leaving standing water beneath the slab.
Build the support in controlled stages
Place suitable granular fill in manageable lifts and compact each lift before adding the next. Use a reversible plate compactor for pads under 400 sq ft. Larger garage excavations may require a sheepsfoot or vibratory roller. Check the result with a proof-roll, not by judging how neat the stone looks. Deflection, pumping, or fresh ruts identify weak areas that need correction.
Drainage must match the lot, soil, and foundation design. Positive surface grading should carry runoff away from the work, while seasonal pooling or impermeable soil may require a planned drain or outlet. The DOE recommendations for positive grading and foundation drainage provide a reference for evaluating that layout. Do not copy a generic slope onto a tight Mid-Atlantic site without confirming where the water will go.
Set forms to the designed finished elevation. They should be straight, firmly braced, accurately dimensioned, and strong enough to resist fresh concrete pressure without spreading. Use sound lumber or forming panels, then check elevations and diagonals again. Pre-wet dry forms, reinforcement, and subgrade, but leave no puddles.
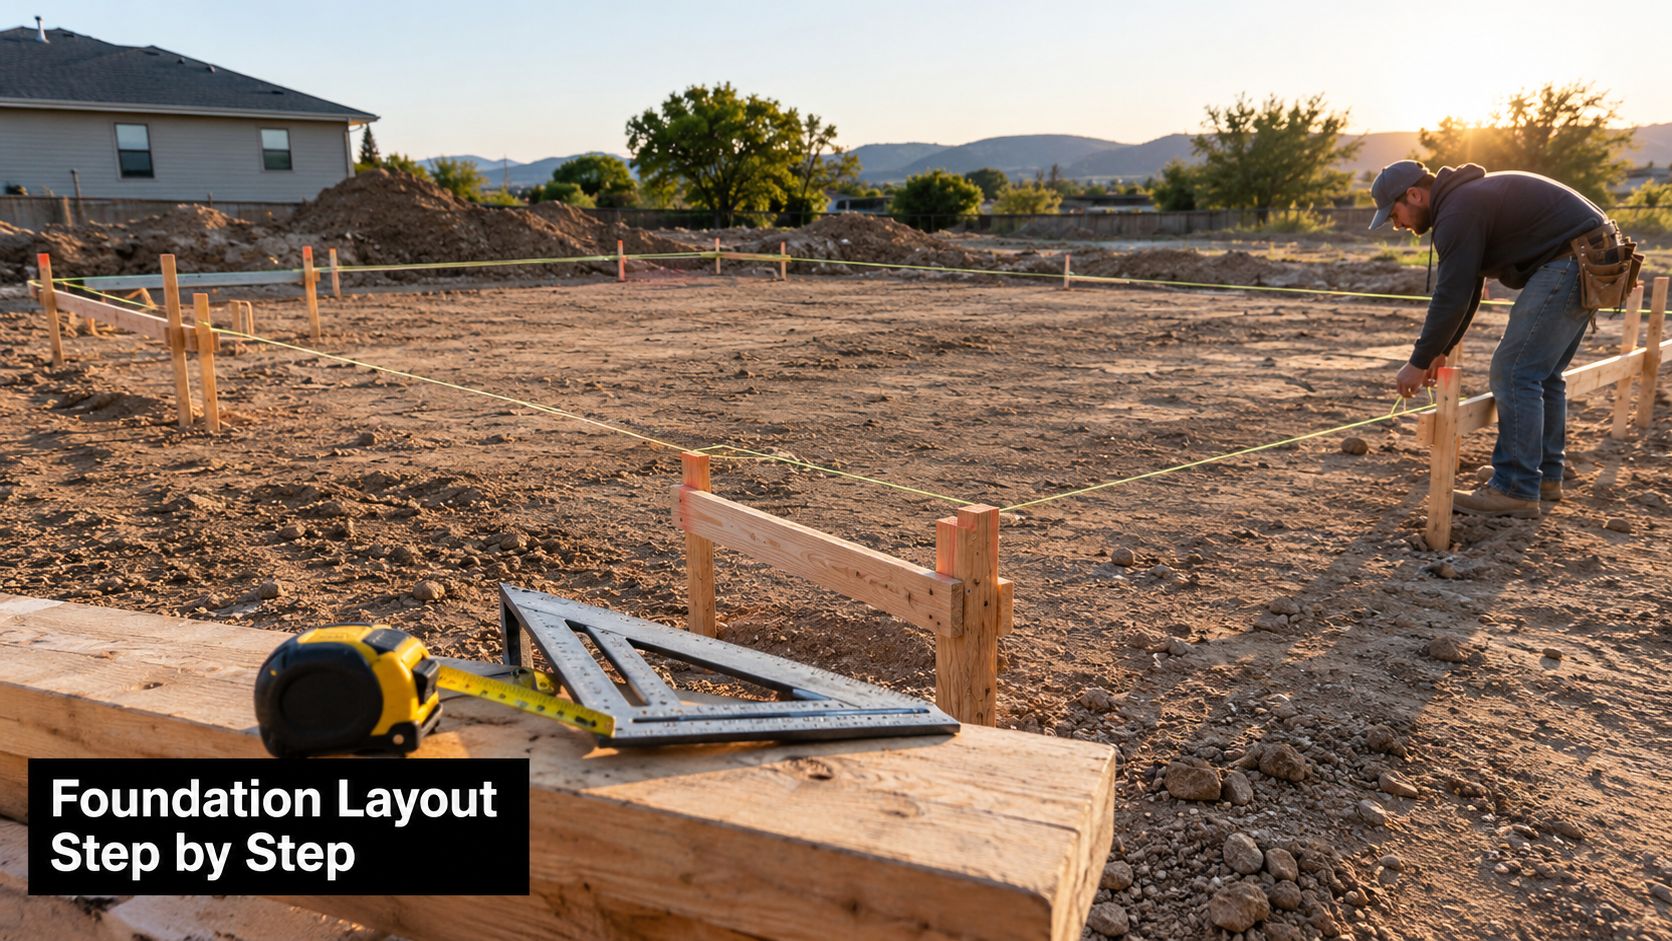
For a gravel shed foundation, raise the finished pad and make it larger than the building when site conditions require that arrangement. The UNH guidance on preparing a gravel shed foundation covers removing topsoil, building a raised gravel base, arranging drainage, and planning future conduits. Loose stone scattered over grass is not a foundation.
Reinforcement, Vapor Barriers, and the Mix
Before the truck arrives, mark the locations of reinforcement, joints, vapor retarder laps, penetrations, and anchor hardware. Steel must sit on chairs or other approved supports at the designed depth. Rebar or mesh lying on the subgrade cannot provide the tensile support intended by the design.
For an interior slab or a foundation beneath moisture-sensitive finishes, place an ASTM E1745-compliant vapor retarder directly below the concrete. NRMCA guidance identifies a maximum permeance of 0.1 U.S. perms and recommends at least 10 mils, or 0.25 millimeters, of thickness. Lap and seal seams, seal penetrations, patch punctures, and protect the membrane from boots, chairs, and reinforcing steel before placement. See the NRMCA vapor retarder recommendations for the stated material requirements.
Wire mesh can work for a light slab when it is supported at the correct elevation. Wire mesh may suit some light slabs when it is properly supported. See our guide to concrete pad reinforcement options for sheds and garages for chair height and cover details. Reinforcing bar fits projects with thickened edges, vehicle loads, concentrated bearing, or footing designs that call for it. The drawings and local requirements control bar size, spacing, cover, and lap lengths.
Foundation Mix and Reinforcement by Project Type
| Project Type | Practical Example | Concrete Strength | Air Entrainment | Reinforcement |
|---|---|---|---|---|
| Light-duty shed pad | 4-inch slab for a small shed | 3500 psi | Considered for freeze-thaw exposure | 6×6 W1.4 mesh on 2-inch chairs |
| Patio or walkway | 4-inch exterior slab over prepared aggregate | 3500 psi | Exterior Mid-Atlantic mix when specified | Wire mesh or bar supported above the base |
| Garage slab | 4-inch slab with thickened edges at vehicle areas | 4000 psi | Selected for freeze-thaw durability | Rebar at thickened edges and reinforcement through the field |
| House or heavily loaded foundation | Footings and slab designed from plans | 4000 to 5000 psi | Controlled by exposure and design | Rebar sized and spaced by the structural plans |
For context, data cited by the Federal Highway Administration describe controlled concrete mixtures reaching 3,000 to 5,000 psi, or 20.7 to 34.4 MPa, at 28 days under curing conditions of approximately 70°F, or 21°C. See the FHWA discussion of concrete strength and curing. Field temperatures, moisture loss, and curing practices still affect the result on a Pennsylvania job.
Do not solve a stiff load by adding water at the chute or across the slab. Extra water can increase shrinkage, weaken the surface, and make finishing less predictable. If the specified mix needs better workability, ask whether the batch design permits a water-reducing admixture.
Use these slump test procedures for concrete placement to understand the consistency check. The test matters only when the crew uses it to decide whether the delivered concrete matches the placement requirements.
Pour Day from Truck to Trowel
Pour morning should feel organized, not improvised. Forms, access, rakes, screeds, floats, edgers, jointing tools, curing materials, and washout arrangements should be ready before the truck arrives. The crew needs a clear path from the chute to the forms, especially on a garage or large slab where delays can create cold joints.
The first check is the concrete consistency at the chute. The crew places concrete close to its final location, avoids pushing large piles long distances, and consolidates it so trapped air doesn't leave honeycombing or voids. A vibrator is used carefully at close, consistent spacing, with enough overlap to consolidate without separating the aggregate.
A foreman's sequence
- Place and spread: Keep the concrete moving in a controlled sequence. Don't bury reinforcement or drag it out of position.
- Consolidate: Work around edges, penetrations, and reinforcement so the concrete fills the forms.
- Screed: Strike the surface to the form tops, adding concrete to low areas rather than flooding high areas with water.
- Bull-float: Close the surface after screeding, but don't work bleed water back into the slab.
- Edge and joint: Tool exposed edges and install control joints at the correct time and locations.
- Finish: Use a broom texture where traction matters. A Fresno or hand trowel belongs later in the sequence, when the surface can support the operation without tearing or bringing excess paste to the top.
The timing cues are tactile. The crew watches for bleed water to disappear and for the slab to support foot traffic without leaving a deep impression. A surface that is still plastic will tear under a trowel; one that has gone too far may resist proper jointing. The right decision depends on the mix, weather, wind, sun, and slab size.
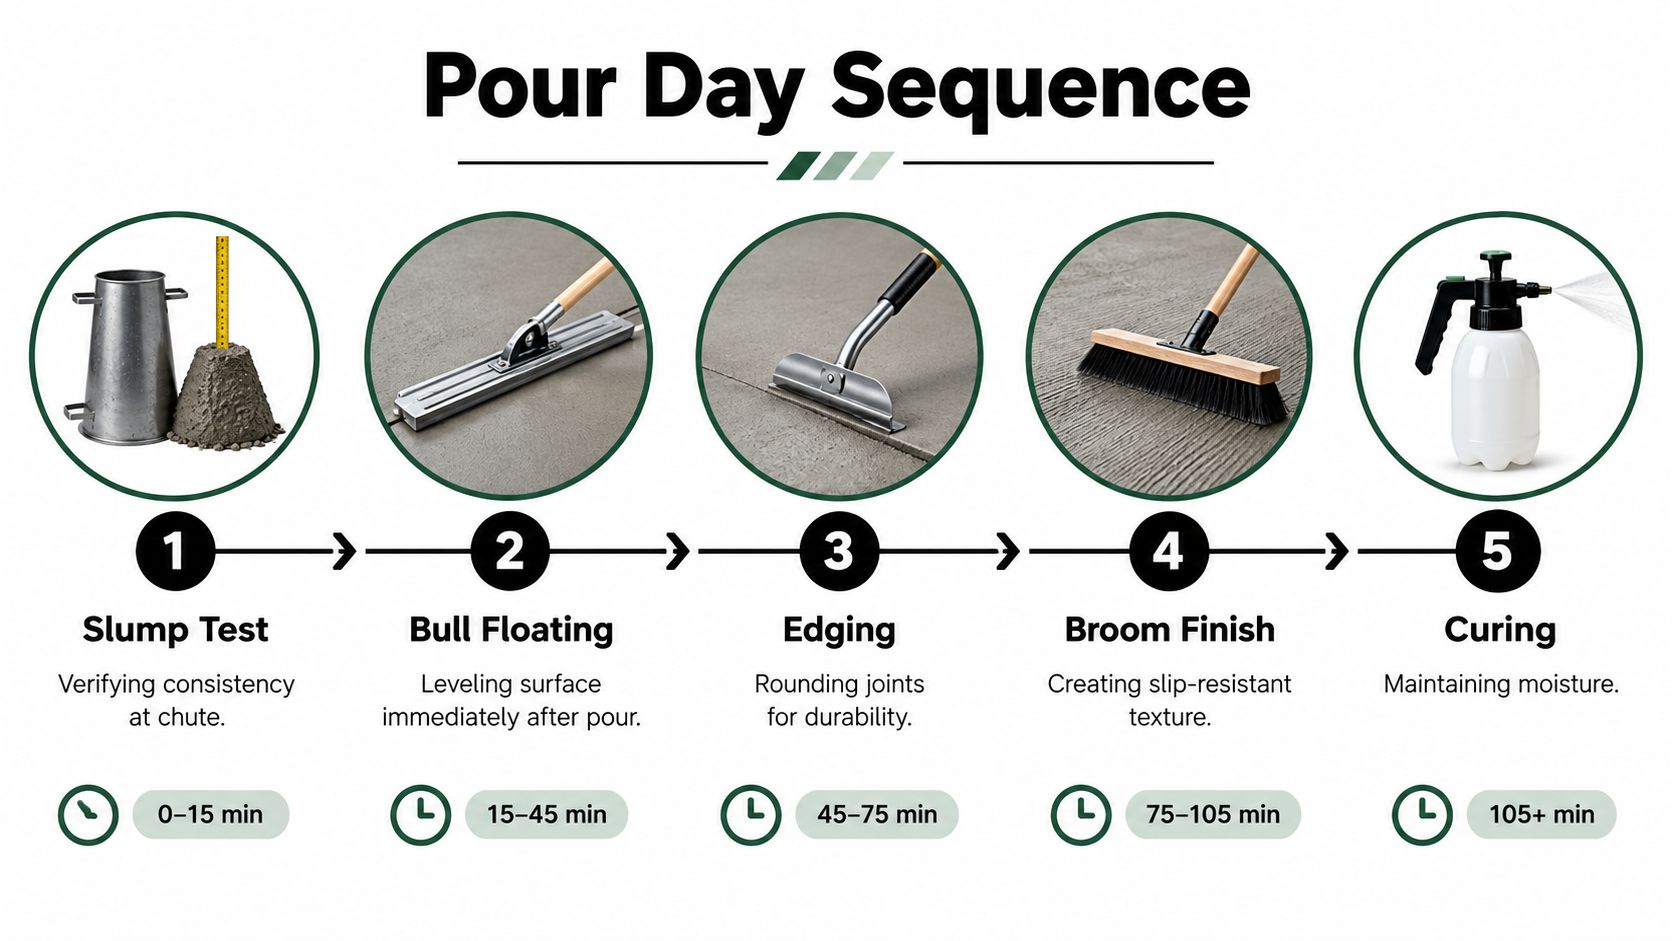
A broom finish gives an exterior slab texture that helps water and foot traffic behave predictably. Low spots, overworked paste, and poorly timed finishing create trouble later, particularly on garage approaches and patios exposed to rain.
This concrete placement video provides a visual reference for the sequence. It doesn't replace a site-specific plan, because a small shed pad, a vehicle-bearing garage, and a foundation with footings demand different preparation and crew coordination.
Curing, Temperature, and the First Week
Curing starts as soon as finishing is complete. Cement hydrates by reacting with water, and that reaction slows when the slab dries or cools. Plan to continue curing for seven days when concrete temperatures stay above approximately 5°C, or 41°F, or until the concrete reaches 70% of its specified compressive or flexural strength, following FHWA curing guidance for concrete.
The familiar 28-day strength value is a comparison point, not a signal that the slab needs no protection before then. A cool fall pour develops strength more slowly than one cured in moderate conditions. At roughly 10°C, or 50°F, the crew may need to protect the concrete longer before it reaches the same strength that develops sooner around 21°C, or 70°F. Temperature and moisture control matter more than a hard-looking surface.
Curing Time and Field Action
| Curing Stage | Field Action |
|---|---|
| First day | Prevent rapid drying, freezing, and sudden temperature changes |
| First week | Maintain moisture and protect the slab from cold air and heat loss |
| 28-day reference | Compare performance with the specified design requirements |
Use wet coverings, an approved curing compound applied at the manufacturer's coverage rate, or insulated blankets when site conditions require them. Keep the surface from drying quickly. Do not allow water to collect against vulnerable materials, and do not create a freezing pocket beneath a cover.
Pennsylvania jobs need a seasonal plan. In October, have insulated blankets on site before the truck arrives if overnight lows are forecast below 40°F. A cold night after a warm afternoon can damage a young slab even when the finish looked sound at the end of the pour.
Excess early heat can also give a false sense of progress. Concrete exposed to high temperatures during its first 24 hours may gain strength faster at first while ending with lower strength at the later reference age. Protect the slab from temperature extremes rather than chasing a quick early result.
The first-week routine is straightforward. Check moisture in the morning, observe surface temperature around midday, and inspect the slab in the evening for shrinkage cracks, drying, or displaced coverings. Keep vehicles, stored materials, and concentrated loads off the foundation until the concrete has reached the strength required by the project. A firm surface alone does not show that the foundation is ready for every load.
Matching the Foundation to Your Soil, Load, and Climate
A basic slab can work beautifully on one site and fail on another. The deciding information is often underground: soil type, fill quality, groundwater, drainage, frost exposure, and how the building will be used. Pennsylvania, Maryland, Delaware, and New Jersey all include sites where frost and water require more than a shallow pad.
The U.S. Department of Energy identifies three conditions for frost heave: frost-susceptible soil, freezing temperatures penetrating the subgrade, and available water. Silty soil beside a poorly drained garage can therefore be more concerning than a well-drained granular site with the same structure.
A site-condition matrix
| Foundation Type | Best Soil | Water Table | Typical Load | Mid-Atlantic Note |
|---|---|---|---|---|
| Monolithic slab | Uniform, stable, well-drained soil or compacted fill | Low or managed | Light to moderate structures | Works only when frost and drainage conditions support the design |
| Thickened-edge slab | Stable subgrade with stronger perimeter support | Managed away from edges | Sheds, garages, and similar structures where edges carry added load | Useful where the slab edge needs additional support |
| T-shaped footing | Suitable bearing soil verified below the slab | Requires drainage planning | Heavier walls, garages, or structures with concentrated loads | Deeper footing depth may be required by local code and frost conditions |
| Pier-and-girder system | Sloping, variable, or difficult ground that can support designed piers | Better suited when surface water must pass beneath | Raised floors, uneven sites, and selected heavier structures | Requires careful pier layout, bracing, and anchorage |
A well-drained site with light loading may suit a monolithic slab, but the decision still depends on the structure and local code. A garage carrying vehicles concentrates load differently from a 10×10 storage shed. A future change in use, such as enclosing a workshop or adding heavier equipment, should be considered before concrete is ordered.
Clay, uncontrolled fill, high groundwater, or a slope may justify piers, soil replacement, a deeper footing, under-slab drainage, insulation, or a different foundation design. More gravel isn't automatically better. Iowa State transportation guidance notes that trapped water can cause subgrade pumping and reduce support strength, while greater permeability can improve drainage but may also reduce material stability. Iowa State guidance on base drainage and subgrade support
Pennsylvania Housing Research Center guidance treats slab-on-grade design as a coordinated decision involving water tables, grade, frost depth, gutters, downspouts, drain tile where warranted, vapor retarders, and a capillary break beneath the slab. PHRC guidance on slab-on-grade foundations
Permits, Common Mistakes, and Getting a Solid Quote
Permit rules vary by municipality, so a homeowner should confirm requirements before excavation. Ask the building department whether the project needs a building permit, foundation drawings, setbacks, footing inspection, stormwater review, erosion control, anchoring details, or separate approvals for utilities.
New Castle County, Delaware, provides a useful example of why local verification matters. Its guidance specifies that the bottom of a footing must be at least 32 inches below grade, with a minimum footing width of 12 inches for a monolithic concrete pour and 16 inches for a block foundation. New Castle County shed and garage requirements
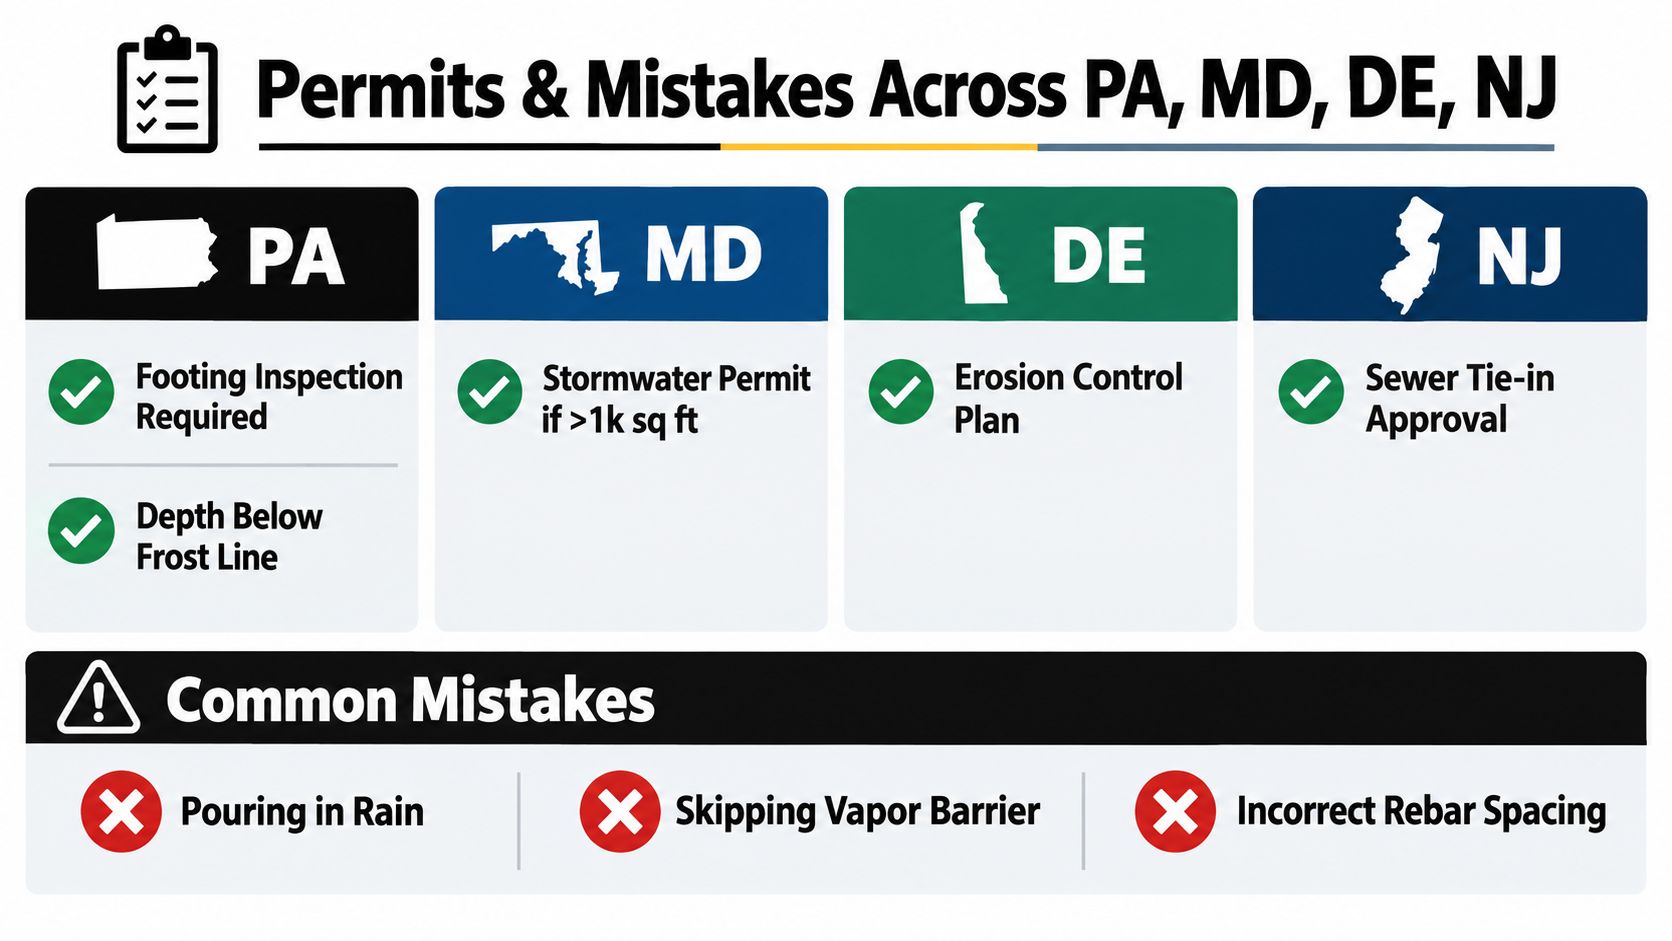
Mistakes that create expensive callbacks
- Frozen subgrade: Concrete placed over frozen soil can lose support when the ground thaws.
- Missing vapor protection: Moisture can migrate upward into an interior slab and finished space.
- Added water: Water added during placement changes the mix and can damage surface performance.
- Late joints: Control joints installed after the slab has already begun uncontrolled cracking don't serve their purpose.
- Early form removal: Removing forms before the concrete and edges can safely support themselves may damage corners and geometry.
- Unanchored sheds: New Castle County states that sheds on treated skids still need ground anchoring, and its permit packet describes mobile-home-style anchors at six-foot intervals around the perimeter. New Castle County shed anchoring guidance
A written quote should identify excavation, unsuitable soil handling, forming, reinforcement, concrete strength, finish, curing method, access, cleanup, drainage work, and exclusions. It should also state who handles inspections and what happens if the excavation reveals rock, groundwater, or unstable fill.
When you're comparing construction services, even a resource like this quote for aviation training illustrates the value of requesting a defined scope rather than comparing vague totals. For foundation work, clear quantities and responsibilities protect both the homeowner and the contractor.
If your project needs excavation near me, concrete contractors, driveway contractors near me, a gravel shed foundation, or garage footings and foundations, ask the contractor to walk the site before pricing the pour. The conversation should cover soil, drainage, frost depth, structure weight, access, setbacks, and the intended use of the finished pad.
Firm Foundations provides site preparation, excavation, forms, reinforcement, concrete pouring, finishing, and curing for shed foundations, garage slabs, patios, driveways, and other foundation projects across Pennsylvania, Maryland, Delaware, and New Jersey. Visit Firm Foundations to request a quote and schedule a site review focused on drainage, soil support, frost requirements, and the foundation system your structure needs.