
Flooring for Workshop Slabs and Shed Pads That Last
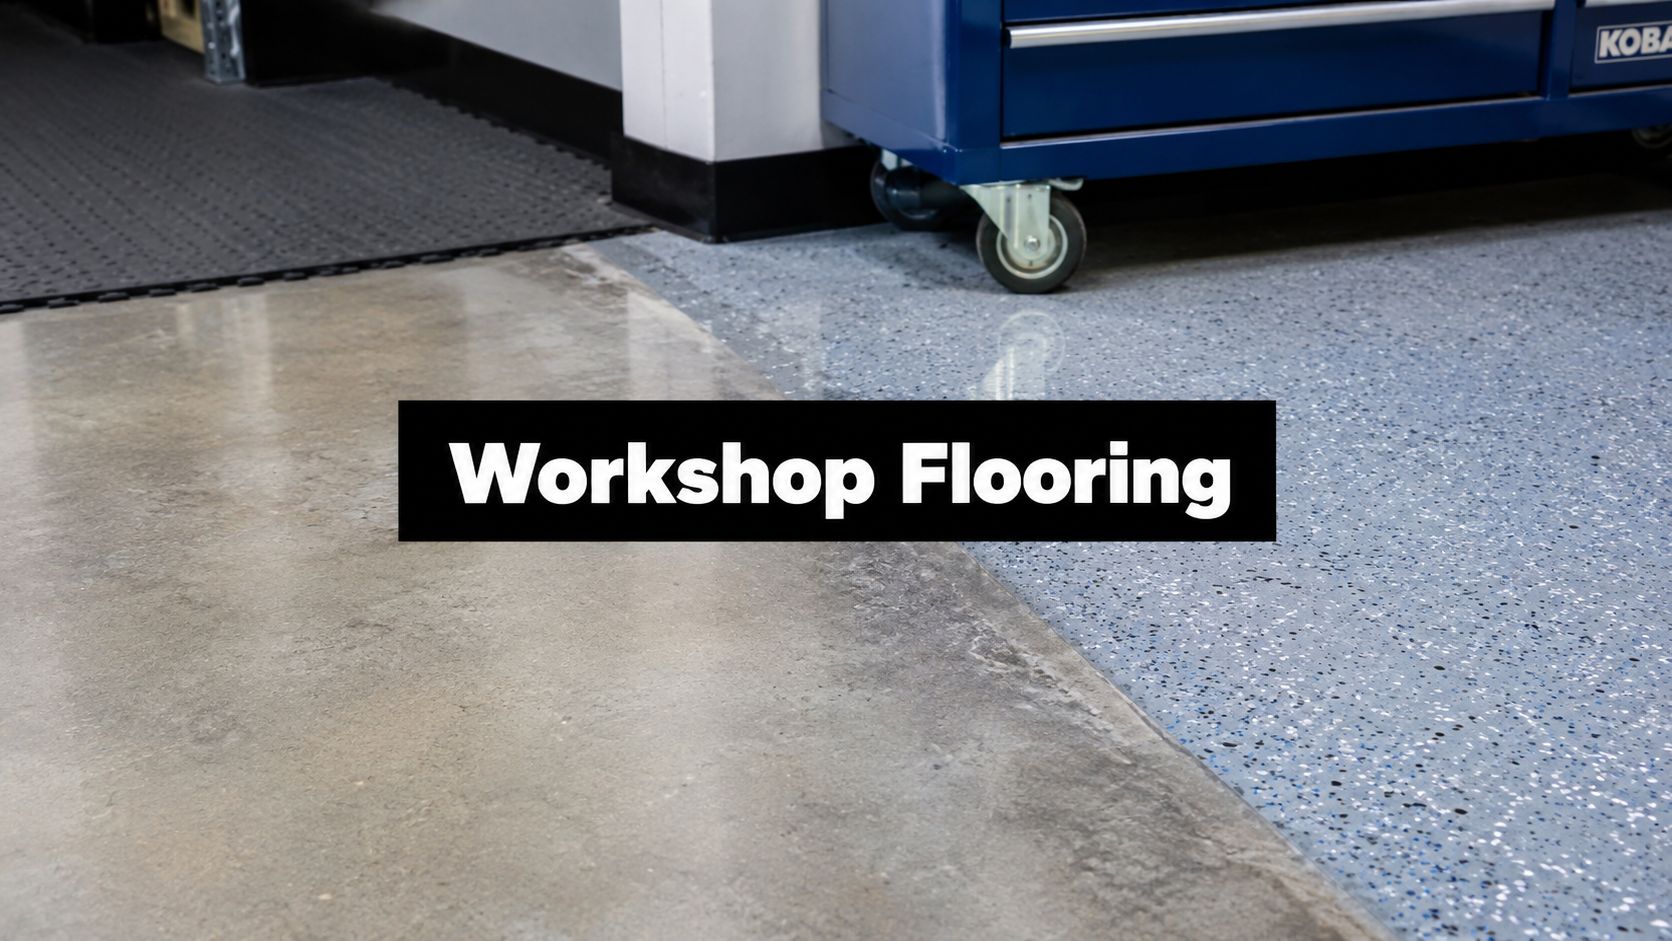
You've got the walls up, the shed or garage is taking shape, and now the question shows up at your feet. Do you pour a slab that can handle the load, or do you try to save money with a surface system and hope the floor underneath is good enough? In Pennsylvania, Maryland, Delaware, and New Jersey, that choice matters even more because freeze-thaw, humidity, and moisture migration can punish a weak floor faster than most homeowners expect.
A good flooring for workshop plan isn't one product. It's a slab beneath the floor and a surface system on top, and both need to match how the space will get used. I've seen too many shops where the top layer looked fine on install day, then lifted, stained, cracked, or wore out because the base work was rushed.
What Most Homeowners Get Wrong About Workshop Floors
The biggest mistake is treating workshop flooring like a finish decision instead of a building decision. People get pulled toward epoxy, tiles, or mats because those products look clean in photos, but the slab underneath still carries every jack stand, tool chest, compressor, mower, and storage rack. If the base is weak, uneven, damp, or poorly sloped, the top layer doesn't fix it, it just hides the problem for a while.
The surface gets the attention, the slab does the work
A workshop floor has to live in the world. That means cold weather, wet boots, dropped tools, rolling loads, and the occasional chemical spill. In a garage or shed bay, the floor may be asked to do more than a living room floor ever would, so the structure underneath matters just as much as the finish you see.
Practical rule: If you wouldn't trust the slab for load, moisture, and drainage, don't spend premium money on the surface yet.
That's why the smartest garage foundation contractors and shed foundations contractors near me conversations start with the base, not the showroom sample. A sealed slab can be the right answer in one shop and the wrong answer in the next. A tile system can be ideal around a bench, but a bad fit over a damp slab or an uneven repair patch.
What the local climate changes
In the Mid-Atlantic, moisture is a bigger deal than many people expect. A floor that seems fine in a dry climate can become slippery, stained, or delaminated when humidity and condensation show up. That's why a base for storage shed or a concrete foundation for garage needs to be planned with the same discipline as a house foundation, even when the building is smaller.
The other trap is buying a surface before the use case is clear. A 4×8 shed with foundation used for lawn tools has a different floor need than a hobby garage with a lift, welding bench, and oil changes. The right answer depends on load, moisture, cleanup, and how much repairability matters later.
The Slab Beneath the Floor
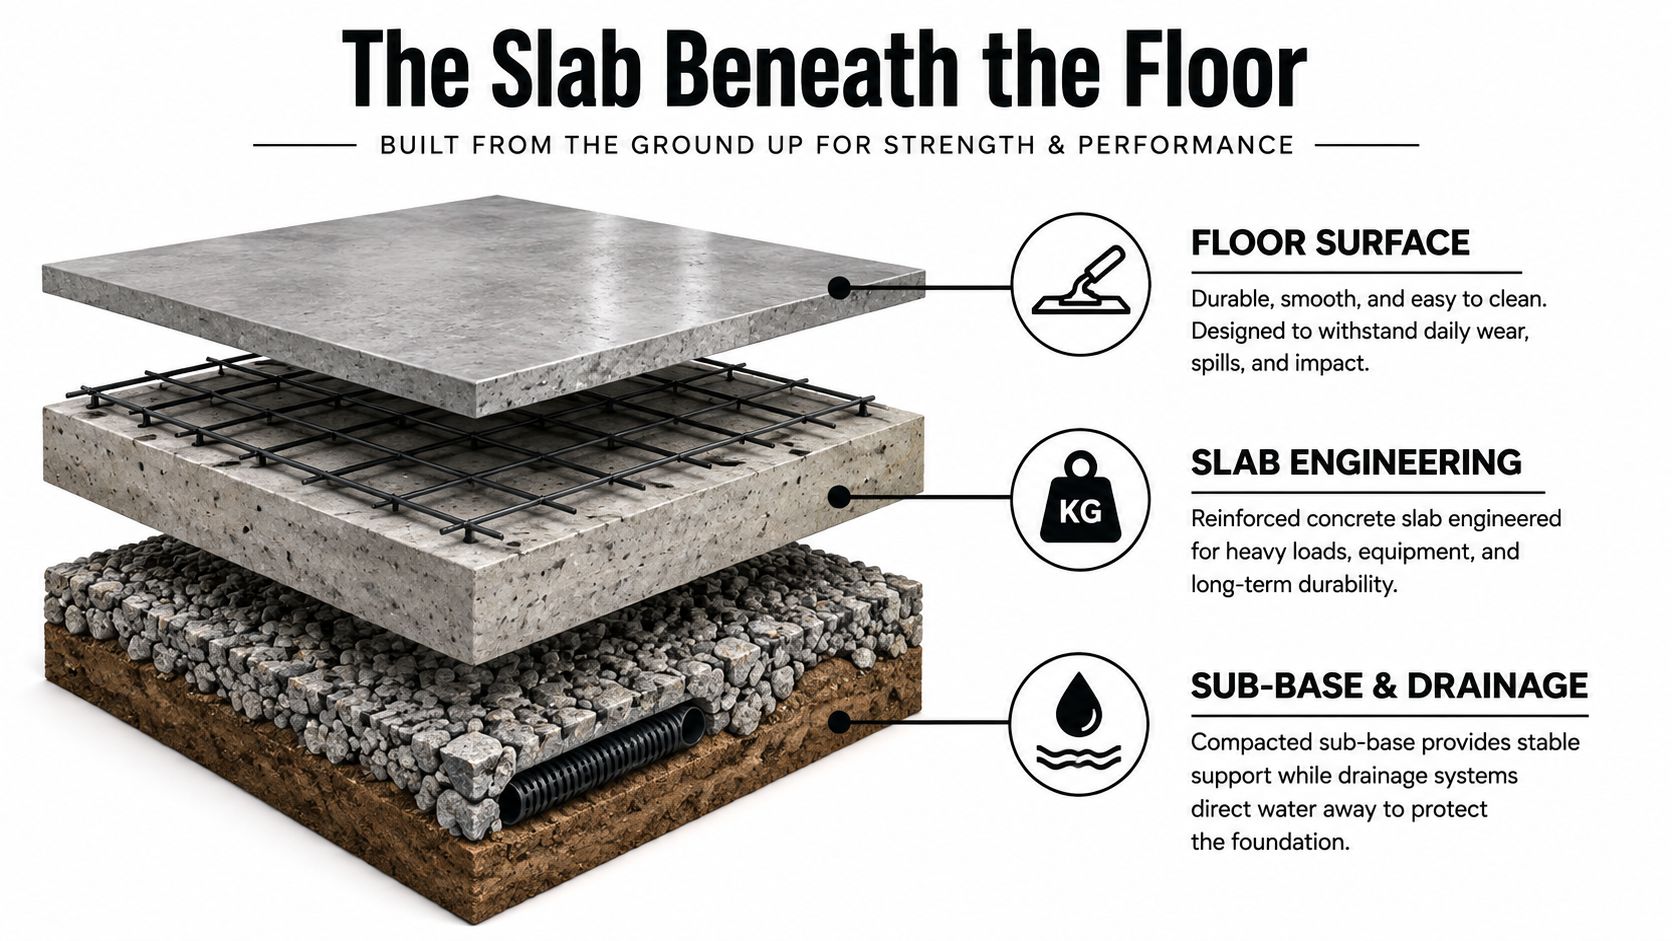
Most flooring guides start with the pretty part. That is backward. The slab, sub-base, drainage, reinforcement, and curing plan decide whether the floor holds up or turns into a maintenance headache later.
Thickness, reinforcement, and the load you actually have
For light residential workshop use, the slab needs to be sized for the load in front of it, not the wish list. The workshop flooring technical guide says the designer should identify the heaviest wheeled load, the chemical exposure profile, and the required slip-resistance class before selecting a system, because the right thickness changes with service conditions. If the slab is too thin or the wear layer is too light, repeated rolling loads can deform it and wear through the surface faster, especially where tool chests, carts, or compact equipment move every day.
Reinforcement matters too. Rebar or wire mesh does not make a poor slab acceptable, but it helps control cracking and keeps joints from becoming the weak point. For garage footings and foundations, that matters because a slab that cracks at the control joints or edges can telegraph through whatever floor system you install on top.
Moisture barrier and slope are not optional in humid climates
If the space sits over a crawlspace, sits partially below grade, or lives in a damp Mid-Atlantic envelope, a vapor barrier belongs under the slab. Without it, moisture can move up through the concrete, collect under floating systems, and create the kind of failure homeowners hate most, mold, odor, and lifted edges. Where free drainage is needed, industry guidance recommends a minimum 1.5% floor slope to move water instead of letting it pool on the surface industrial concrete floor guidance.
That same guidance also ties failures to cure and drainage. In coated or resin-finished floors over concrete, it recommends 1 to 3 days of cure at 15 to 20°C before significant traffic and 3 to 7 days before chemical exposure, because early use can trap moisture and weaken adhesion. If you are planning a sealed slab, keep the process tight and avoid concrete floor sealer mistakes to avoid.
Sika's floor guidance adds a few more practical numbers for concrete that is meant to perform inside a building. It calls for continuous wet curing for at least 3 to 7 days, a water-cement ratio not exceeding 0.55, slump of 70 to 100 mm for floor applications, and no air entrainment in interior floor mixes, with entrapped air no more than 3% Sika concrete floor guidance. Those are not vanity specs. They separate a slab that stays tight from one that becomes a moisture and durability problem.
That is why the slab and the finish should be chosen together, not one at a time. A good coating over a wet, underbuilt slab still fails. A modest surface over a well-built slab usually gives better service than a flashy system over poor prep.
A workshop floor starts failing long before the top coat peels. Most of the time, the warning signs are in the slab prep, not the surface choice.
Comparing the Main Workshop Floor Surfaces
Once the slab is sound, the surface decision gets easier to judge. Homeowners often get overloaded here, because every product sounds like the right answer until you compare how it behaves under real use. For a typical 400-square-foot workshop, the pricing guidance puts sealed concrete around $200 to $800 for DIY installation, epoxy coating at $1,200 to $2,000 DIY or $2,400 to $4,800 professionally installed, rubber interlocking tiles at $2,000 to $4,000, and PVC interlocking tiles at $1,600 to $4,800 workshop flooring pricing guide. Independent pricing guidance also notes workshop flooring can run from under $1 per square foot for a basic concrete sealer to more than $20 per square foot for premium polished concrete or high-end tile.
What each surface does well
Sealed concrete is the baseline. It is simple, affordable, and easy to clean if the slab itself is decent. It does not add much comfort, but it gives you a hard-working surface that fits a storage bay, utility shed, or basic hobby shop.
Epoxy and coating systems give a cleaner look and better chemical resistance. They make sense where oil, coolant, or frequent cleanup matter. They also depend heavily on prep and cure, and a bad slab or rushed installation shows through fast. If you want a practical warning on that process, the guide on concrete floor sealer mistakes to avoid is worth reading before anyone opens a can on your slab.
Rubber interlocking tiles add comfort and repairability. They work well around workbenches or anywhere you stand for long stretches, and they are forgiving if one tile gets damaged.
PVC interlocking tiles bring modularity and easier cleanup, with better resistance in many shop settings than soft overlays. A related comparison of garage floor tiles vs epoxy helps homeowners weigh installation style against long-term service.
A quick side-by-side view
| Workshop floor surface comparison at a glance | DIY cost for 400 sq ft | Best fit activities |
|---|---|---|
| Sealed concrete | $200 to $800 | Basic storage, utility sheds, light hobby use |
| Epoxy coating | $1,200 to $2,000 | Auto work, spill cleanup, brighter garages |
| Rubber interlocking tiles | $2,000 to $4,000 | Workbenches, assembly zones, anti-fatigue use |
| PVC interlocking tiles | $1,600 to $4,800 | Modular shops, clean-up areas, mixed-use bays |
Plywood or OSB overlays have a narrow role, usually as a temporary or localized fix rather than a finished floor. Anti-fatigue mats are even more targeted, best used in front of a bench, press, or assembly table where standing comfort matters more than full-room coverage.
Thickness, reinforcement, and the load you have
The right choice usually comes down to what the room does most of the time, not what it might do someday. If the floor will see solvent spills and rolling tool carts, a coating may earn its keep. If the shop is mostly storage and occasional projects, sealed concrete with targeted mats can be the smarter spend. It is also worth checking whether the slab can carry the load pattern you already have, since a light hobby room and a bay with cabinets, compressors, and wheeled equipment ask different things from the floor system.
Matching the Floor to How the Shop Gets Used
A shop floor has to match the way the room works. A woodshop needs flatness and easy cleanup. An auto bay takes oil, jacks, and rolling weight. A welding area puts a different kind of abuse on the surface, and the slab underneath has to be ready for it.
Woodworking, auto work, and welding each ask for something different
A woodworking shop usually does well with a flat slab and a surface that sweeps clean without creating trip points when stock or machinery gets moved around. Sealed concrete fits that setup well, and rubber or anti-fatigue tiles make sense near a bench where someone stands for long periods. The slab still has to be sound, because dropped chisels, clamp racks, and mobile tools show every hump and low spot.
Auto work asks more from the floor. Epoxy or another well-prepared coated slab usually fits better if oil cleanup is part of the weekly routine. Jack stands, creepers, and tool chests test the surface in a way that light hobby use never will, so the slab has to stay stable and the coating has to hold up under repeated rolling loads.
Practical rule: If the shop gets wheeled equipment every week, think load first, shine second.
Welding and fabrication spaces need a tougher-minded setup. Spark and slag resistance matter, but the floor also has to stay usable after grinding dust and metal debris build up. In those spaces, a durable coated slab with local protection around the welding zone is usually more practical than trying to make the entire room behave the same way.
Storage, farm use, and small business space
A storage shed or barn shed is often better served by a simple, durable slab or a properly prepared gravel pad, depending on the structure and intended use. If a tractor, pallet jack, or engine stand lives inside, point load matters more than appearance. The right frame of reference is the slab beneath the finish, which is why a concrete slab underlayment guide is useful before anyone starts shopping for surface materials. A floor can look fine and still deform under the wrong equipment.
Small e-commerce and shipping spaces need a different balance. Cleanability and rolling resistance matter, and a bright floor makes daily work easier, but the surface still has to handle carts, pallets, and steady traffic without chipping or separating. The slab and moisture plan do the heavy lifting there.
The flooring choice should also reflect whether the room is a shed foundation, a garage foundation, or a true work zone inside a larger structure. A garage foundation contractors near me search often turns up surface talk first, but the better conversation starts with how the room gets used and what load it sees every week. The floor should fit the job, not just the price tag.
Site Preparation That Prevents Floor Failure
Good flooring starts before the concrete ever arrives. The sequence matters, and skipping a step often shows up later as cracking, settlement, edge failure, or moisture damage. That holds true whether the final finish is sealer, epoxy, tile, mats, or a hybrid layout.
The job sequence that protects the floor above
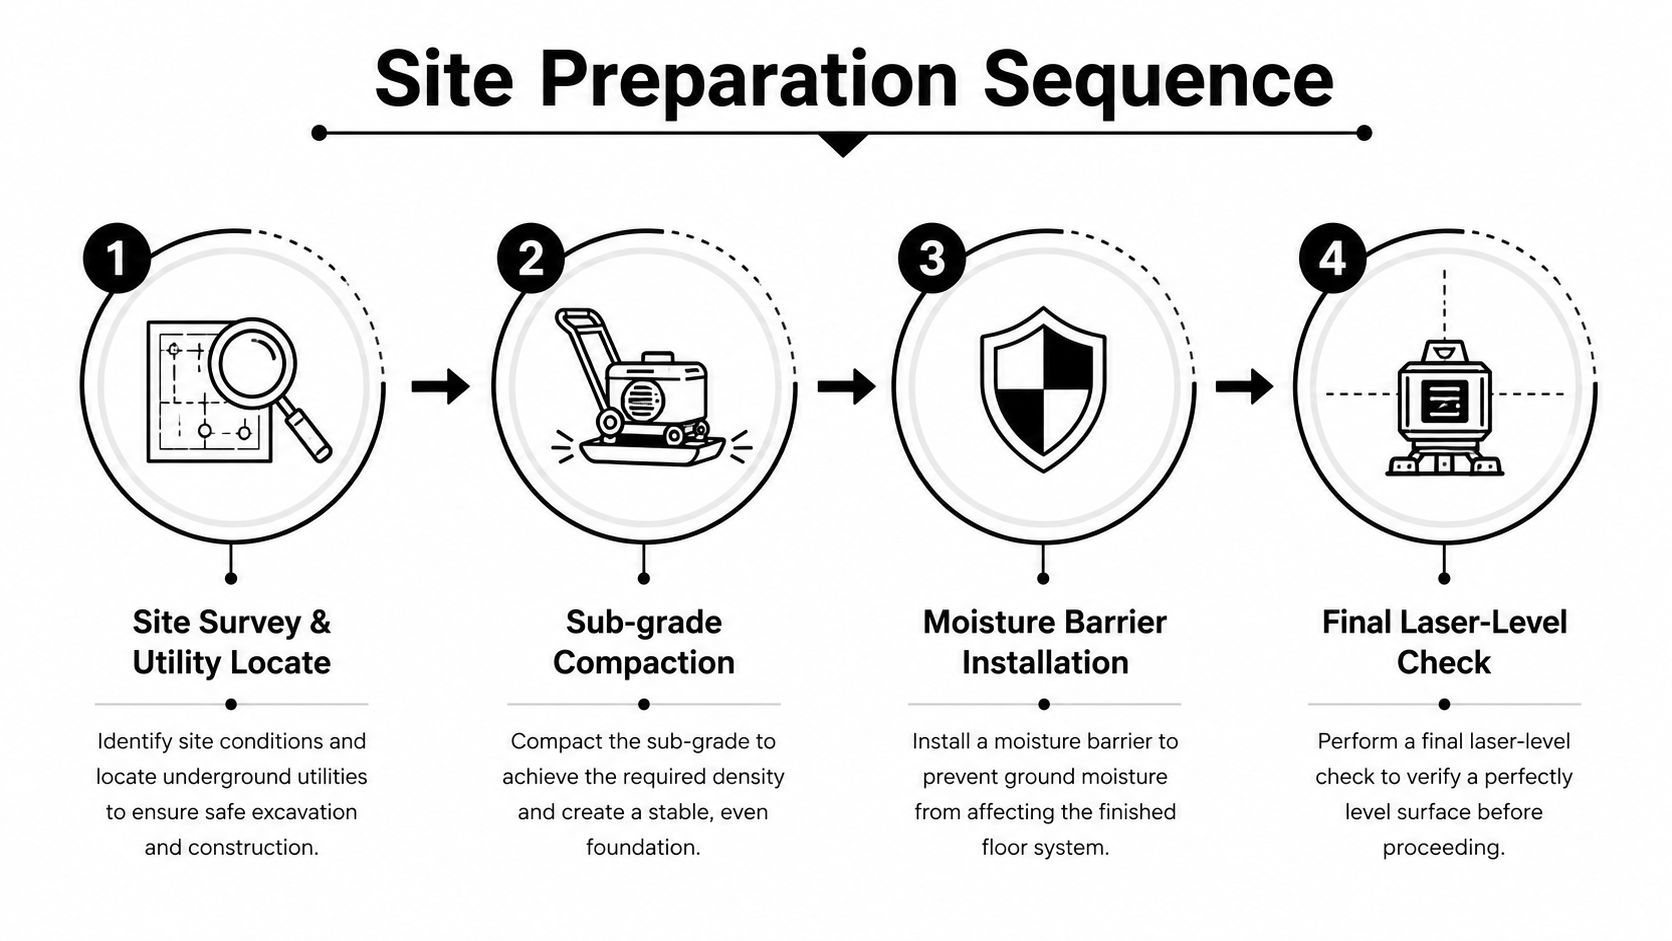
A proper project starts with a site survey and utility locate. That sounds basic, but it keeps excavation from hitting buried lines and creating a problem before the slab work even starts. Once the area is marked, the crew excavates to depth, checks the subgrade, and compacts it so the structure has a stable base.
Then the base goes in, usually crushed stone, along with the moisture plan. If the slab needs a vapor barrier, it belongs under the pour. After that come the forms, reinforcement, placement, finishing, and cure protection. Each step affects how the floor performs because the surface can only be as steady as the ground below it. For homeowners comparing slab build details, concrete slab underlayment guidance helps explain why the layers under the finish deserve as much attention as the finish itself.
Why each step matters in plain language
A weak subgrade can telegraph through tile and crack a coated slab. A missing vapor barrier can let dampness rise under floating systems and create mold risk in enclosed shops. Poor forming or leveling leaves you fighting puddles, dirty edges, and uneven rolling paths every time the floor gets used.
The prep also affects how long the slab stays useful. That matters for concrete foundations that may serve more than one purpose over time. A shop often starts as storage, then becomes a woodworking room, then needs space for a lift or heavier equipment. The slab has to be built with that kind of change in mind.
For homeowners comparing options, it helps to separate site prep from finish choice. A concrete foundation for garage work does not need to be complicated to be right, but it does need proper drainage, load handling, and moisture control. A contractor who handles excavation near me, forms, and slab work brings real value there, because the floor above only works if the base below is set up correctly.
Why a Hybrid Floor Often Beats a Premium Full-Coverage System
A lot of flooring advice pushes one product across the whole room. That works for a seller, but it is not always the best use of money in a real shop. In many workshops, a hybrid floor performs better because it puts the right material in the right zone.
Heavy-use zones and comfort zones don't need the same floor
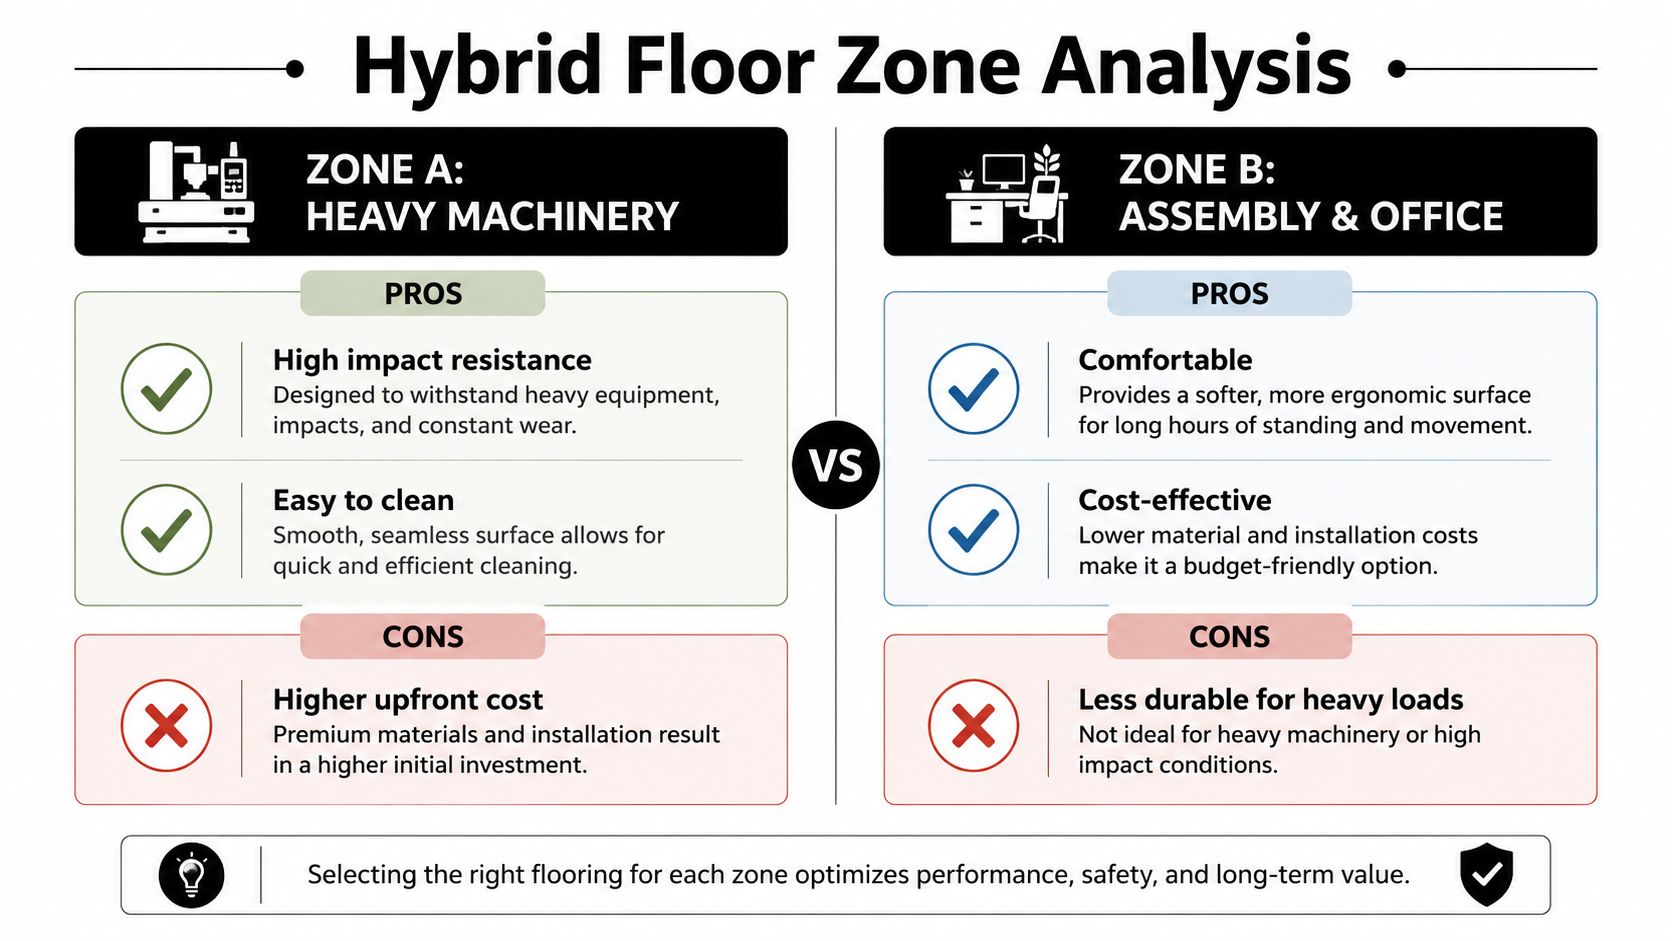
A vehicle bay or equipment lane may need epoxy, sealed concrete, or a tougher modular tile that can handle rolling loads and point loads. A bench area may do better with rubber or anti-fatigue tile, especially if someone stands there for long periods. Storage areas often do fine with a well-sealed slab.
The load matrix matters. Start with the heaviest wheeled load, chemical exposure, and slip resistance needs. A premium full-coverage floor can be more than a small shop needs if only one part of the room sees hard use.
Why zone-based layouts make sense
A zone-based layout gives you more control over cost and service life. Sealed concrete across the whole slab, epoxy in the vehicle bay, rubber tiles at the workbench, and mats in front of the press or grinder can solve more problems than one expensive finish everywhere. It also makes repairs easier because you are replacing or refreshing only the part that wears out first.
That approach fits the gap I see on jobs. Many products advertise strong load numbers, but most small workshop owners do not need constant industrial traffic. They need a floor that survives a few heavy tools, easy cleanup, and the occasional mistake. In those cases, targeted protection often beats overbuying a premium system for the whole room.
A contractor can apply the same thinking to a shed foundation kit concept or a custom-built pad. The structure gets built for the actual use, then the floor finish gets assigned by zone. That is often the cleanest balance of cost, comfort, and durability for homeowners who want a shop that feels finished without paying for a factory-style surface.
For more on workshop floor coatings and concrete surface options, Firm Foundations offers coating work as one choice, but the slab still has to be right first.
A Regional Project Walkthrough
A homeowner in central New Jersey wanted a detached 24×24 garage slab that could handle a future lift, but the space also needed to work as a hobby shop right away. The original plan was a full epoxy floor, but after looking at how the room would be used, the layout changed. The final build used a stronger slab specification, a vapor barrier because of site moisture concerns, epoxy in the bay, sealed concrete in the storage half, and rubber tiles at the workbench.
How the choices got made
The first conversation was about the slab, not the finish. If a lift might go in later, the concrete has to be planned for that load now. The contractor also looked at drainage and moisture because the site sat in a part of the Mid-Atlantic where water management can't be an afterthought.
The finish plan became a budget and use decision. Full epoxy across the whole floor would have looked clean, but it wasn't necessary in the storage half. Sealed concrete there kept the cost down and made cleanup simple. Rubber tiles at the bench gave the homeowner a more comfortable standing area where tools, clamps, and assembly work happen every week.
What held up over time
Three years later, the room was still doing its job. The coated bay cleaned up easily, the sealed half was still practical for storage, and the rubber tiles gave the owner a softer spot to work without locking the whole floor into one expensive system. That's the kind of result a good slab and a smart zone plan are supposed to produce.
This is also where the contractor's role matters. A company like Firm Foundations can handle the slab, pad, and excavation side of the project, which is the part most flooring retailers never touch. If the base is built right, the surface choices become simpler and the whole room lasts longer.
The same logic applies whether the project is a gazebo foundation, a house foundation, or a small workshop pad. The floor only performs if the structure under it was designed for the specific use case, not just the cleanest sales pitch.
Your Next Step and the Firm Foundations Checklist
Before you pick a finish, write down the basics, primary use, load requirements, chemical exposure, vapor barrier needs, slope, surface system, drainage, and maintenance plan. Firm Foundations handles the slab and pad work across Pennsylvania, Maryland, Delaware, and New Jersey, including workshop pads, garage foundations, and excavation for new builds.
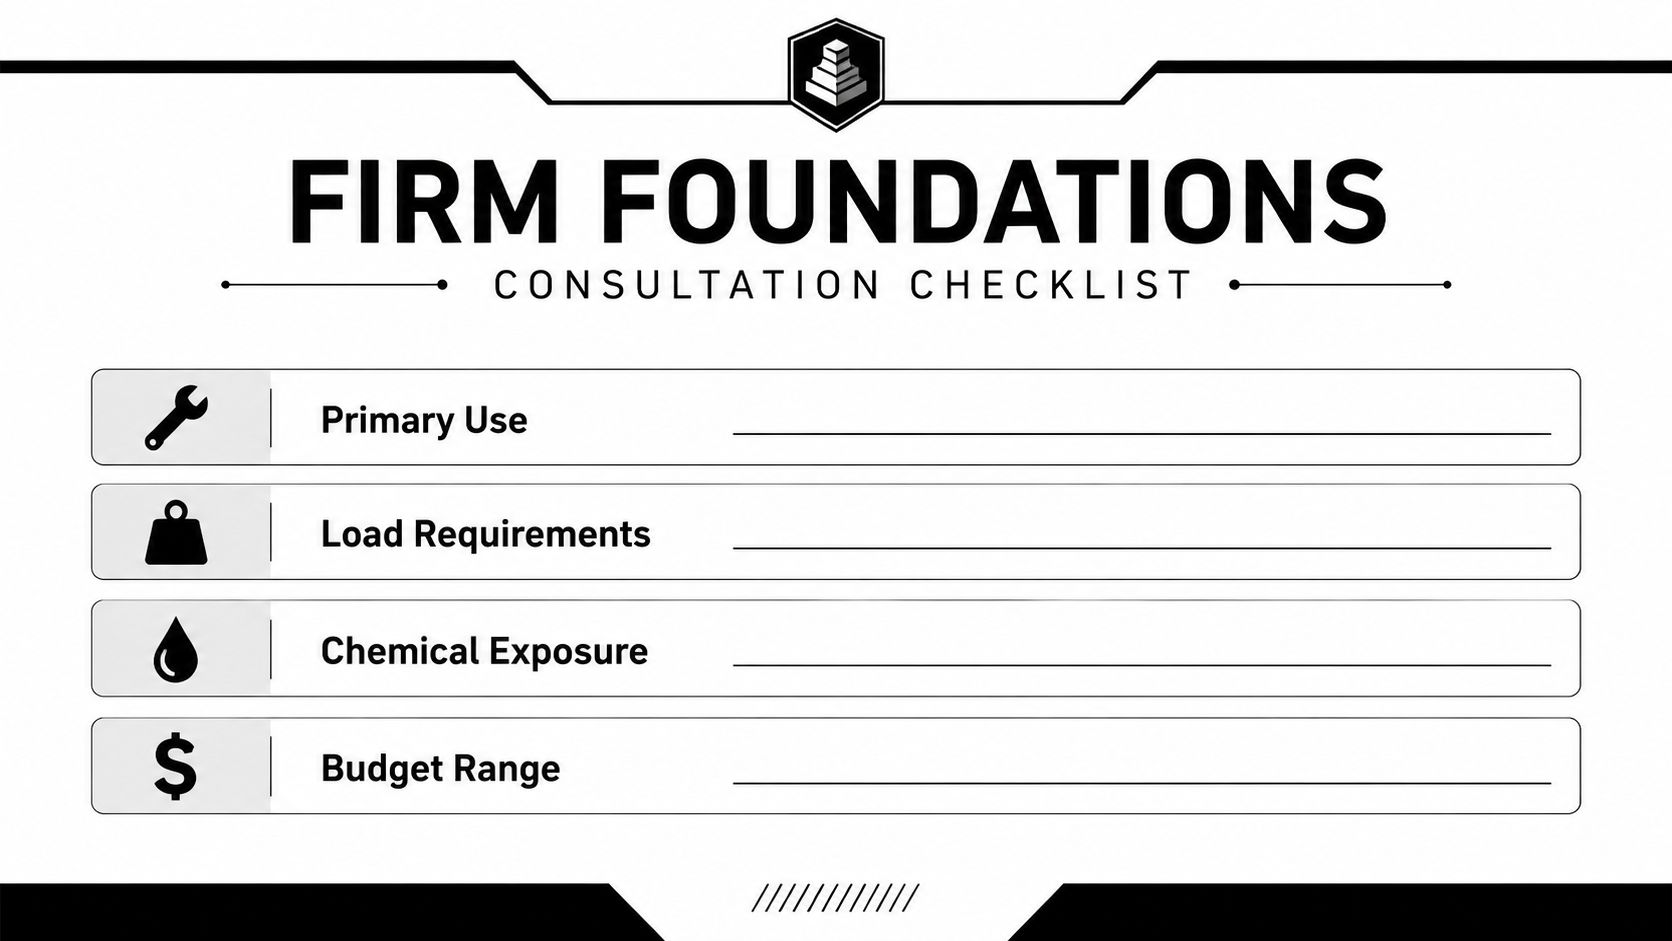
If you're planning a workshop, garage, shed, or utility space and want the slab right before you choose a surface, visit Firm Foundations to request a quote. They can help with the pad, slab, and excavation side so your floor system starts on solid ground and stays that way.