
Concrete Slab Underlayment: A Homeowner’s Guide
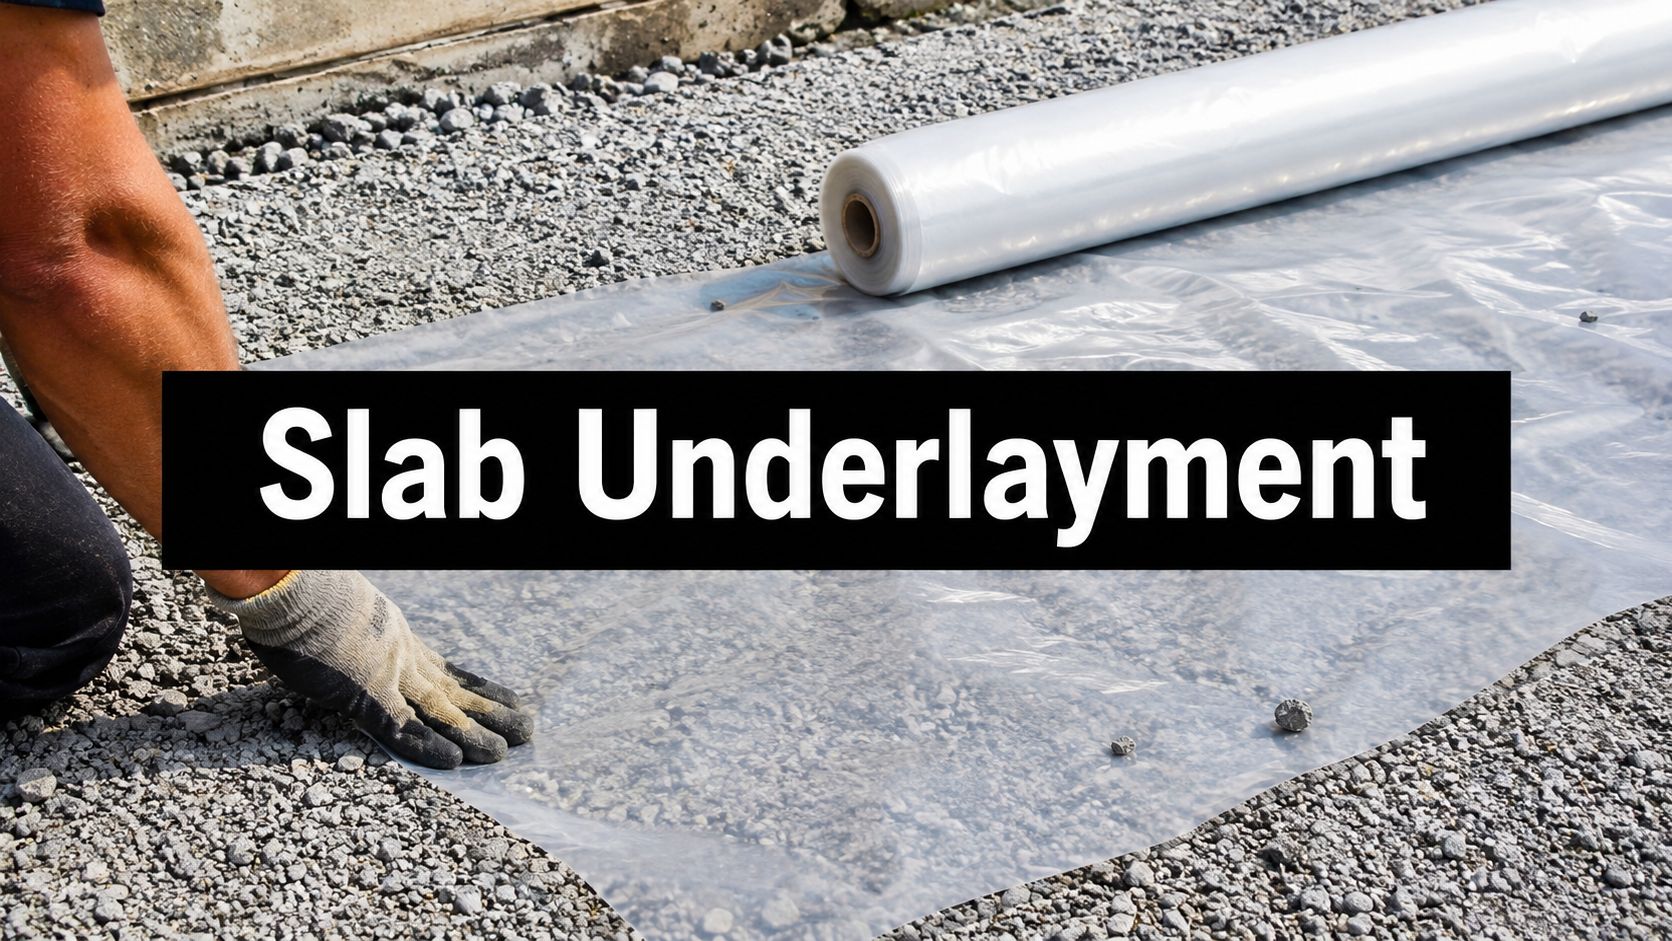
If you're planning a shed, garage, patio, or small addition in Pennsylvania or the Mid-Atlantic, the part you can't see is usually what decides whether the project stays straight and dry. A slab that looked fine on day one can start telegraphing problems later, especially on clay soils, around poor drainage, or where frost and seasonal moisture keep pushing on the assembly from below.
That's why concrete slab underlayment shouldn't be treated like a roll of padding under flooring. The actual job starts under the slab, with the soil, the base, and the vapor control layer. Get those layers right, and the finished floor has a chance to perform. Get them wrong, and no amount of patching or finish flooring will fully fix the root problem.
Why the Layer Under Your Slab Decides Everything
A homeowner calls after a garage floor starts smelling damp every spring. The slab itself looks solid, the finish still shines in spots, but the drywall at the base is stained and the stored tools have a faint musty odor. That usually isn't a concrete mix problem, it's an assembly problem.
The layer under the slab decides how water behaves for years after the pour. If the base holds moisture, if the subgrade settles, or if vapor keeps moving up from below, the slab becomes the messenger for those issues. I've seen shed pads, garage slabs, and even small patio slabs stay serviceable for a while, then start showing curling edges, efflorescence, or floor failures because nobody paid attention to what was underneath.
The slab is only as stable as the ground below it
Concrete doesn't float above bad soil and magically outlast it. In real field work, the slab depends on the subgrade, the base, and the vapor control layer working together as one system. That's why a simple-looking garage foundation or shed foundation often takes more planning than people expect.
A lot of the trouble in the Mid-Atlantic starts with wet ground and inconsistent drainage. If the site holds water after a storm, the under-slab layers matter more than the slab thickness itself. A well-built pad for a 10×10 storage shed, a 4×8 shed with foundation, or a full concrete foundation for garage needs that whole system treated as the foundation, not just the top surface.
Practical rule: if water can sit under the slab, the slab should be designed to handle moisture first and appearance second.
The best time to solve these problems is before the forms go up. That's why experienced concrete contractors talk about grading, drainage, base prep, and vapor retarder placement before they ever discuss finishing touches. For homeowners searching shed foundations near me or garage foundation contractors near me, that's the difference between a pad that lasts and one that becomes a recurring repair.
What Concrete Slab Underlayment Actually Means
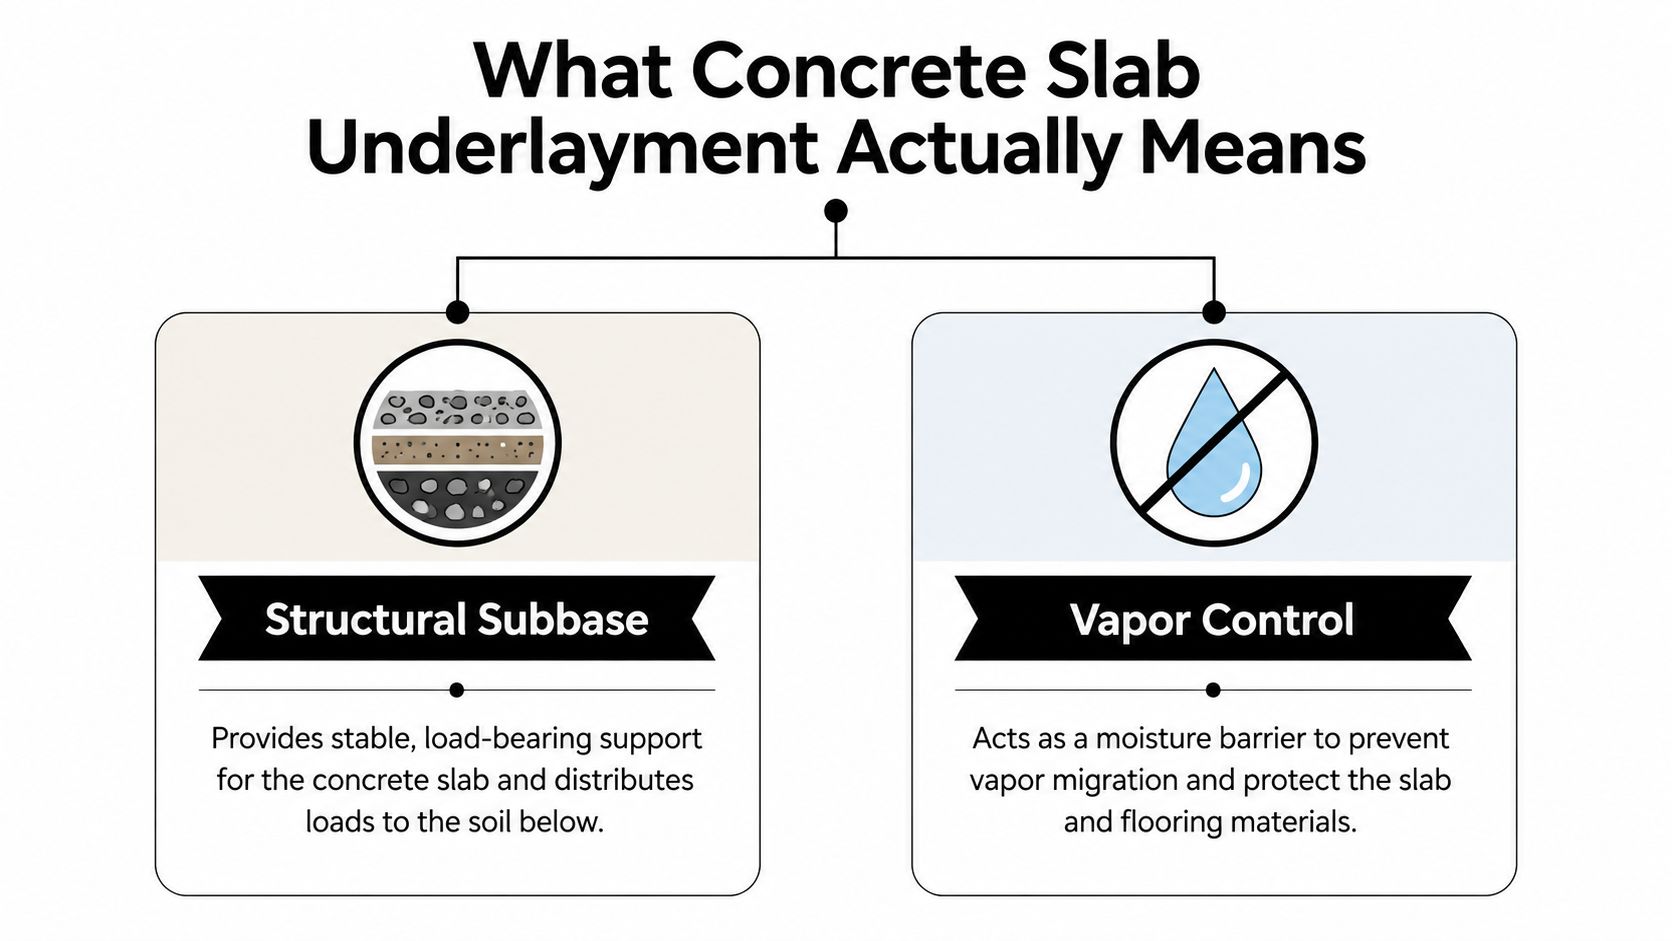
People use the phrase concrete slab underlayment two different ways, and that's where a lot of confusion starts. In one sense, it means the layers the concrete crew builds below the slab. In another, it means the thin product a flooring installer places above a cured slab before the finish floor goes down.
A layer cake offers a helpful comparison. The native soil forms the bottom, the compacted base sits above that, the vapor control layer blocks moisture movement, the slab provides the structural mass, and the finish underlayment or membrane helps the flooring system perform on top. Each layer has one job, and none of them can cover for the others.
Five layers, five different jobs
The native subgrade is the soil in place. If it's soft, wet, or full of organics, it needs attention before anything else goes down. The granular base is the imported material that helps spread load and improve drainage. The vapor retarder controls moisture movement, and the slab itself carries the load. The finish underlayment, when one is needed for flooring, deals with the surface conditions above the cured concrete.
That distinction matters on real jobs. A homeowner looking for a shed foundation kit might be thinking only about something to keep the shed level. A crew building garage footings and foundations has to think about support, drainage, freeze-thaw movement, and moisture control at the same time. Those are not the same problem.
A good slab assembly starts below the pour, not after the slab is already hard.
For practical planning, the question is simple. Are you dealing with structure, moisture, or finish-floor compatibility? If the answer is structure, you're talking about the base and vapor control. If the answer is finish performance, you're talking about the top-side underlayment a flooring installer chooses later. On Pennsylvania and Mid-Atlantic projects, both can matter, but they are never the same layer.
Comparing Common Base and Membrane Materials
On real Pennsylvania and Mid-Atlantic jobs, the right underlayment choice usually comes down to soil, drainage, and what the slab has to support. A compacted stone base with a vapor retarder can be a practical setup on a well-drained lot. On heavy clay, or under a garage slab that will carry vehicles and see freeze-thaw stress, the base has to be better and the membrane has to stay continuous.
The job changes once moisture risk goes up. A small shed pad on forgiving ground does not need the same assembly as a slab meant for conditioned space or a garage that will stay in service for years. That is why I look at the whole system, subgrade, base, vapor control, and the finish layer, instead of treating underlayment like one product under everything.
Common Underlayment Material Combinations Compared
| Material Combo | Typical Use Case | Moisture Control | Relative Cost |
|---|---|---|---|
| Compacted crushed stone with a 10-mil polyethylene vapor retarder | Most shed pads, garage slabs, and general residential work where moisture control matters | Strong, because the membrane sits under the slab and the base helps drainage | Moderate |
| Gravel-only base without a separate membrane | Small, low-risk projects on well-drained sites where conditions are forgiving | Limited, because drainage improves but vapor control is weaker | Lower upfront, higher risk if the site is damp |
| Class A 15-mil membrane for tighter control | Conditioned slabs, tighter moisture-sensitive assemblies, and higher-risk sites | Very strong, because tighter permeance helps reduce moisture transmission | Higher |
| Self-leveling underlayment over a cured slab | Finish-floor prep, not the structural base | Depends on the slab below it, not the self-leveling product alone | Moderate to higher, depending on flooring needs |
The 10-mil membrane is a common field choice because it gives solid moisture control without adding unnecessary complexity. That matches regional practice, where most respondents in the slab-on-grade survey results recommended 10-mil membrane and most also always recommended a vapor retarder below the slab. For a typical base for storage shed or a garage slab in Pennsylvania, that is often the sensible middle ground.
A gravel-only base can still work when the lot drains well and the use is light, but it becomes a weaker choice on clay-heavy or wet ground. A Class A 15-mil membrane makes more sense when the owner wants tighter moisture control, especially for conditioned slabs or moisture-sensitive finishes. If you need a closer look at how membrane selection affects a garage slab, this garage floor vapor barrier guide is a useful reference.
Self-leveling underlayment serves a different job. It is a finish-surface product, not a substitute for a sound slab assembly. MAPEI's technical guidance says those products need stable, dry substrates and no hydrostatic pressure, because they are not built to handle flooding, leaks, or excess moisture exposure MAPEI technical sheet.
For homeowners comparing shed foundation blocks with a gravel pad or a full slab, the main question is how much moisture risk the site carries and how much the finished use can tolerate. That is also where a local contractor earns the fee. If the finished floor includes wood, the solid wood floor on concrete guide is worth a look before the slab goes in.
Why Moisture Control Is the Priority
A slab can look solid and still give you trouble if moisture keeps migrating through it. That is why good slab work starts with moisture control and only then turns to finish quality. Field practice in the Mid-Atlantic backs that up. Crews that work on garages, basements, and conditioned slabs keep treating the vapor retarder as part of the slab assembly, not as an optional add-on. For a closer look at how that plays out under garage slabs, see this garage floor vapor barrier guide. Moisture control is a required part of the build.
What the numbers mean in real jobs
A capillary break does its job before the slab ever sees bulk moisture. Survey results cited earlier showed that most respondents who recommended one specified a 4-inch layer, with recommendations ranging from 2 to 6 inches. That matches what crews see on clay ground and other damp sites. If you leave that layer out, you are asking the membrane to handle every bit of upward moisture movement by itself.
ACI guidance makes the same point in technical language. When a vapor retarder is part of the design, it should be specified with the slab, not added after the fact. The guidance also points to ASTM E1745-class materials with permeance not exceeding 0.1 perms, and tighter specifications sometimes call for Class A material with 15 mil minimum thickness and permeance below 0.01 perms for conditioned slabs ACI 302.1R. That is the level of detail that matters on a garage slab or any finished space over concrete.
Moisture protection is measured in assembly design, not in wishful thinking.
For finish flooring, the moisture threshold matters too. One lab drying study cited by Granite Rock found that 4-inch-thick concrete samples with a water-cement ratio of 0.50 and sealed from below needed 82 days to reach a moisture vapor emission rate of 3.0 pounds per 1,000 square feet per 24 hours lab data. In the same technical world, in-situ relative humidity testing often uses a 75% ceiling under ASTM F2170 when the flooring manufacturer does not specify otherwise moisture guidance.
If you are putting wood over a slab, the solid wood floor on concrete guide is a useful reference because it connects slab moisture to flooring compatibility in plain language. The same issue shows up before the finish floor is even considered, which is why slab underlayment decisions need to be made with the membrane, drainage, and finish use in mind from the start.
How a Slab Underlayment System Gets Installed
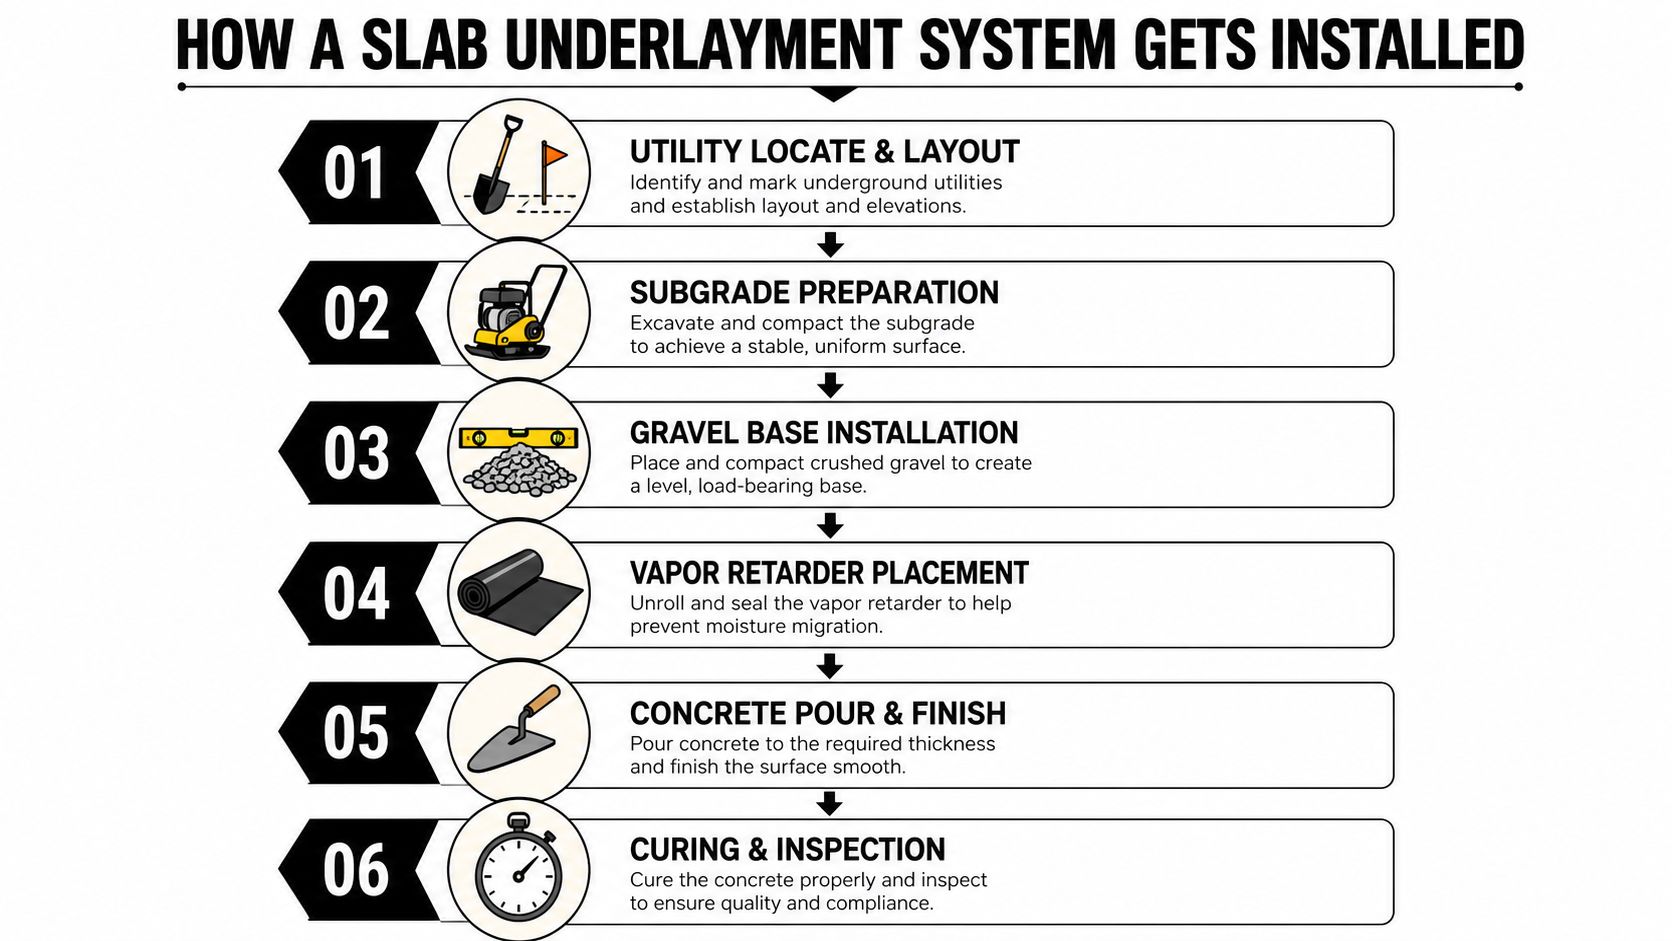
A good slab starts with the site, not the pour. On Pennsylvania and Mid-Atlantic jobs, the crew should begin by marking the pad, calling utility locates, and stripping topsoil and organics before any base material arrives. That part matters because organic material breaks down and creates settlement later.
What quality looks like during the build
Next comes the granular base. The crew places and compacts crushed stone in lifts, checking grade as they go. A stable base should feel firm under equipment, not soft or pumping. ACI guidance stresses a compactible, stable granular base with no clay, silt, or organic material, and industry guidance commonly points to at least 4 inches total subbase or base thickness with 10% to 30% fines passing the No. 100 sieve to help with trimming and compaction base guidance.
Then the membrane goes in. The vapor retarder should be lapped, taped, and kept smooth so it doesn't tear when the crew places steel or mesh. In Bartlett, Illinois, the code library requires a 6-mil polyethylene vapor barrier beneath basement floors, with joints lapped at least 12 inches and taped, plus a minimum 4-inch subbase of gravel, sand, screenings, or crushed rock that is level and compacted after organic material is removed municipal code. Different jurisdiction, same discipline.
If the membrane is wrinkled, punctured, or poorly lapped, the slab inherits that mistake.
After that, forms get set, reinforcement gets placed, and the concrete is poured, consolidated, and finished. Homeowners don't need to stand over the crew, but they can watch for simple quality markers, like clean edge forms, consistent base elevation, rebar chairs that keep steel off the ground, and a curing plan that doesn't get rushed because the schedule got tight. The final check comes later, when the slab is tested for moisture readiness before any finish underlayment or flooring is installed. That's the point where the build either supports the next trade or creates a problem for it.
Matching the Assembly to Your Soil, Climate, and Use
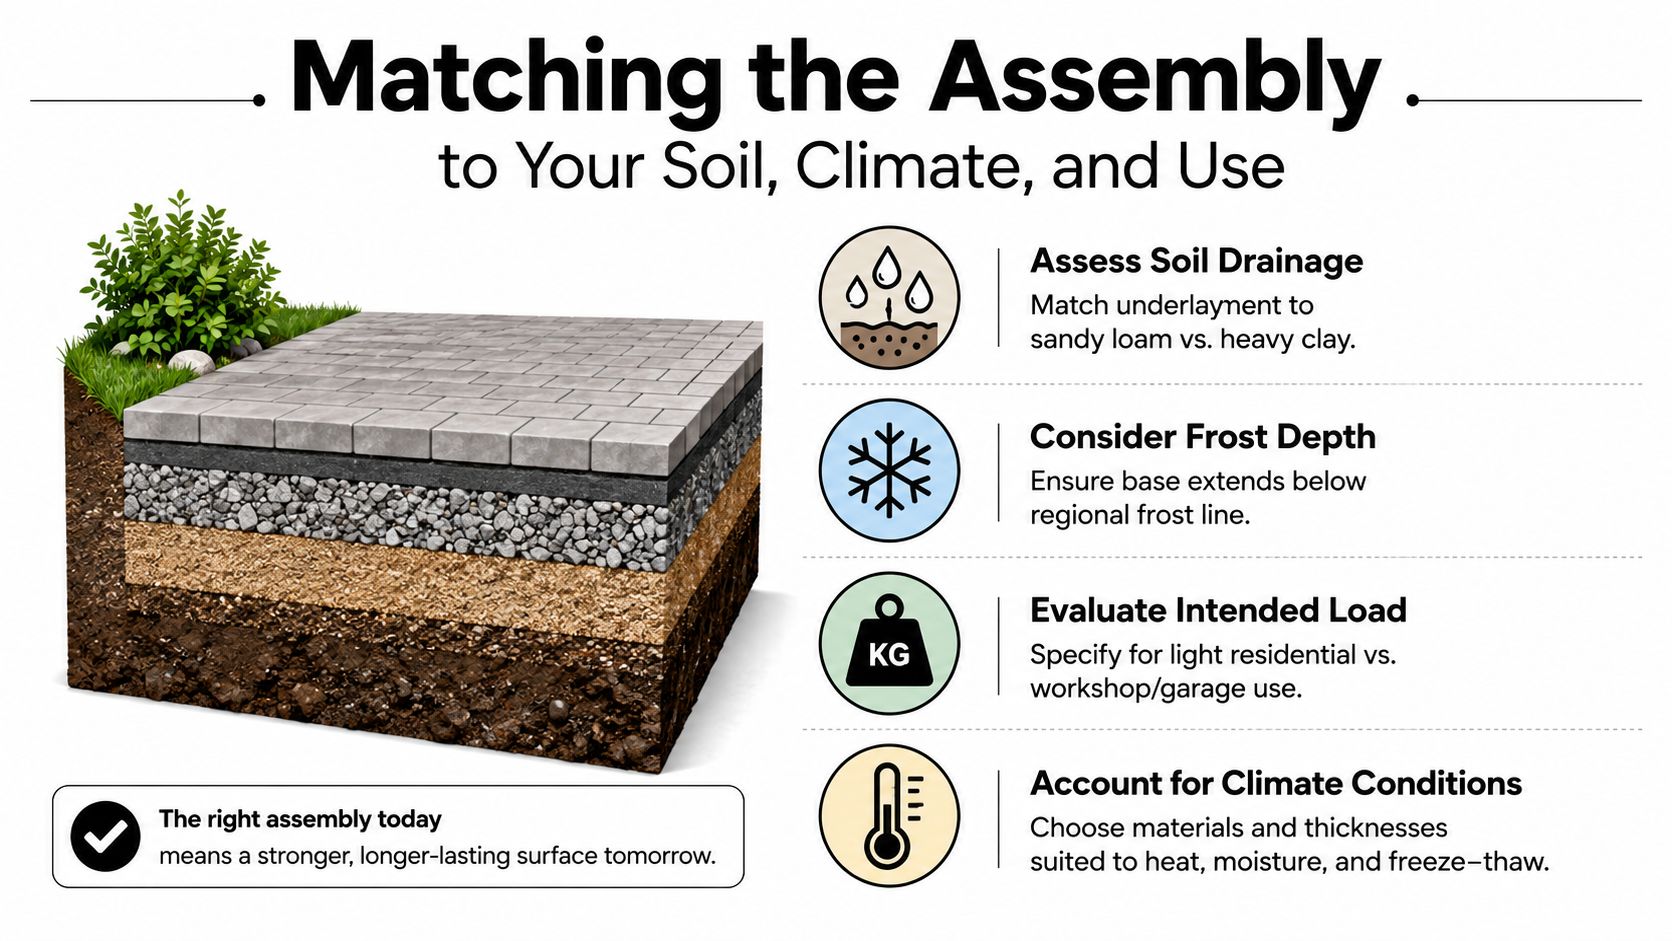
A slab in Chester County clay shouldn't be built like one on a drier, sandier lot farther south. Soil type changes how water moves, how much compaction matters, and how hard the base has to work before the slab is even poured. That's where local experience beats generic advice.
Three questions that steer the design
First, look at drainage. If stormwater hangs around the lot, the underlayment assembly needs stronger moisture control and better base prep. The best way to reduce capillary rise under a slab-on-ground is to replace fine native material with coarse base material, which is why the base and drainage discussion matters as much as the membrane choice.
Second, decide what the slab will carry. A small barn shed or garden structure has different needs than a garage that sees vehicles or a workspace that will hold heavier tools. A gazebo foundation also needs a different approach than a slab meant for a house foundation tie-in or a conditioned room.
Third, factor in the freeze-thaw climate. Edge support and grading matter because water that sits at the slab edge can create more trouble when temperatures swing. That's one reason a well-built gravel shed foundation or a reinforced slab is often better than a quick, thin pad on questionable soil.
The right assembly is the one that fits the site, not the one that uses the fewest materials.
For homeowners comparing a shed foundation gravel base against a full concrete slab, the decision comes down to intended use and moisture risk. A light storage structure may do fine on a well-prepared gravel pad. A garage or any space that sees repeated traffic usually needs more deliberate base work, a vapor retarder, and a cleaner transition to the finish floor. For slab insulation and edge considerations on enclosed spaces, a local detail like concrete slab insulation guidance can help tie the assembly together without guessing.
Common Misconceptions That Cost Homeowners Money
The most expensive slab mistakes usually start with a simple assumption. The first one is thinking a slab is ready for underlayment when it looks dry. A slab can look fine and still miss moisture criteria, which is why installers should verify the flooring manufacturer's threshold and use recognized methods such as ASTM F2170 in-situ relative humidity testing instead of relying on appearance alone moisture prep guidance.
Myths worth shutting down before the pour
Another common mistake is believing any rolled product under flooring is the same thing as moisture protection. That's not true. Some products are just sound control or comfort layers, while others are true vapor barriers, and the slab assembly underneath still has to do the heavy lifting.
A third myth is that a thicker slab fixes moisture problems. Thickness can help with structural performance, but it doesn't stop vapor migration from below. If the base is wet, the slab can still carry that moisture upward unless the assembly was designed to interrupt it.
Here are the checks I'd want before I signed off on a project:
- Ask for the base spec: You should know whether the contractor is using compacted crushed stone, how thick the base is, and how it will be compacted.
- Confirm the membrane: Ask what vapor retarder is being used and how the seams will be lapped and taped.
- Verify moisture testing for finish floors: If flooring is planned, the slab should be tested with the method the finish manufacturer accepts.
- Check drainage assumptions: If water pools on the lot, the design should account for it instead of pretending it won't matter.
The last misconception is that concrete itself is waterproof. It isn't. For concrete foundations and slab-on-grade work, the protection comes from the whole assembly, not from the top surface alone. That's the part many low bids leave out, and it's usually why the cheapest quote ends up costing more.
Working With a Licensed Foundation Contractor
A licensed, insured foundation contractor earns the job by controlling the details that homeowners can't see once the slab is poured. That means site evaluation, excavation, base placement, vapor retarder installation, forming, reinforcement, pouring, and finishing all have to line up. It's the same standard whether the project is a shed foundation, a garage foundation contractors near me search result, or a patio slab tied into the rest of the property.
When you compare quotes, ask how the crew handles compaction, membrane seams, reinforcement, and curing. A good contractor will answer plainly. If the quote is vague, if they won't name the base material, or if they dodge moisture questions, that's a red flag.
For related anchoring details on accessory structures, the reference on concrete anchors for decks and fences is useful because it shows how slab and attachment planning intersect in real-world work. On the contractor side, Firm Foundations is one option in Pennsylvania, Maryland, Delaware, and New Jersey for gravel pads, concrete foundations, and excavation work, but the key is choosing a crew that explains the spec instead of hiding behind it.
If you're getting ready for a shed pad, a garage slab, or a gazebo foundation, ask for a written scope that covers base prep, vapor control, and cure expectations. The contractor you want won't mind the questions.
If you're planning a shed pad, garage slab, or patio in Pennsylvania, Maryland, Delaware, or New Jersey, Firm Foundations can help with site prep, base work, and concrete foundations built around real drainage and moisture conditions. Visit Firm Foundations to request a quote and get a clear scope for your project.