
Soil Testing for Foundations: A Homeowner’s Guide
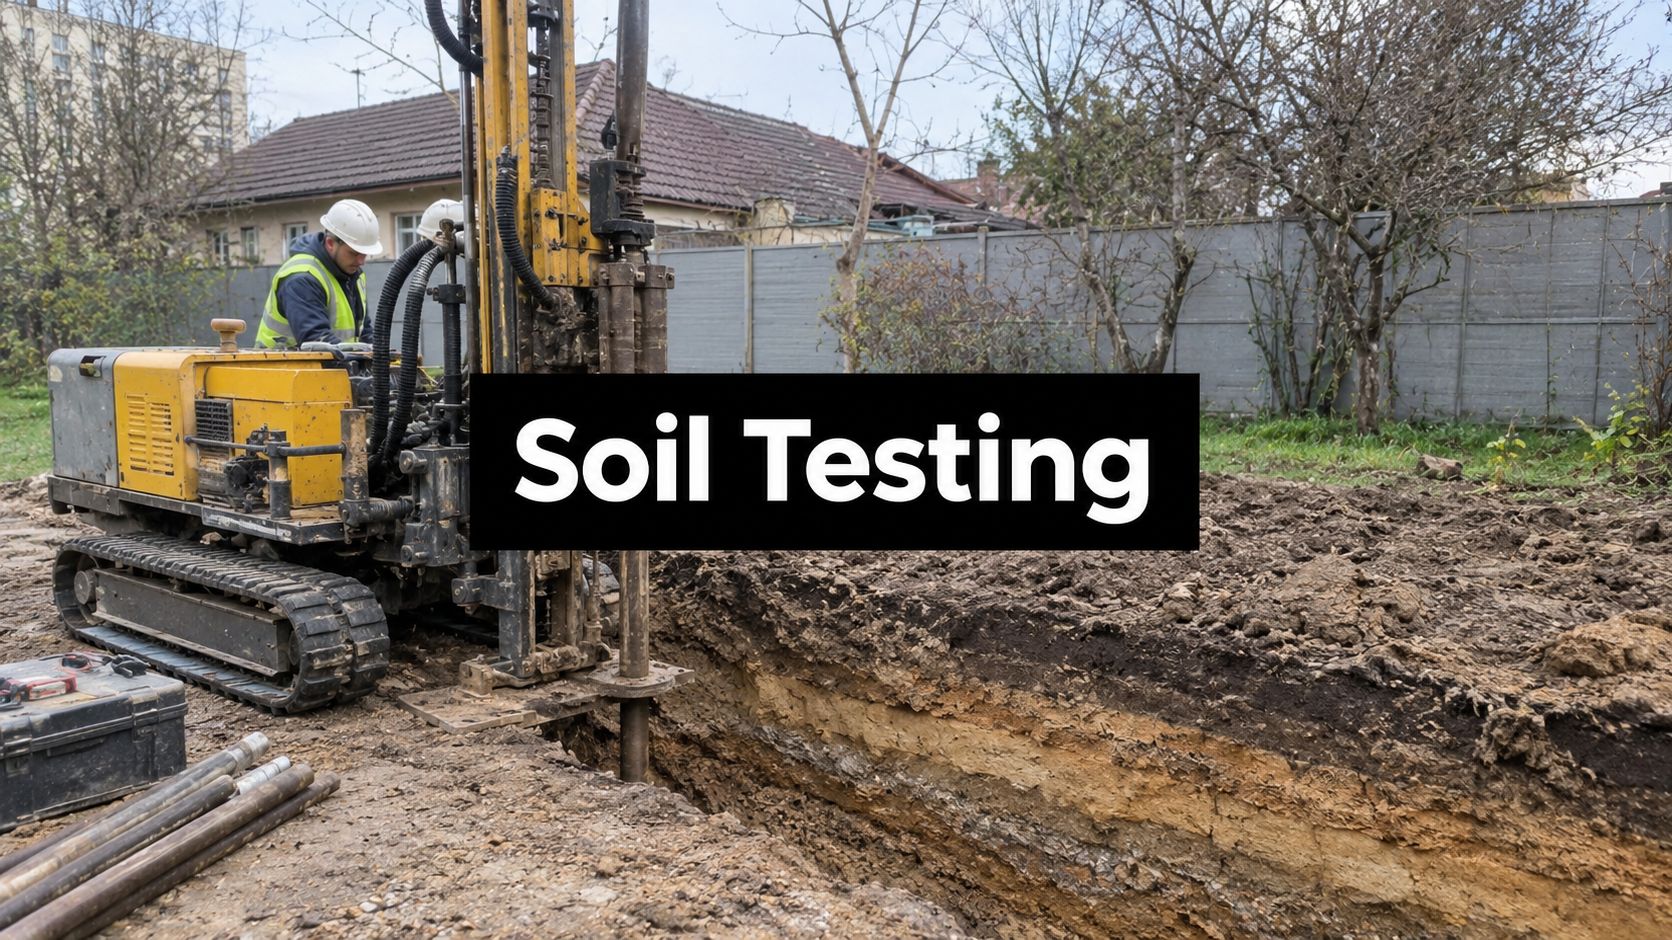
You're standing in a soggy backyard after a hard rain, watching water collect where a new shed, garage, or gazebo is supposed to go. Maybe an older shed floor has started sitting out of level, or a fresh crack has appeared across a basement wall. Those problems often begin below the surface, where soil can compress, expand, drain poorly, or shift differently from one part of a site to another.
Soil testing for foundations gives your builder a clearer picture before excavation and concrete work begin. It helps connect the ground conditions to practical choices, including the footing depth, slab design, gravel base, drainage plan, and foundation type. Whether you're searching for shed foundations near me, garage foundation contractors, or concrete foundations for a new home, reliable soil information replaces guesswork with a plan.
Why Soil Testing Matters Before You Build
A shed can look light and simple, but the ground still has to support its weight without uneven movement. The same applies to a garage slab, a gazebo foundation, a house foundation, or a barn shed pad. If one part of the site rests on firm native soil while another rests on loose fill, the structure may settle unevenly. That movement can show up as a tilted shed, cracked concrete, sticking doors, or gaps where the foundation meets the walls.
A soil investigation reads the ground beneath the planned structure. Field and laboratory information can include moisture content, density, shear strength, and compaction characteristics. These measurements help a geotechnical professional estimate how the soil will respond when the foundation transfers its load into the site, as described in the available discussion of foundation soil behavior and settlement prediction.
The cost of guessing
Foundation design depends on more than the structure's footprint. A 10×10 storage shed may need a properly prepared gravel base, while a garage may require concrete forms, reinforced concrete, and deeper footings. A house addition can bring heavier loads and greater settlement concerns. The soil report helps determine whether the existing ground is suitable, whether weak material should be removed, and whether drainage improvements belong in the scope.
Research shows why that information matters. In an international exercise involving shallow foundations on soft clay, predicted bearing capacity varied by more than an order of magnitude, while settlement predictions varied by more than two orders of magnitude. A separate evaluation using the U.K. DINGO pile-load database found that settlement models generally over-predicted settlement, reflecting conservative assumptions and the uncertainty that remains even when investigation data are available. These findings are summarized in this technical paper on predicting foundation behavior.
Practical rule: Soil testing is less about producing a thick report and more about avoiding the wrong footing, slab, or drainage decision.
Standardized compaction testing has also remained part of construction practice for decades. ASTM D1557, the Modified Proctor test, was originally approved in 1958, with a current edition approved on May 1, 2012, according to the referenced material on the history and use of foundation soil testing. That long use reflects a simple truth. The ground beneath concrete matters just as much as the concrete itself.
For a homeowner, the payoff is practical. Testing can help prevent re-leveling a shed, re-pouring a garage slab, or repairing a foundation affected by differential settlement. If you're comparing gravel shed foundation contractors near me or concrete contractors for a larger build, ask how site conditions will be checked before work starts. You can also review the basics of soil bearing capacity for foundation planning before requesting a quote.
How Soil Testing Actually Works
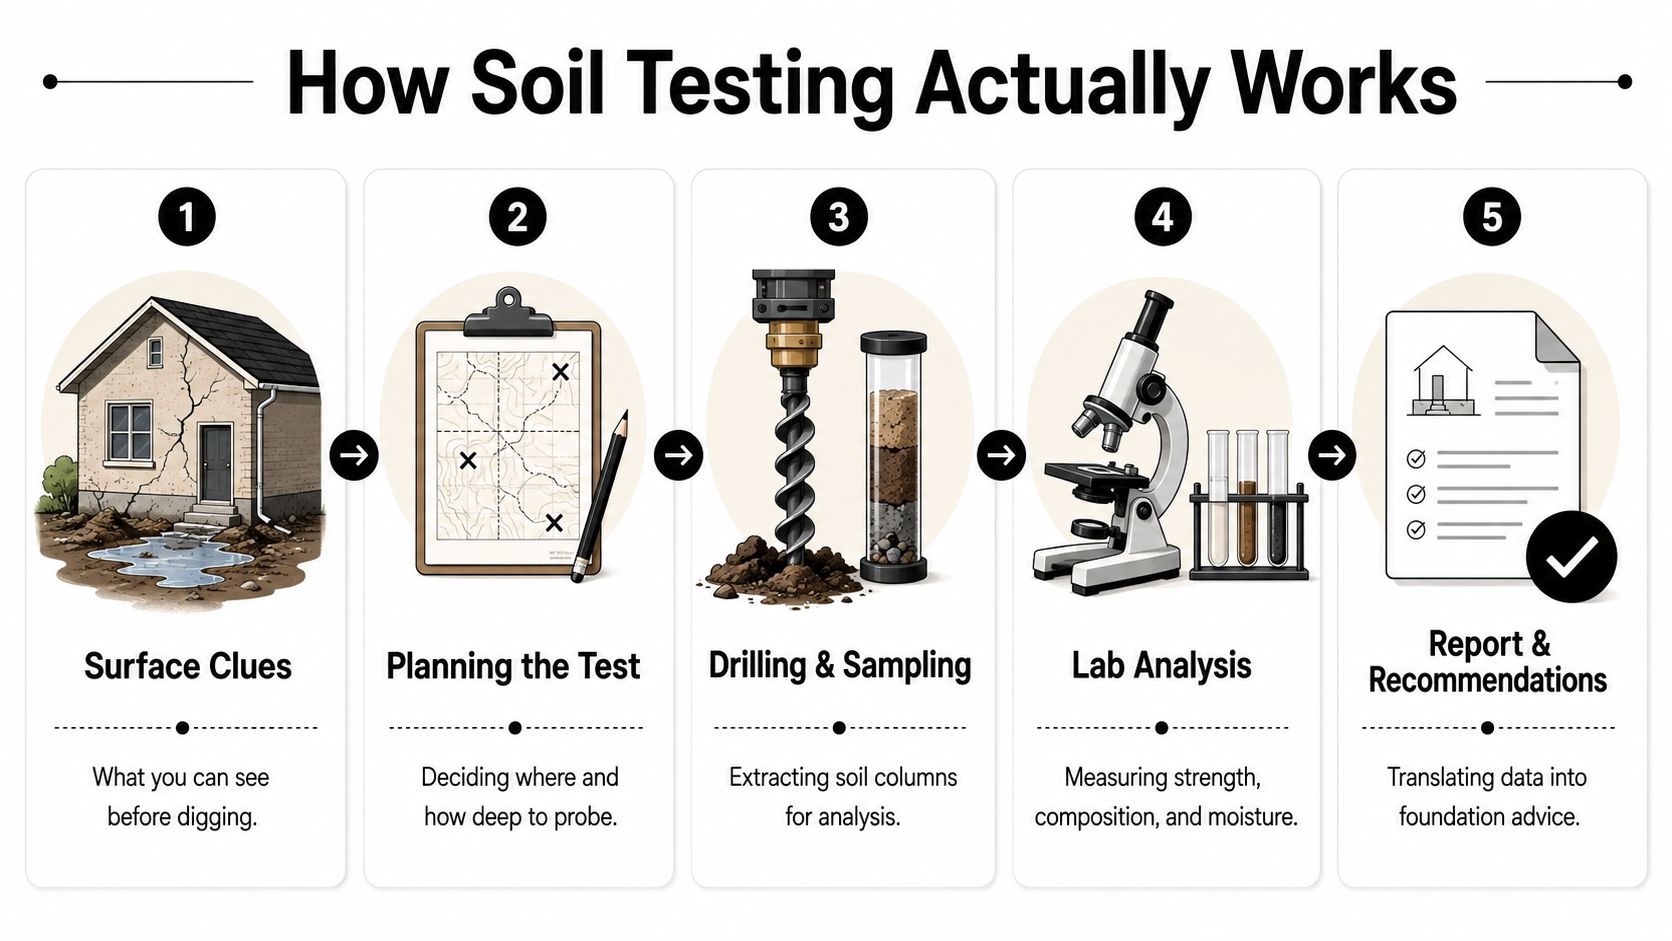
A good subsurface investigation follows a progression. It starts with what people can observe, moves into field measurements, and finishes with laboratory testing that gives the design team more precise information. Skipping one stage can leave an important piece of the site's story unanswered.
Start with the surface
Walk the proposed building area after rain. Look for standing water, soft spots, visible fill, erosion, unusual vegetation, or cracks in nearby slabs and foundation walls. A steep grade, a wet low area, or a recently filled section of yard may change where testing should occur.
These clues don't prove that the soil is unsuitable. They tell the engineer where to ask better questions. A soft patch near a planned garage may deserve a test boring, while a dry, level area with known construction history may need a more targeted investigation.
Move below ground
Field crews may use a hand auger for shallow work or a drill rig for deeper samples. The boring reveals the layers beneath the site, including topsoil, fill, clay, sand, gravel, weathered rock, or other materials. It also helps show whether the conditions change from one test location to another.
Think of the process like a medical evaluation. A visual exam identifies symptoms, field work gathers direct evidence, and laboratory analysis measures specific properties. Each stage sharpens the next question.
Let the laboratory answer the fine points
Laboratory testing can measure moisture, density, plasticity, consolidation behavior, and drainage characteristics. Those results help the designer decide whether the proposed shed foundation, garage footing, or concrete slab needs a wider support area, deeper excavation, improved subgrade, or additional water control.
Building-code guidance also treats investigation as more than one observation. The referenced building-code provisions for soils and foundations call for subsurface exploration such as borings or test pits, along with consideration of soil strength, compressibility, moisture variation, slope stability, liquefaction, and expansive behavior where applicable.
Common Soil Tests and What They Reveal
The tests on a proposal should connect to a design question. You don't need to memorize every technical term, but you should understand what the information changes on the job.
Test borings
A boring creates a vertical look at the ground. The crew records the layers, collects samples, and notes changes with depth. This answers the homeowner's most basic question: what is under the slab or footing, layer by layer?
A boring can reveal fill over soft clay, dense soil over loose material, or shallow rock that affects excavation. That information may influence whether a shed pad stays near grade, whether a garage footing must reach deeper, or whether unsuitable material needs removal.
Standard Penetration Testing
The Standard Penetration Test, commonly called SPT, uses hammer blows to evaluate the resistance of the soil during sampling. The result provides a practical indication of density and relative support, which can influence footing sizing and settlement evaluation.
A low-resistance layer beneath a planned footing may lead the engineer to recommend a wider footing, deeper support, soil replacement, or another foundation approach. A denser layer may support a more conventional design, subject to the complete report.
Atterberg limits
Atterberg limits describe how fine-grained soil changes as moisture increases. The test identifies transitions between solid, plastic, and liquid behavior. In plain language, it helps show how clay may react when the ground gets wet and then dries.
The plasticity index, or PI, is especially useful for expansion concerns. Guidance associates expansive soils with a PI above 15, and identifies PI ranges of 0–20, 21–50, 51–90, and above 90 as low, medium, high, and very high expansion potential, respectively, in this technical overview of expansive soils and foundations. That information can affect slab-on-grade details, moisture control, and foundation depth.
Consolidation testing
Consolidation testing compresses a soil sample in a laboratory device. The results help estimate how much soil may compress under a foundation load and how that movement may develop over time.
That matters for a garage, addition, or home foundation where uneven settlement can damage finishes and framing. The result may support a recommendation for removing weak soil, using engineered fill, or selecting a foundation system that better manages movement.
Permeability testing
Permeability testing measures how readily water moves through soil. The result helps shape the drainage plan, including whether the site needs a gravel layer beneath a slab, footing drains, a French drain, or a sump arrangement.
| Test | What It Measures | Foundation Decision It Informs |
|---|---|---|
| Test boring | Soil layers and sample locations | Excavation depth, footing depth, and foundation type |
| SPT | Resistance and relative soil density | Footing width and support assumptions |
| Atterberg limits | Moisture-related plasticity of fine soil | Shrink-swell precautions and slab design |
| Consolidation test | Compression under load and settlement behavior | Settlement allowance and subgrade treatment |
| Permeability test | Rate of water movement through soil | Gravel base, footing drains, and waterproofing needs |
A plate-load test can provide useful near-surface information, but ASTM D1194 explains that it characterizes soil only to about two plate diameters in depth and captures only part of time-dependent behavior. The ASTM D1194 plate-load testing reference is why designers generally don't treat that test as a complete substitute for deeper investigation where consolidation or deeper weak layers may control performance.
What Happens During a Site Investigation
The site visit usually begins before anyone drills. The engineer reviews available maps, topography, geology, prior reports, and the proposed building plans. That background helps identify likely problem areas and choose useful boring or test-pit locations.
On arrival, the crew walks the property. They look for slopes, seepage, drainage paths, old fill, trees, nearby foundations, and access for equipment. Test locations may be marked with flags or paint, and the crew will normally discuss anything that could interfere with a drill rig or hand-auger setup.
Drilling and sampling
The crew advances the boring, records each soil layer, and places samples in labeled containers or bags. The work may disturb a small area of lawn or gravel, but a professional crew plans the layout to limit unnecessary damage. For a small shed, the investigation may be targeted. A garage, addition, or homesite can require broader coverage because the structure places more load on the ground.
Groundwater observations may be taken at the end of a boring or during the visit. Water levels can change with weather and seasons, so the report should explain how the observation was made and what it means for excavation, slab preparation, basement walls, or drainage.
The on-site portion can be brief, while the interpretation takes longer. Lab testing and the written report follow the field work, and the final document typically includes boring logs, laboratory results, design assumptions, and recommendations for the builder.
The report is the part that turns soil samples into construction instructions. It can address allowable bearing pressure, excavation limits, compaction requirements, drainage details, and foundation support. A homeowner doesn't need to read every technical page, but the builder and concrete crew should use the recommendations when preparing the site.
The video below offers another visual explanation of the investigation process.
DIY Checks Versus Hiring a Geotechnical Engineer
A homeowner can learn useful things before hiring anyone. You can dig a small shovel test to see how much topsoil sits above firmer material, walk the yard after rain, look for soft areas, and use a steel rod to compare resistance across the proposed building footprint. A jar sedimentation test can also provide a rough visual indication of clay, silt, and sand content.
Those checks are helpful for planning a conversation. They aren't a foundation design.
What a homeowner can learn
DIY observations can identify warning signs and help you describe the property accurately. You may discover that water collects near the planned base for a storage shed, that one corner contains loose fill, or that a previous driveway cut changed the grade.
| Aspect | DIY Preliminary Checks | Full Geotechnical Investigation |
|---|---|---|
| Main purpose | Identify visible warning signs | Characterize subsurface conditions for design |
| Typical tools | Shovel, jar, steel rod, observation after rain | Borings, field sampling, in-situ tests, laboratory testing |
| Bearing capacity | Cannot establish a reliable design value | Provides engineering recommendations when included in scope |
| Settlement risk | Only rough observations are possible | Evaluates compressibility and likely movement |
| Groundwater | May reveal surface wetness | Investigates subsurface water conditions |
| Permitting value | Usually limited | May provide a signed or sealed report when required |
| Best use | Early screening and project preparation | Permit, engineering, and higher-risk foundation decisions |
What the engineer adds
A licensed geotechnical engineer can combine boring logs, field results, laboratory data, site conditions, and building loads. The finished report may provide code-recognized recommendations and professional responsibility that a homeowner's jar test cannot provide.
The choice depends on the project and local requirements. A small, lightly loaded structure on known, undisturbed ground may call for a targeted approach, while a garage, house addition, basement, retaining wall, or site with fill and drainage problems deserves more formal review.
A DIY check can tell you where to look. It can't tell you what footing will safely carry the building.
How Test Results Shape Your Foundation Design
A soil report becomes useful when it changes a construction decision. The builder doesn't order a test just to collect numbers. The information should explain what happens beneath the structure and what the crew must do before placing concrete.
Bearing capacity controls support size
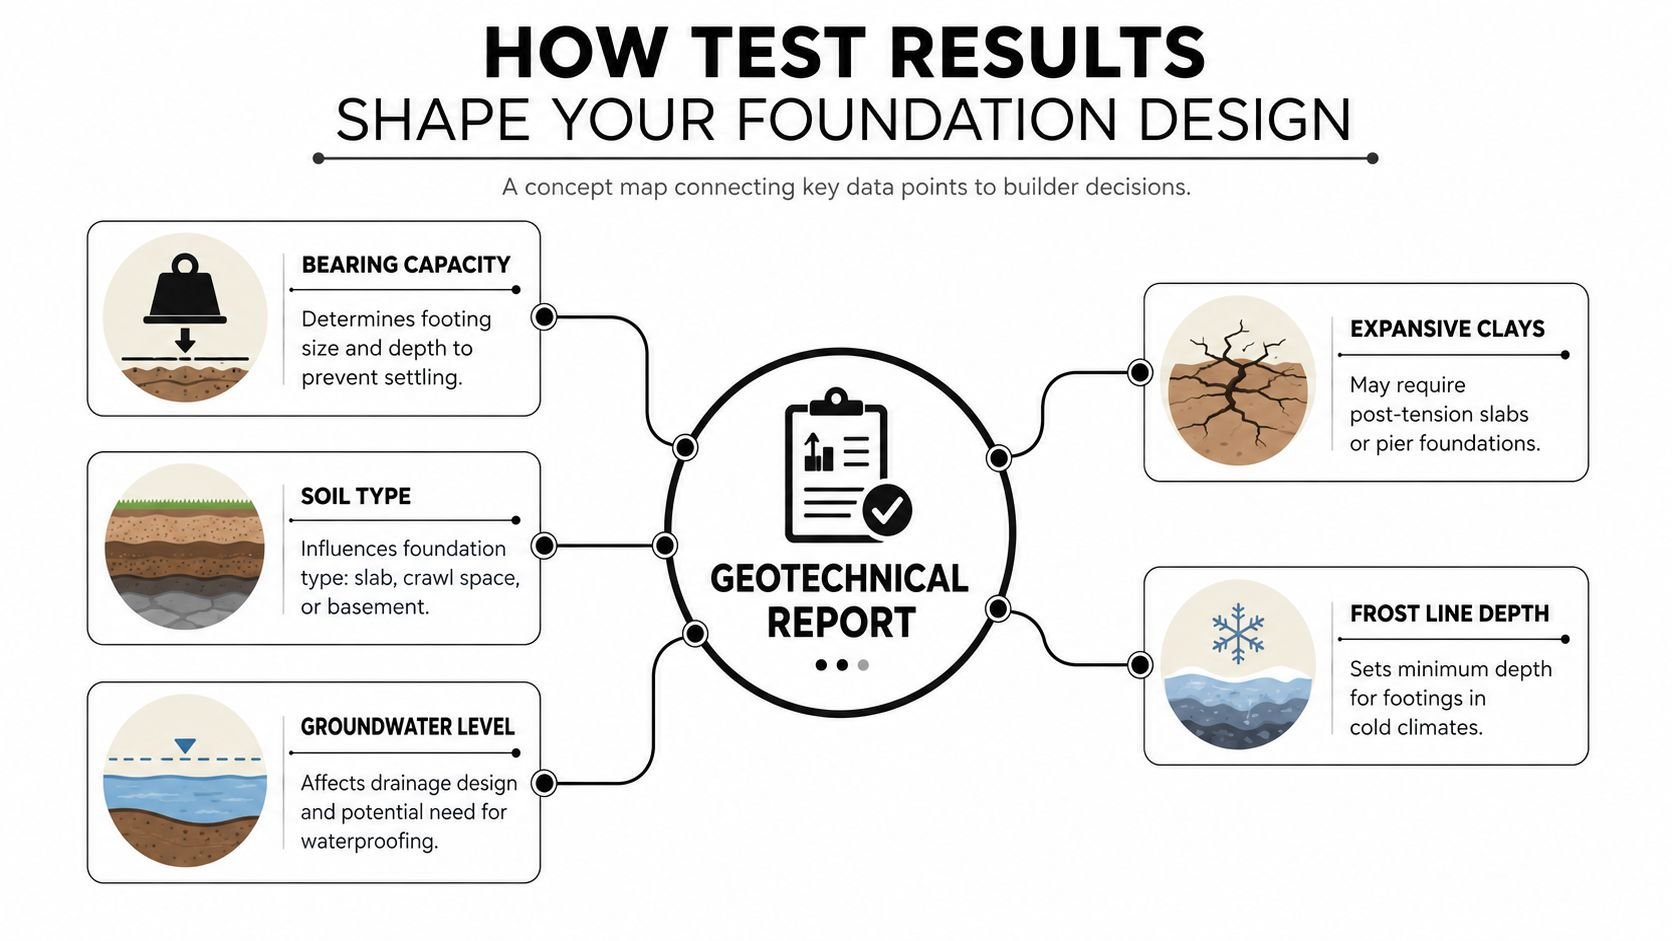
Bearing capacity describes how much pressure the soil can carry without unacceptable failure or movement. If the allowable value is low, the designer may increase footing width so the building's load spreads across more soil. A weak surface layer may also lead to deeper excavation or improved subgrade.
A widely used code-based default is 1,500 psf when site-specific testing isn't available. Published classification tables also show that stronger soils may support 2,000 psf or more, while weaker or organic soils may require lower values based on the report. The federal soil bearing pressure table explains why the assumed value affects footing size, slab planning, and subgrade decisions.
Moisture behavior controls movement precautions
Atterberg limits and the plasticity index help identify clay that may expand when wet and contract during drying. The active zone is the layer where seasonal moisture changes cause volume movement. Guidance places that zone at roughly 3 feet in humid coastal climates and more than 15 feet in semiarid inland regions, as explained in the expansive-soil foundation guidance.
High expansion potential may require moisture management, deeper support, a specialized slab system, or another engineered solution. A builder may also need to adjust grading and surface drainage so water doesn't repeatedly collect beside the foundation. For homeowners comparing a shed foundation kit with a built-up gravel pad, the site findings determine whether the simple option is appropriate.
Water and frost control the details
Permeability and groundwater observations guide drainage. A high water table can lead to footing drains, a thicker or better-draining gravel layer, waterproofing, or a sump system. Poor drainage beneath a slab can affect the subgrade and create moisture problems even when the concrete itself was installed correctly.
Frost depth sets the minimum footing depth in cold regions. The International Building Code requires footings to extend below the frost line, and published guidance places common continental U.S. frost depths from about 12 to 42 inches, depending on jurisdiction, according to this frost-depth and foundation-code guidance.
The report isn't paperwork that sits in a file. It's the rulebook for excavation, base preparation, concrete forms, and drainage.
For homeowners considering garage footings and foundations, cement foundations for a garage, or a gravel shed foundation, that connection matters. The soil data can influence slab thickness, reinforcement, footing dimensions, excavation limits, and whether stabilization is needed. A contractor may also coordinate soil stabilization methods when the native ground doesn't meet the project requirements.
Local Rules for Pennsylvania, Maryland, Delaware, and New Jersey
Local requirements can change the answer to a basic question: does this project need a formal soil report, engineered drawings, deeper footings, or erosion controls? The township, county, and project type all matter, so homeowners should confirm requirements before scheduling a boring.
Pennsylvania commonly has a frost line of roughly 30 to 36 inches, while Maryland county guidance commonly places frost depths at 24 to 30 inches. Delaware commonly uses a 24-inch minimum frost depth, and New Jersey commonly falls around 30 to 36 inches. These values are planning references, not a substitute for the building official's direction.
Soil profiles also vary across the region. Clay-heavy areas in Pennsylvania's Piedmont can respond differently from coastal plain sands in Delaware and southern New Jersey. Shrink-swell clays in central Maryland may call for moisture and movement evaluation, particularly beneath slabs and additions.
| State | Frost Depth | Permit Trigger | Typical Soil |
|---|---|---|---|
| Pennsylvania | 30–36 inches | UCC requirements and local permit review | Clay-heavy Piedmont soils |
| Maryland | 24–30 inches | County review, with MDE involvement for applicable erosion and sediment control | Shrink-swell clays in central areas |
| Delaware | 24 inches | Local permitting and DNREC stormwater requirements where applicable | Coastal plain sands |
| New Jersey | 30–36 inches | Municipal review, including possible soil escrow ordinances | Coastal plain sands in southern areas and varied inland soils |
Pennsylvania's Uniform Construction Code can trigger engineered drawings based on the project and local review. Maryland's Department of the Environment, Delaware's DNREC, and municipal offices in New Jersey may also affect site preparation and stormwater planning. Requirements aren't identical from one jurisdiction to another.
Call 811 before any boring or excavation, and ask the local township or county what documents it needs. That one call can prevent a return visit, a permit delay, or a foundation plan that doesn't match local rules.
Your Next Steps and Hiring Checklist
You don't need to arrive at the first contractor conversation with an engineering background. You do need a clear project description and enough site information for the engineer or foundation contractor to recommend an appropriate scope.
Prepare the project
Start by writing down what you're building. Include whether it's a shed, garage, gazebo, house addition, horse barn, playset, hot tub pad, shipping-container base, driveway, or patio. Note the approximate footprint, expected loads, whether the structure will have a basement or crawl space, and whether the site has a slope, fill, standing water, or a history of movement.
Gather property surveys, existing plans, prior soil reports, septic information, and photographs of problem areas. Mark the proposed foundation area clearly, then call 811 before any drilling or excavation. If a crew needs equipment access, identify gates, narrow drives, overhead obstructions, septic areas, and soft ground before the appointment.
Compare proposals carefully
Request written proposals from licensed geotechnical engineers or qualified foundation contractors who can explain who performs the testing and who signs the report. Ask each firm to identify the proposed test locations, expected depth, field methods, laboratory work, deliverables, exclusions, and schedule.
A useful proposal should answer:
- Scope: Is the work for a new build, an addition, a repair, or a shed or garage pad?
- Design connection: Will the report address bearing pressure, settlement, drainage, frost, expansive soil, and compaction where relevant?
- Documents: Will you receive boring logs, laboratory results, and foundation recommendations?
- Site readiness: Does the price assume clear access, marked utilities, and open boring locations?
- Credentials: Can the firm provide proof of licensing, insurance, and relevant references?
Don't compare proposals by price alone. A cheaper scope may omit the test needed to answer your actual foundation question, while a broader proposal may include work your small project doesn't need. Ask for a sample report and a realistic timeline so you understand what you'll receive.
Clear the work areas, gain access, and secure pets before the crew arrives. Those simple preparations can keep the visit focused and help the contractor move from soil information to excavation, concrete forms, gravel placement, or a complete foundation build without avoidable delays.
Firm Foundations is a licensed and insured foundation and excavation contractor serving Pennsylvania, Maryland, Delaware, and New Jersey. The company handles site preparation, excavation, gravel pads, concrete foundations, garage slabs, shed bases, driveways, and related foundation work, with project scopes developed around the property and planned structure.
Firm Foundations can help connect your soil conditions to the right preparation for a shed, garage, home, gazebo, barn, driveway, or patio project. Visit Firm Foundations to request a no-obligation site walk and written quote, or call to discuss your foundation plans and next steps.