
Foundation Moisture Barrier Guide for PA, MD, DE, and NJ
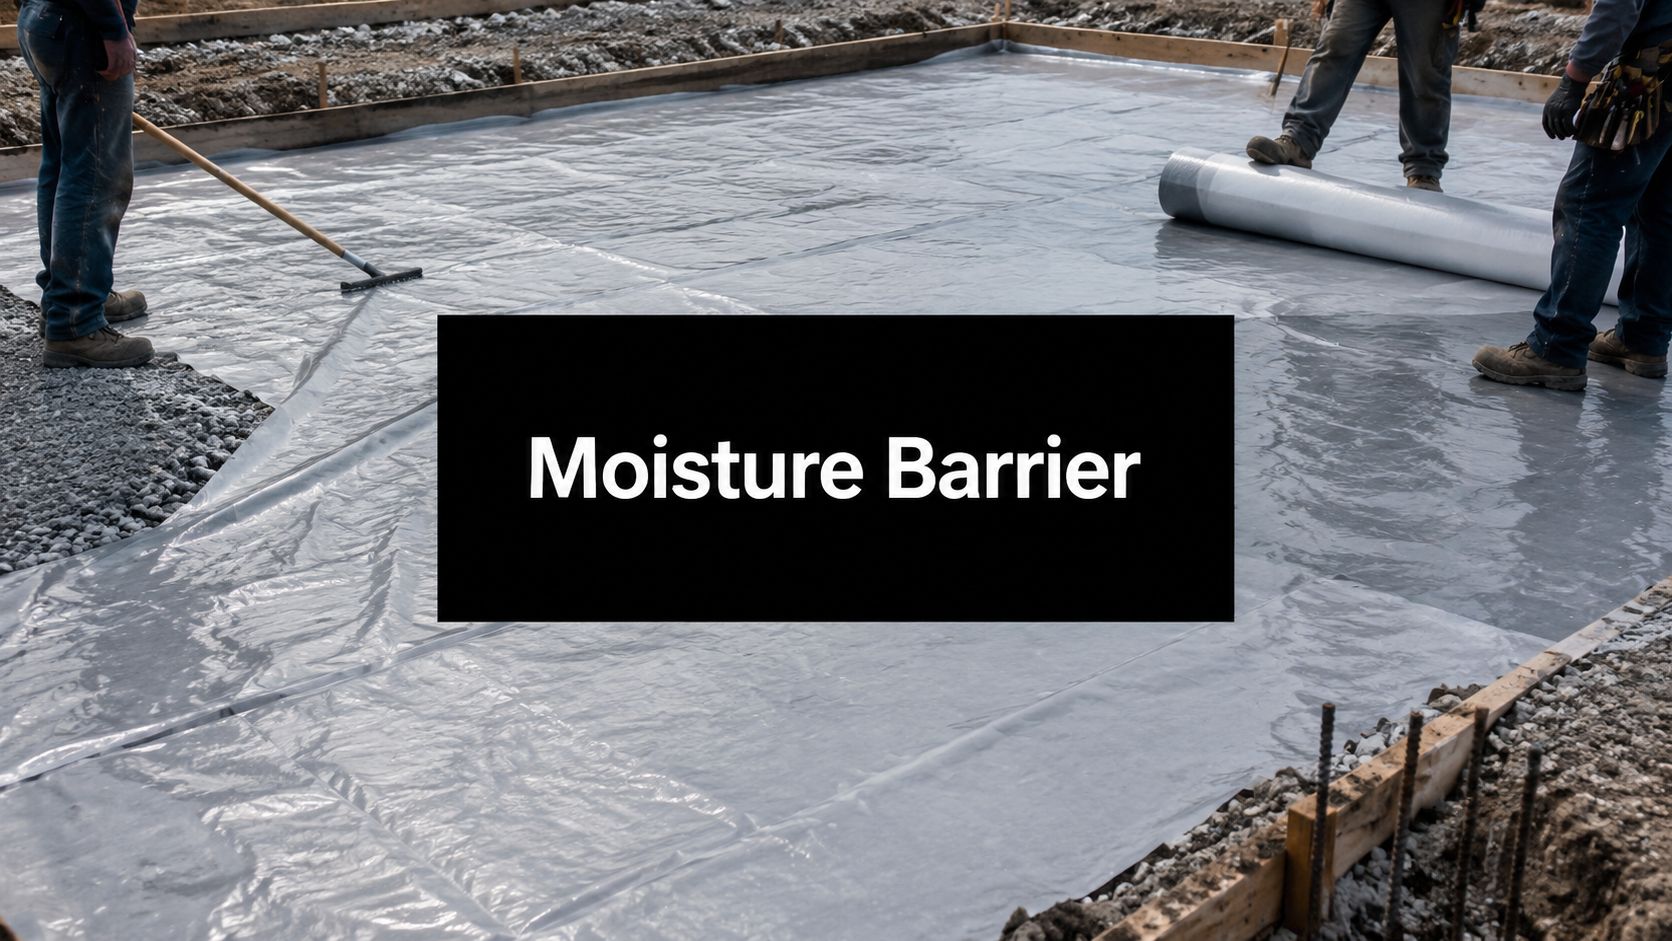
A damp shed floor on a cool morning tells you a lot before you even see the rest of the job. The concrete feels cold, the air smells musty, and the bottom of a mower deck or a box of tools starts showing rust sooner than it should. Across Pennsylvania, Maryland, Delaware, and New Jersey, that usually points to the same problem, ground moisture is moving into the foundation system and the building above is paying for it.
That's why a foundation moisture barrier isn't just a sheet of plastic tossed under concrete. It's part of a larger system that keeps a shed pad, garage slab, crawlspace, or basement drier for the long haul. When the layers are chosen and installed correctly, they help protect the structure, the floor finish, and the equipment sitting on top of it.
Why Moisture Sneaks Into Sheds, Garages, and Homes
A homeowner steps into a garage after a hard rain and notices the same thing they noticed last month, the concrete still smells damp. The slab isn't flooded. There's no visible leak. Still, the floor holds on to moisture, and the room never quite dries out the way it should.
That kind of moisture problem shows up because water does not need an obvious entry point. It can move upward through porous concrete, and it can also move in from damp soil at the slab edge or under a shed pad. Building America guidance treats that as a capillary and vapor issue, which is why it recommends a polyethylene ground cover in crawlspaces and a foundation system that uses a vapor barrier to block ground moisture from entering the slab (Building America guidance).
What that means on a real jobsite
On a shed pad in Lancaster County, a garage slab in Maryland, or a basement floor in New Jersey, the pattern is usually familiar. The soil holds moisture longer than people expect, then the concrete pulls that moisture upward and keeps it there. The common assembly uses 6-mil plastic sheeting over a 4-inch layer of gravel, so moisture can drain away instead of sitting against the slab.
Practical rule: If the ground under the slab stays wet, the slab needs more than concrete alone.
That is why a musty garage after rain is usually a sign that the foundation assembly is incomplete. In many Mid-Atlantic jobs, the fix starts below the concrete, because that is where the moisture enters the system first.
What a Foundation Moisture Barrier Does
A foundation moisture barrier works like a raincoat under the slab. It blocks ground moisture from moving up through the concrete and into the space above it. That matters on a shed pad, garage slab, or basement floor, because concrete will absorb and pass moisture if the assembly below it is weak.
Homeowners hear “barrier” and assume one product can fix the whole problem. Field work says otherwise. A sound moisture-control assembly uses a graded gravel base, a barrier sheet, sealed seams, and drainage that carries water away from the structure. EPA moisture-control guidance also ties that work to grading and air sealing, because foundation moisture control performs as a system, not as a roll of plastic laid in the mud (EPA moisture-control guidance).
The difference between barrier, coating, and waterproofing
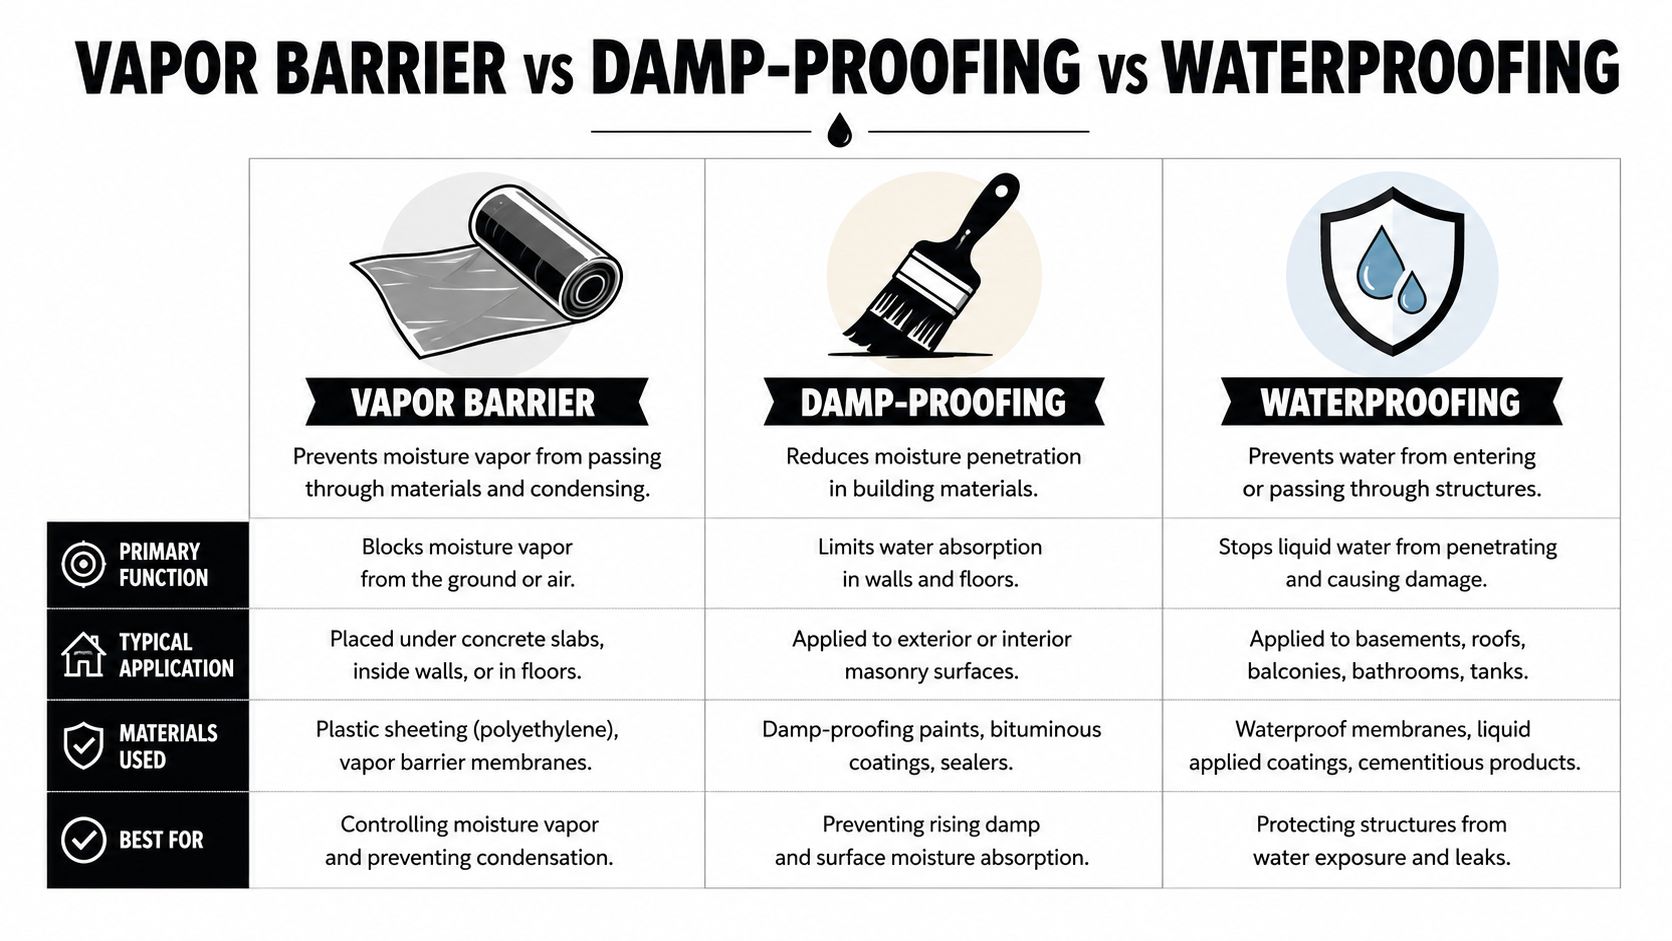
A sheet under the slab has one job, it blocks vapor rising from the ground. A coating on a below-grade wall does a different job, it slows moisture migration through the wall surface. A waterproofing membrane does more than either of those, because it is built to handle liquid water under pressure in harsher conditions.
That difference matters on accessory structures and full basements alike. A shed pad may only need a vapor barrier and capillary break. A garage foundation may call for a thicker membrane and better drainage around the footing. A basement wall in poor soil can need full waterproofing instead of dampproofing, especially where water sits against the foundation or the site sheds runoff slowly. If you are sorting through damage after movement or seepage, the issue can also affect a claim tied to homeowners insurance foundation cracks, so the cause matters as much as the repair.
The mistake is buying one product and assuming the job is done. The better question is simple. Which moisture path are you trying to stop, vapor, seepage, or pressurized water?
Vapor Barrier vs Damp-Proofing vs Waterproofing
The terms get mixed up all the time, and that leads to weak bids. A homeowner asks for a “barrier,” a contractor hears “minimum plastic,” and the finished work ends up lighter than the site calls for.
The cleanest way to sort it out is by use case. On a slab-on-grade shed or garage, the main concern is usually vapor moving up from the soil, so the assembly needs a vapor barrier plus a capillary break. On below-grade walls, the issue shifts to moisture against the wall, so dampproofing may be enough in drier conditions, while waterproofing is the better choice where there is a high water table or severe soil-water conditions (IRC-based guidance).
| Choosing the Right Moisture Protection by Use Case | What It Stops | Best For | Watch Out For |
|---|---|---|---|
| Vapor barrier | Moisture vapor from the soil | Slabs, shed pads, garages, crawlspace floors | It won't fix poor drainage by itself |
| Dampproofing | Water vapor migration through below-grade walls | Drier below-grade walls and retained soil conditions | It's not for significant hydrostatic pressure |
| Waterproofing | Liquid water under pressure | Basements, severe soil-water conditions, high water table sites | Wrong membrane selection can still fail |
The International Residential Code-based guidance also says below-grade retaining foundation walls must be dampproofed from finished grade to the higher of the top of footing or 6 inches below the basement floor, and membrane waterproofing joints must be lapped and sealed with compatible adhesive. That is the part many bids skip over, then the wall gets treated like a simple coating job when the site really needs a tougher system.
A useful outside reference for homeowners dealing with structural damage is homeowners insurance foundation cracks. It is a reminder that foundation problems are not always cosmetic, especially once water and settlement start working together.
What gets installed under a slab
A slab or pad usually starts with excavation, then a leveled and compacted gravel layer, then the barrier sheet. PNNL describes a foundation capillary break using 6-mil polyethylene or taped rigid foam over a 4-inch gravel layer, which interrupts upward wicking while the gravel helps drainage away from the slab (PNNL capillary break guidance).
Here is the trade-off many homeowners never see. 6-mil can satisfy code in some places, but 10-mil polyethylene or thicker is commonly preferred under slabs because it holds up better during construction traffic and backfill. On a shed pad or garage slab, that extra durability can be the difference between a clean pour and a punctured barrier.
The internal underlayment guide at concrete slab underlayment lines up with what good field work looks like, a clean subgrade, a stone base, and a barrier that stays intact during the pour.
Site note: The cheapest roll of plastic is rarely the best value once the concrete is in place.
That is especially true on accessory structures where a warped floor or a damp storage area turns into a daily annoyance. Under-slab moisture control is not glamorous, but it is one of the few layers you only get one chance to install correctly.
How a Slab or Pad Is Built to Stay Dry
A dry slab starts before the concrete truck shows up. I've seen plenty of pads and garage slabs go bad because the prep was rushed, not because the concrete itself was weak. The crew has to shape the ground, control drainage, and protect the barrier long before anyone is walking on finished concrete.
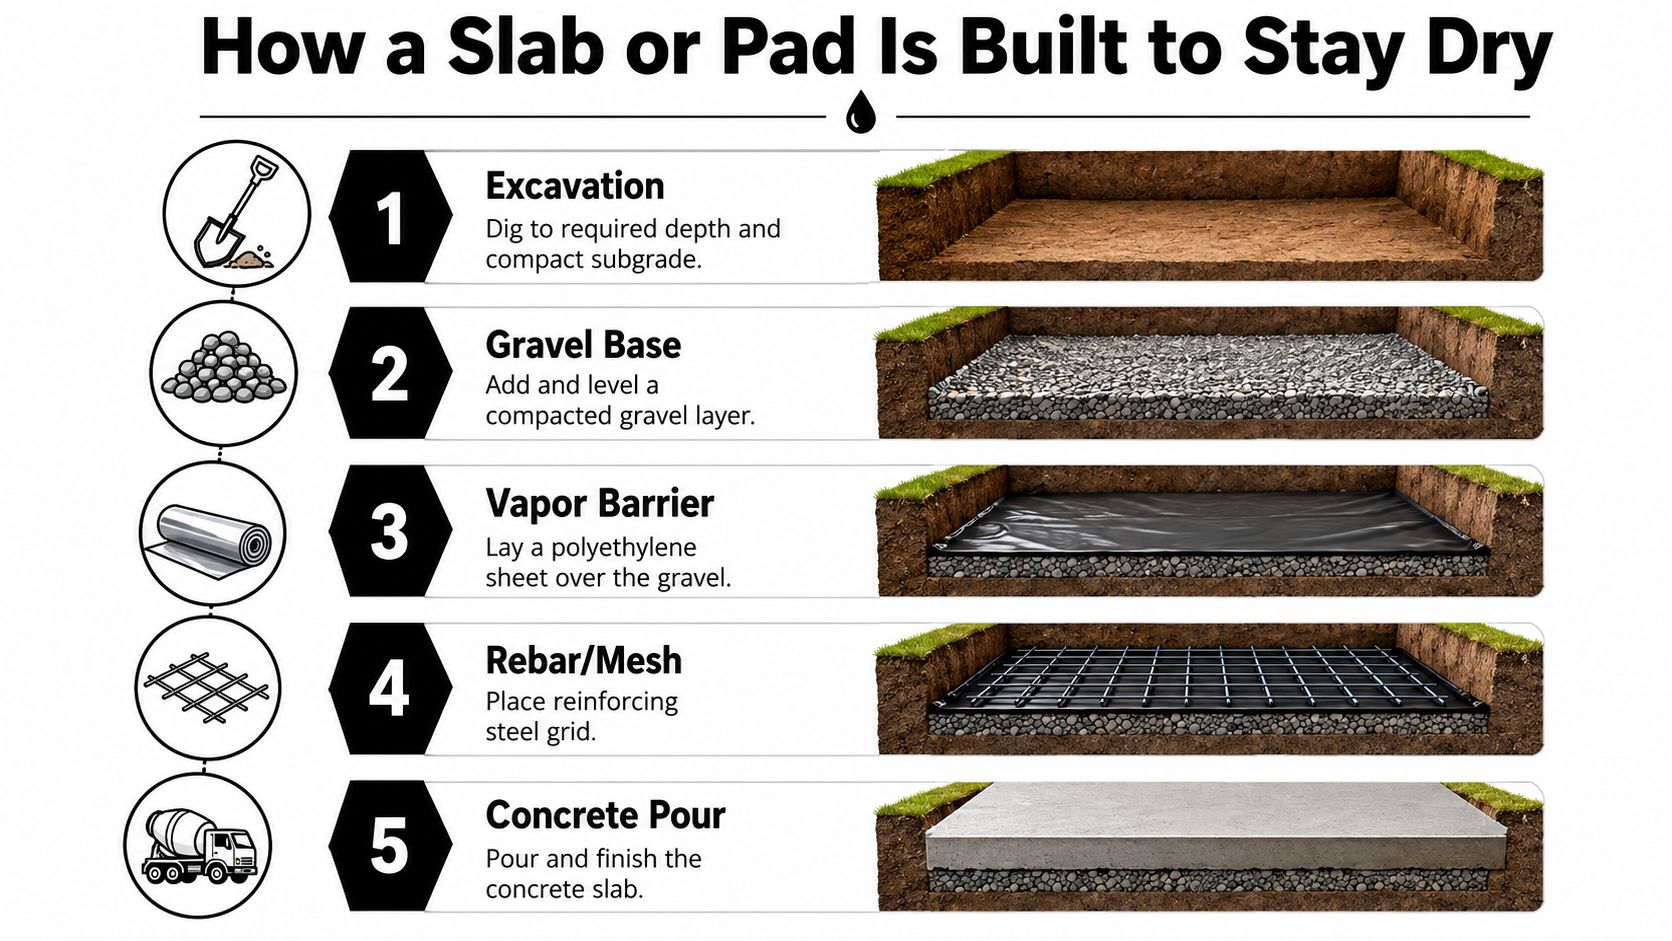
The sequence is plain enough when the work is done correctly. First comes excavation to the right depth, then a compacted gravel base that gives water somewhere to move. Next comes the polyethylene sheet, with seams overlapped and taped so the barrier stays continuous. After that, the crew places reinforcement and pours the concrete.
The details that separate good work from callbacks
A homeowner usually sees the finished slab. The performance comes from the hidden layers underneath it. That is why details like 6-mil versus 10-mil poly, seam overlap, and gravel depth matter on every shed foundation, garage foundation, and concrete pad.
The internal underlayment guide at concrete slab underlayment matches what good field work looks like, a clean subgrade, a stone base, and a barrier that stays intact during the pour. If a crew tears the sheet with rebar chairs, boots, or sharp stone, the whole system weakens before the slab even cures.
<iframe width="100%" style="aspect-ratio: 16 / 9;" src="https://www.youtube.com/embed/stOvOxIDRYo" frameborder="0" allow="autoplay; encrypted-media" allowfullscreen></iframe>
For homeowners comparing a shed foundation kit against a poured slab, the installation sequence matters as much as the material list. A gravel base can work well for a base for storage shed, but a garage slab or a conditioned space above it needs tighter moisture control. The same logic applies to a 4×8 shed with foundation, a 10×10 storage shed, or a larger concrete foundation for garage. On a sandy lot with good drainage, a simple pad may be enough. On tighter Mid-Atlantic soil, the barrier, the base, and the drainage all have to be built with more care, because each layer has less room to make up for mistakes in the others.
What to ask before the pour
- Barrier thickness: Ask whether the crew is using 6-mil, 10-mil, or another specified poly.
- Seam treatment: Confirm the seams will be lapped and taped, not just laid edge to edge.
- Stone base: Make sure the gravel layer is compacted and leveled before the barrier goes down.
- Protection during placement: Ask how they'll protect the sheet from punctures while concrete is being placed.
A homeowner who wants a practical check on the ground work can start with grading tips for homeowners. The same sequence shows up whether the project is a gravel shed pad, a garage slab, or a house foundation. Once you understand the order, it is easier to tell the difference between a crew that installs a system and one that just covers the ground.
Drainage and Longevity in PA, MD, DE, and NJ Climates
A good barrier can still fail if the ground around it stays wet. In Pennsylvania, freeze-thaw cycles push small mistakes into bigger ones. In Maryland and Delaware, heavy summer storms can overwhelm weak grading. In southern New Jersey, high water tables and coastal conditions make drainage even more important.
That is why foundation moisture control starts outside the slab. The ground should shed water away from the structure, with the yard shaped so surface runoff does not collect at the edge of the pad. If the grade falls toward the building, even a well-installed membrane has to work against a wet site.
What proper drainage looks like on site
Grading is the first line of defense, and downspouts matter just as much. Water coming off the roof should be carried away from the foundation, not dumped beside it. Organic mulch, soil piled too high, and planted beds tight against the wall trap moisture where it does the most harm.
Homeowners who want a practical check on their yard can start with grading tips for homeowners. That guidance lines up with what we look for on site, because the barrier below the slab and the drainage above it have to work together.
The best-case property has sandy, well-drained soil and enough slope to keep water moving. The harder case is clay soil, a low spot, or a site where groundwater hangs up after a storm. On those sites, a basic sheet under the slab usually is not enough. The whole foundation build has to help the structure dry out, from the stone base to the surface drainage and the perimeter details.
Drainage is part of the foundation, not separate from it.
For projects that need a perimeter drain as part of the plan, see perimeter drain systems. That kind of detail often separates a dry crawlspace or pad from one that stays damp year after year.
Cost Ranges and Code Considerations Homeowners Should Know
The barrier itself is usually not the expensive part. Excavation, gravel, forming, concrete, and labor drive most of the budget. Skipping the moisture layer feels cheaper on day one, but it's one of the fastest ways to create a callback later.
Code matters here too. Below-grade wall guidance calls for 6-mil polyethylene, 6-inch lapped seams, and sealed joints, with the film protected from mechanical damage near grade (IRC-based guidance). In the field, many inspectors and builders still prefer 10-mil or thicker under slabs because it's tougher during construction and backfill.
What a real quote should spell out
A solid written quote should identify the slab type, the gravel base, the vapor barrier, and the finishing details. If you're pricing a gravel shed foundation, a monolithic garage slab, or a conditioned basement slab, the quote should tell you what's being installed, not just the final square footage number.
That's the difference between an accurate estimate and a vague ballpark. A backyard shed pad might be a straightforward gravel-and-barrier assembly. A garage foundation usually adds more concrete, more forming, and more finish work. A conditioned basement slab brings the strictest moisture-control expectations because the floor is part of the home's occupied environment.
For broader planning, homeowners can also use foundation moisture control as a reminder that good work includes grading, drainage, dampproofing or waterproofing, capillary breaks, and a vapor retarder under the slab.
| Item to look for on a quote | Why it matters |
|---|---|
| Barrier thickness and type | Tells you whether the assembly is built for the job |
| Gravel depth and compaction | Affects drainage and capillary break performance |
| Seam detail | Prevents vapor leaks through overlaps |
| Protection during pour | Reduces puncture risk before the slab cures |
A cheap bid can hide the most important layers. If the quote leaves out the barrier, the gravel, or the seam detail, it's not a bargain. It's an incomplete foundation build.
How to Hire a Foundation Crew You Can Trust
The plastic roll matters, but the crew matters more. A moisture barrier only performs as well as the people placing it, protecting it, and finishing around it. That's why homeowners should vet a foundation contractor the same way they'd vet a roofer or a plumber, by license, insurance, references, and written scope.
Firm Foundations is one local option that handles shed pads, garage foundations, and excavation work across Pennsylvania, Maryland, Delaware, and New Jersey. The company also works with shed builders such as Stoltzfus Structures and Sheds Unlimited, which tells you the work has to fit a real production process and not just a one-off guess.
What to verify before you sign
- License and insurance: Ask for proof, not a verbal promise.
- Local references: Look for projects in your part of the four-state service area.
- Written specifications: The quote should name the barrier thickness, gravel depth, and seam treatment.
- Clear scope: The contractor should say who handles excavation, forming, pouring, and finish work.
When those details are in writing, there's less room for surprise. A homeowner should never have to guess whether the crew is using 6-mil or 10-mil poly, whether the stone base is compacted, or whether the slab is being built for a shed, garage, or house foundation.
The bigger point is simple. A foundation moisture barrier is a system, and the contractor you choose is the system you buy.
Your Next Step Toward a Dry, Lasting Foundation
The right move is usually the straightforward one. First, match the foundation type to the structure, whether that's a shed pad, garage slab, gazebo foundation, or house foundation. Second, match the moisture protection to the soil and water conditions. Third, hire a local crew that will install the layers the way they were quoted.
That checklist keeps the decision grounded in the actual job, not the cheapest line item. It helps avoid warped floors, rusted equipment, and the kind of dampness that shows up after every heavy rain. It also makes it easier to compare contractors because you're looking at the system, not just the concrete.
If you're planning a new pad or slab in PA, MD, DE, or NJ, ask for a transparent quote before the ground is opened up. A good contractor should be able to walk you through the barrier, gravel, drainage, and finishing details in plain language.
If you're ready to build a shed pad, garage slab, or other concrete foundation that's sized and detailed for your site, Firm Foundations can lay out the work and price it clearly. Visit Firm Foundations to request a free quote and get the moisture control details right before the first shovel hits the ground.