
Basic Wiring Diagram for Shed: Safe Code Guide 2026
Most shed wiring guides start with a neat little sketch and imply that the job is straightforward. That's the advice I'd question first. A basic wiring diagram for a shed isn't a shopping list or a weekend shortcut. It's a plan for an outdoor electrical installation, and the right design depends on what you'll plug in, how far the shed sits from the house, and whether the structure rests on a gravel shed foundation or a concrete slab.
A small storage shed may only need lighting and a couple of receptacles. A workshop, office, or barn shed may need a feeder and subpanel. The foundation matters, too, because poor drainage can leave conduit fittings, boxes, and receptacles sitting in damp conditions.
For homeowners searching for shed foundations contractors near me, shed foundations near me, or concrete foundations in Pennsylvania, Maryland, Delaware, and New Jersey, electrical planning should happen before excavation. Firm Foundations handles the site preparation and foundation work, while a licensed electrician should determine the energized wiring and complete the electrical connection.
Why a Simple Sketch Is Not Enough for Shed Power
The popular one-line diagram usually shows a house panel, an underground cable, one outlet, and a light. That drawing may be useful as a visual starting point, but it leaves out the decisions that determine whether the installation will work safely. A practical plan begins with three questions: What loads will the shed serve? How long is the run? What foundation and drainage conditions surround the building?
Modern NEC-based guidance treats sheds and similar outbuildings as outdoor electrical environments. A widely cited rule requires 125-volt, 15-amp and 20-amp receptacles in outbuildings to have GFCI protection, which is why a current diagram normally begins with a protected feed and continues to weather-resistant receptacles and lighting devices. The shed wiring guidance from WireRef also describes a common arrangement using 12 AWG copper on a 20A breaker at 120V, with conduit or another approved protection method for exposed wiring.

Start with the building use
A shed used for seasonal storage has a different electrical profile from one used for power tools. Lights and occasional hand tools may fit on a single protected branch circuit. A compressor, heater, or several tools operating together can justify a feeder and subpanel, especially when the trench will be difficult to reopen.
Distance also changes the design. Longer runs increase voltage-drop concerns and material requirements, so the electrician should size the conductors from the actual route and expected load rather than copying a diagram found online. Regional wiring conventions vary as well. For readers working outside North America, Australian wiring colour codes explained by DLG Electrical offers useful context on why wire identification must match the local standard.
Field observation: The cheapest drawing is rarely the cheapest installation. Reworking a buried route after the shed is set in place costs more than deciding the topology before the pad and trench are built.
A gravel shed foundation should drain water away from the structure, while a concrete pad must be planned so conduit routes and penetrations don't create weak or wet points. The diagram should follow the site plan, not exist separately from it.
Choosing Between a Branch Circuit and a Subpanel
This is the main fork in the road. A single 120V, 20-amp branch circuit can suit a modest shed with lighting and limited receptacle use. A four-wire feeder with hot-hot-neutral-ground conductors and a subpanel gives a detached building separate circuit capacity for lighting, receptacles, and planned expansion.
The correct choice depends on load, distance, and future use. A nearby garden shed with one light and occasional small-tool use may not need a subpanel. A distant workshop with multiple circuits, a compressor, or a heater should be evaluated as a small distribution system from the beginning.
| Feature | Single Branch Circuit | Feeder with Subpanel |
|---|---|---|
| Best fit | Basic lighting and limited receptacles | Workshops, offices, and expansion plans |
| Distribution | One protected circuit | Multiple labeled downstream circuits |
| Up-front work | Simpler route and termination | More planning, equipment, and inspection detail |
| Future changes | Limited by the original circuit | More adaptable when properly sized |
| Local control | May use a dedicated disconnect | Typically includes a local disconnect or panel disconnect |
| Foundation coordination | One planned conduit route | Larger feeder route and panel location must be reserved |
A feeder can make sense even when the immediate load is modest if trench access is difficult. Reopening a finished gravel base or cutting a completed slab later can disrupt drainage, framing, and the shed itself. That doesn't mean oversizing automatically makes sense. The electrician still needs a load calculation, conductor selection, overcurrent protection, and approval from the local authority.
For a detached subpanel, the neutral and grounding conductors have separate jobs and shouldn't be bonded together in the panel. The feeder path, disconnect location, grounding electrode system, and circuit labels all need to match the approved design.
Homeowners comparing options should review sub panel load calculations from Value Tools Co. as background, then have a licensed electrician calculate the actual installation. Permit and inspection expectations can differ across Pennsylvania, Maryland, Delaware, and New Jersey, so a diagram that looks acceptable online may not satisfy the authority having jurisdiction.
Core Components of a Code-Compliant Shed Circuit
Once the topology is chosen, the diagram should identify every protective and disconnecting component. A pile of cable, boxes, and receptacles isn't a system until each part has a defined place and purpose.
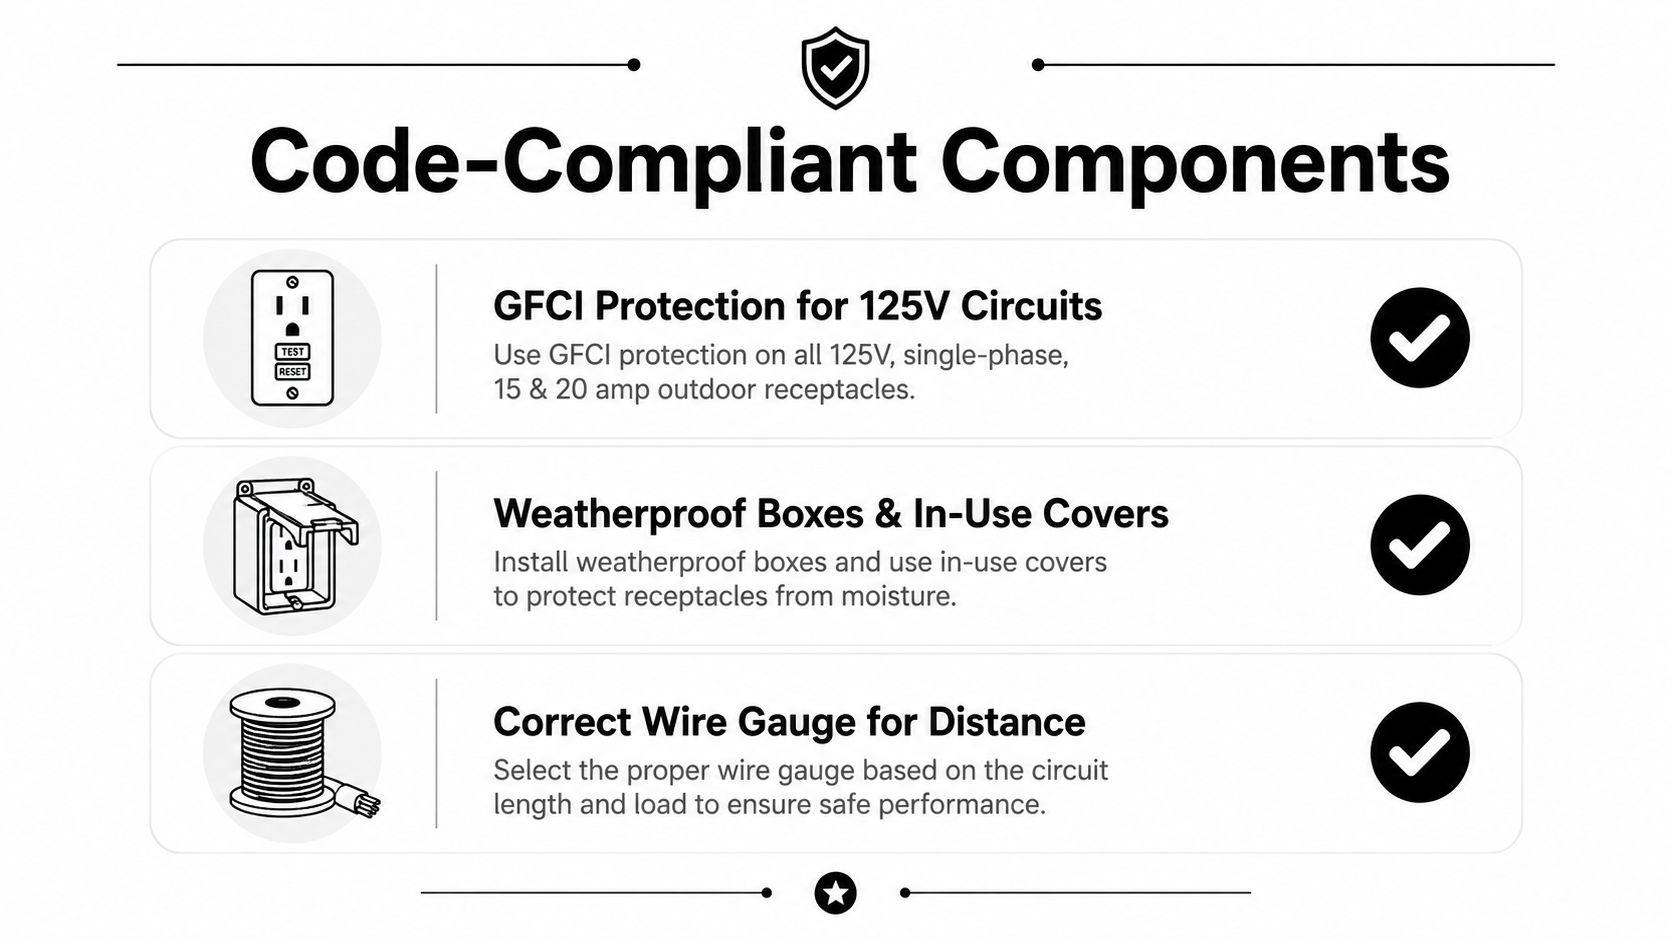
The first item is GFCI protection. NEC-based references identify outdoor and accessory-building receptacles as part of the provisions requiring protection for 125V, 15A and 20A outlets, and other code-focused guidance explains that outdoor receptacles need weatherproof enclosures and covers. EC&M's GFCI requirements overview is a useful reference for understanding why this protection is central to inspection.
Match the hardware to the environment
Every exterior or damp-location device needs protection suited to exposure. That normally means weatherproof boxes, covers designed for use while a cord is plugged in, and a wiring method approved for the location. A standard indoor box with an ordinary cover is not a substitute for outdoor-rated equipment.
A detached shed also typically needs a grounding electrode system, often using a ground rod driven at least 8 feet into the soil. Super Bright LEDs' NEC-based buried wiring explanation discusses grounding, weatherproof equipment, and protection for underground runs.
In a detached subpanel, keep the neutral bar insulated from the enclosure and grounding bar. The grounding conductor and grounding electrode connection must follow the electrician's design and local code requirements. This separation is easy to miss when someone treats the shed as an extension-cord project.
Build a diagram someone else can follow
Label the feed, disconnect, subpanel, lighting circuit, receptacle circuit, and grounding points. A future homeowner or inspector should be able to trace the route without guessing. The drawing should also identify the wiring method, conductor sizes selected for the route, and where GFCI protection occurs.
A clear diagram reduces mistakes at termination points. It also gives the foundation crew a practical route for conduit sleeves and trench coordination before the gravel shed foundation or concrete forms are installed.
Installation Sequence From Trench to Final Test
Electrical work goes more smoothly when the physical sequence is planned with the foundation and shed placement. The route should be marked before excavation, not improvised after the pad is complete.
Mark the trench path. Confirm the house panel location, shed wall entry, disconnect or subpanel location, and the route around the planned pad. Arrange utility locating before digging, and keep the route accessible for inspection.
Excavate to the required burial depth. The electrician or local inspector determines the approved burial method and depth for the selected wiring system. Don't assume that a depth used for one conduit or cable method applies to another.
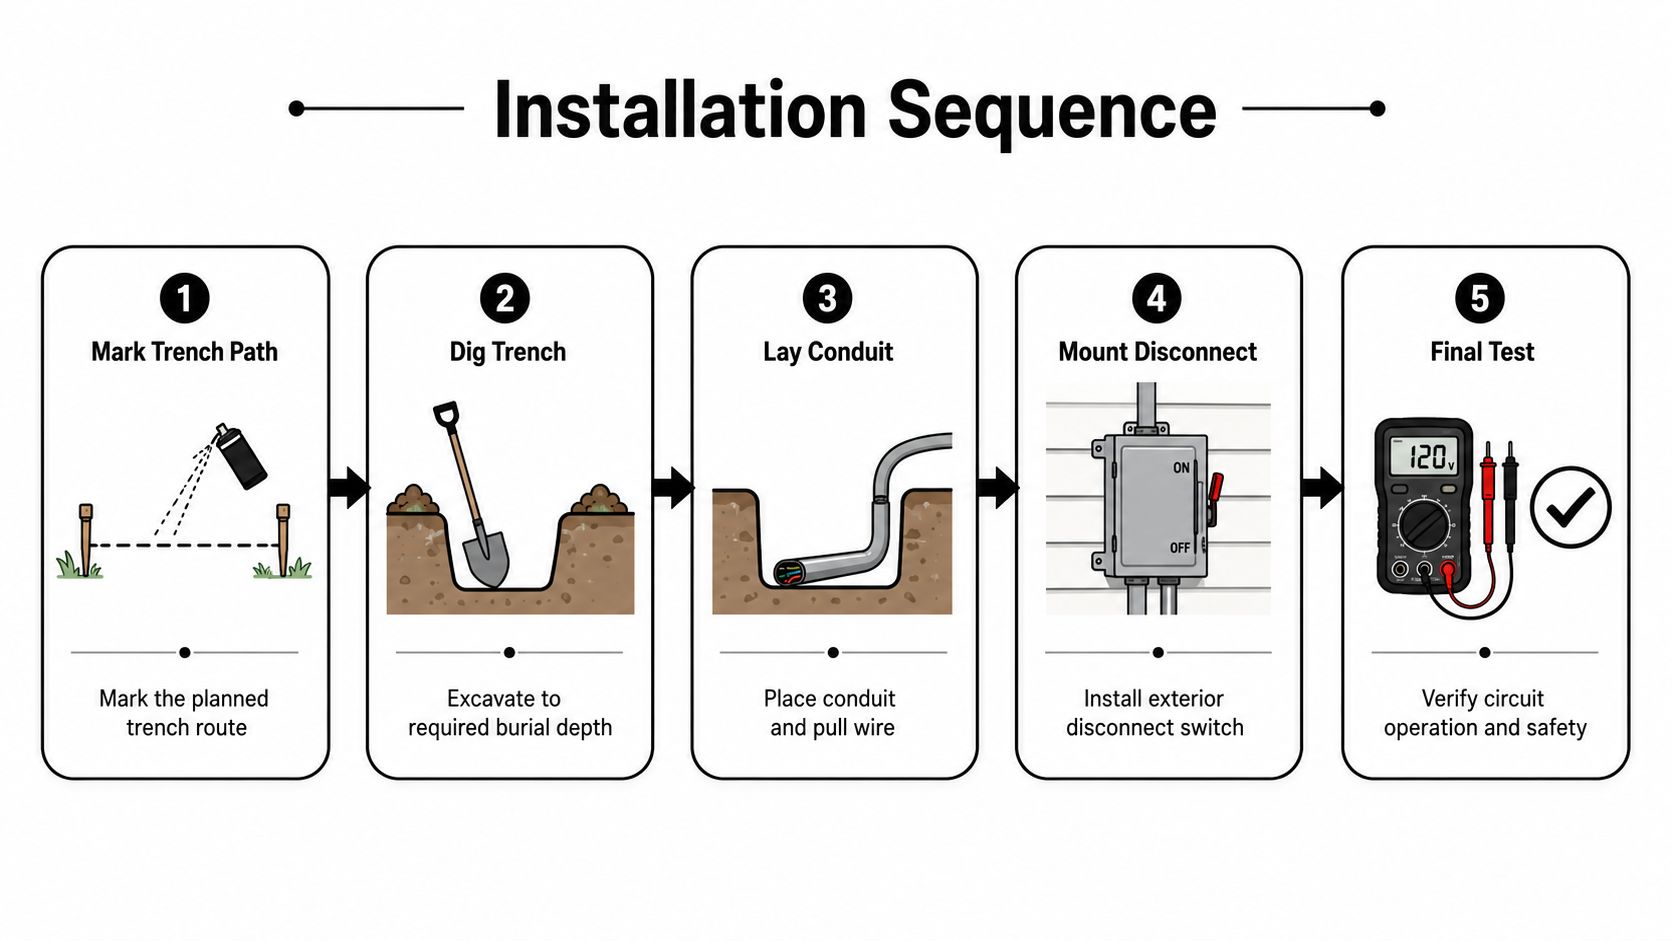
Place conduit and pull wire. Keep the wiring method consistent through the circuit. Mixing methods without proper transitions, using unsuitable cable, or packing the conduit too tightly creates problems that may not appear until inspection or troubleshooting.
Mount the disconnect or subpanel. Use a weather-suitable location and leave enough working space for safe access. Label the panel and each circuit before the final connection.
Terminate and test. Install weatherproof boxes, in-use covers, lights, and receptacles. The licensed electrician should make panel connections, energize the system, verify polarity and grounding, and test every GFCI device.
This video provides a visual overview of outdoor shed wiring concepts:
Common failures include forgetting service-loop slack in a panel, leaving an unprotected outdoor receptacle, failing to label the shed panel, and skipping the GFCI test. A confident homeowner may handle planning, non-energized trench work, and some conduit placement if local rules allow it. Panel connections and energized testing belong with a licensed electrician.
How the Shed Foundation Affects Electrical Safety
A shed's electrical equipment is only as durable as the site beneath it. Water that collects against a low pad or flows toward the shed wall can expose boxes and conduit fittings to conditions they weren't meant to handle. A properly prepared shed foundation gravel base helps move water away, while a well-planned concrete pad gives the structure a stable, clean surface and a predictable edge for routing utilities.
The foundation choice should follow the site and structure. A gravel base may suit a storage shed where drainage and access are priorities. A reinforced concrete slab may be more appropriate for a heavier workshop, garage-style shed, or structure requiring a flatter finished floor. The same planning applies to a gazebo foundation, barn shed, or base for a storage shed. Each needs the right excavation, bearing surface, drainage plan, and utility coordination.
Coordinate before the pour
If the electrical route needs to enter through a slab, plan the conduit sleeve before concrete placement. Cutting through a finished slab later can damage the concrete, complicate waterproofing, and force the electrician to change the interior panel location.
With a gravel pad, keep the trench route outside the compacted foundation area where possible. That protects the finished base and gives the electrician room to install and inspect the conduit without disturbing the shed support system. The concrete pad planning guidance for sheds provides a useful reference for thinking through pad layout and utility coordination.
Local foundation requirements also vary. Minneapolis guidance for a conventional detached garage specifies a 12-inch minimum footing width and exterior footings at least 12 inches below undisturbed ground. Its slab guidance also addresses 1/2-inch anchor bolts, spacing, and placement near plate ends. Minneapolis detached-garage foundation guidance shows why the electrical plan should be coordinated with the structure rather than treated as an afterthought.
When to Call a Licensed Electrician and Request a Quote
A homeowner can often help with the non-energized parts of the project. You can decide how the shed will be used, mark preferred equipment locations, clear the work area, and discuss whether the site needs a gravel shed foundation or concrete slab. Depending on local rules, you may also be able to assist with trenching and conduit placement under professional direction.
The electrician should handle the parts that affect life safety and inspection approval:
- Panel connections and energizing: The electrician determines conductor sizing, overcurrent protection, grounding, and final terminations.
- Permits and inspections: Requirements vary by jurisdiction across Pennsylvania, Maryland, Delaware, and New Jersey.
- Final circuit testing: GFCI operation, polarity, grounding, disconnect operation, and circuit labeling should be verified before use.
The code checkpoints are straightforward to list, but they're not casual details. Inspectors may look for GFCI protection, weatherproof enclosures, an approved underground wiring method, a disconnecting means, proper detached-building grounding, and clearly labeled circuits. If the shed needs a feeder, the subpanel arrangement must also keep neutral and ground functions separate.
Firm Foundations can coordinate the shed foundation, gravel or concrete pad, excavation, trench route, and conduit stub-up locations so the electrical contractor doesn't have to undo finished site work. Homeowners comparing garage foundation contractors near me, garage footings and foundations, or cement foundations for a garage should ask whether the contractor will coordinate utility paths before placing concrete.
For a quote, have the shed dimensions, location, intended use, distance from the house panel, preferred foundation type, and any future tool or heating plans ready. The shed electrical wiring planning guide can help organize those questions before the site visit.
Firm Foundations provides gravel shed foundations, concrete foundations, excavation, and utility-path coordination across Pennsylvania, Maryland, Delaware, and New Jersey. Visit Firm Foundations to request a quote for the pad, slab, trench route, and conduit planning needed to help your licensed electrician complete the shed power installation safely.