
Shed Pad Preparation Done Right for Lasting Results
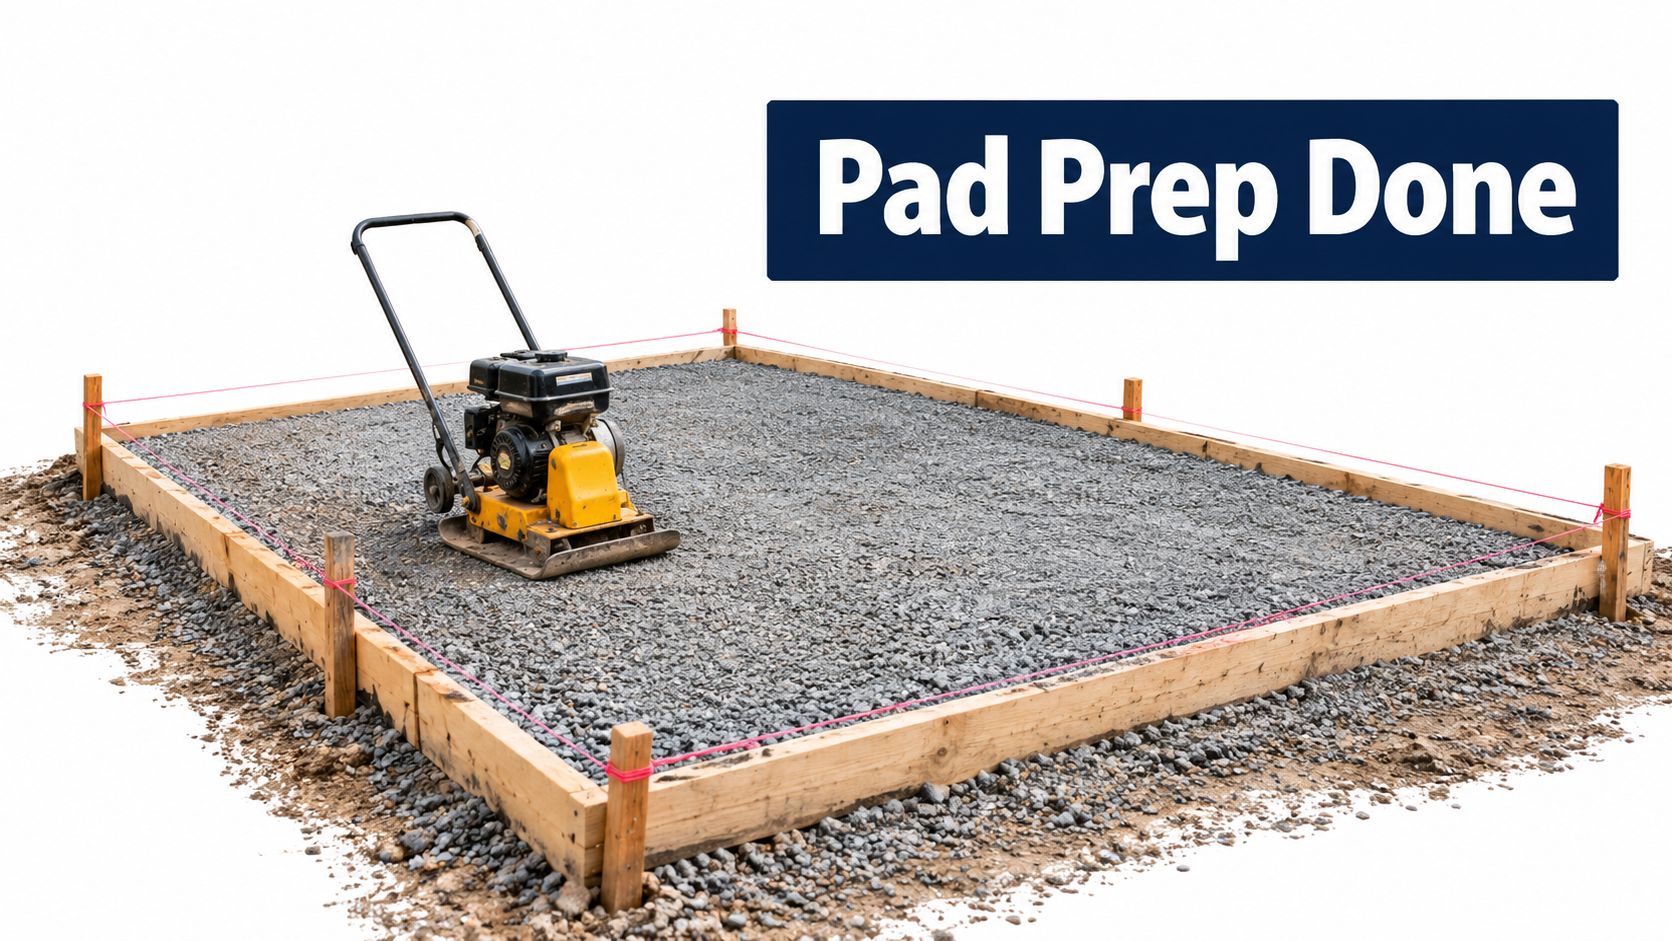
You've ordered a shed, cleared a space in the yard, and now the temptation is to set a few blocks on the grass and call the job finished. That shortcut often leads to a dropped corner, a sticking door, standing water, and soft flooring after the ground settles. Proper shed pad preparation treats the project as site work, not just a place to set a building.
Firm Foundations provides excavation, compacted gravel pads, and concrete foundations for homeowners across Pennsylvania, Maryland, Delaware, and New Jersey, including customers looking for shed foundations contractors near me, gravel shed foundation contractors near me, and dependable local concrete contractors. The right base starts with the soil, drainage, access, and local requirements long before the shed arrives.
Why Most Shed Problems Start Before the Shed Goes Up
A homeowner recently described the familiar sequence: a small shed went onto blocks over an area that had been lawn. At first, everything looked fine. After repeated rain and seasonal ground movement, one corner settled, the door rubbed the frame, and water collected along the low side.
The shed itself wasn't necessarily defective. The ground underneath had never been prepared to carry the load or move water away. Grass roots and organic soil compressed, loose earth shifted, and the blocks transferred every change in the ground directly into the floor system.
Practical rule: If the base isn't stable and dry, the shed can't stay square for long.
A proper shed foundation is a compact site-prep project. It includes the decisions made before delivery:
- Location: Confirm the shed can legally sit where you want it.
- Utilities: Mark buried electric, gas, water, and communication lines before excavation.
- Drainage: Establish a finished grade that moves runoff away from the footprint.
- Excavation: Remove sod, roots, and weak topsoil.
- Subgrade: Compact firm native soil and correct soft spots.
- Base: Place clean aggregate in controlled lifts and compact each layer.
Industry guidance commonly recommends removing 4 to 6 inches of topsoil or organic material before construction because those materials don't provide dependable long-term support. A practical pad also extends at least 12 inches beyond the shed on every side, giving the gravel a stable edge and keeping the building away from unsupported ground. The complete site-prep checklist before construction reinforces why these decisions belong at the start of the job.
A few careful hours underground can protect the shed floor, doors, siding, and stored equipment. Whether you're planning a 10×10 storage shed, a barn shed, a gazebo foundation, or a 4×8 shed with foundation, the pad deserves the same attention as the structure above it.
Permits, Setbacks, and Utility Checks Before You Dig
Before equipment reaches the site, confirm that the location is legal and safe to excavate. A well-built shed foundation can still create a serious problem if it crosses a setback, easement, flood area, or buried utility route.
Start with the local rules
Contact the local building department and ask about permit requirements for the shed's size, height, placement, and intended use. One source notes that permits are commonly required for sheds over 100 to 120 square feet, while anchor-spacing rules may also apply. Verify the current requirements in your jurisdiction rather than relying on a neighbor's experience.
Check the property survey or plat for:
- Side, rear, and front-yard setbacks
- Recorded utility or access easements
- Drainage paths and stormwater restrictions
- Floodplain or wetland overlays
- Lot-coverage limitations
- HOA design and placement rules
Ask the building office whether local frost-depth requirements affect the foundation design. That answer can change whether a simple gravel pad, shed foundation blocks, concrete slab, or deeper garage footings and foundations make sense.
Mark utilities and document the clearance
Call 811 or your local utility locating service before excavation, and wait until every applicable utility has been marked or cleared. Photograph the marks, record the ticket information, and keep those details with the project file. Don't assume that a short excavation is harmless. A shallow pad can still conflict with service lines, private utilities, irrigation, or buried drainage.
If the project includes new water, drainage, or electrical work, a specialist resource such as construction plumbing San Antonio can help explain how construction plumbing should be coordinated with site work.
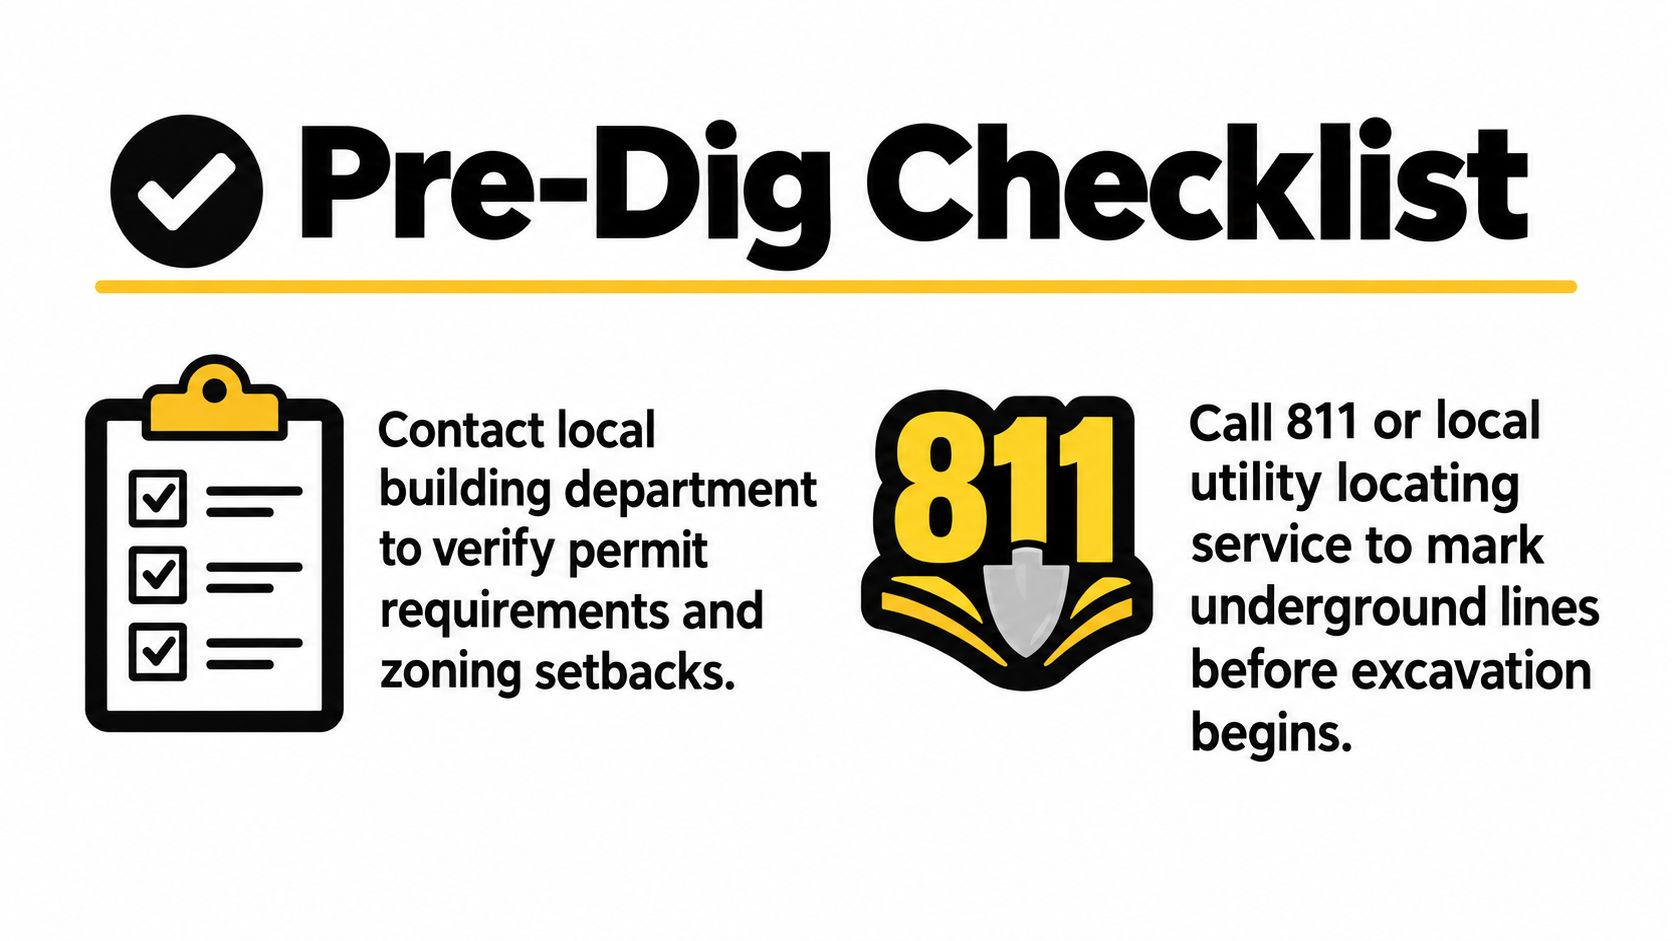
A short check before digging prevents expensive rework, delayed delivery, and forced removal. It also gives your contractor the information needed to price excavation and foundation work accurately.
Picking the Right Spot and Getting the Slope Right
The best shed location isn't always the flattest-looking patch of lawn. Start by looking at how water travels across the property, how materials will reach the site, and how the surrounding terrain will affect the pad over time.
Avoid low pockets, the bottom of a slope, and areas where a downspout or sump discharge releases water. Keep practical clearance from large trees as well. Roots can disturb the base, and heavy shade can leave the ground damp after rain. A location with useful sunlight and reasonable equipment access usually dries more reliably and makes delivery, excavation, and future maintenance easier.
Establish drainage before placing stone
The finished pad should direct water away from the shed rather than trapping it beneath the floor. Neutral pad and construction-entrance guidance commonly specifies a finished slope of about 1% to 2% away from the structure, while a university drainage specification requires at least 0.5% slope in the drainage system and a minimum 4-inch crushed-stone layer over compacted subgrade. These figures are cited in the shed pad preparation and geocell guide.
A 1% to 2% grade is approximately one-eighth to one-quarter inch per foot. Mark the proposed high and low points with stakes and a string line, or use a line laser to check the fall across the footprint. Measure before excavation, then check again after the base is compacted.
Don't create a flat-looking pad that holds water. A shed needs a controlled platform that supports the building while allowing surface runoff to move away from the walls and floor.
Plan for the whole site
Consider the route for a delivery truck, skid steer, or wheelbarrow. Leave room for door swings and a ramp if the shed will store riding equipment. If the pad sits near a driveway, coordinate the work with driveway contractors near me or excavation near me searches so access, stockpiled soil, and finished grades don't conflict.
Excavation and Subgrade Prep the Right Way
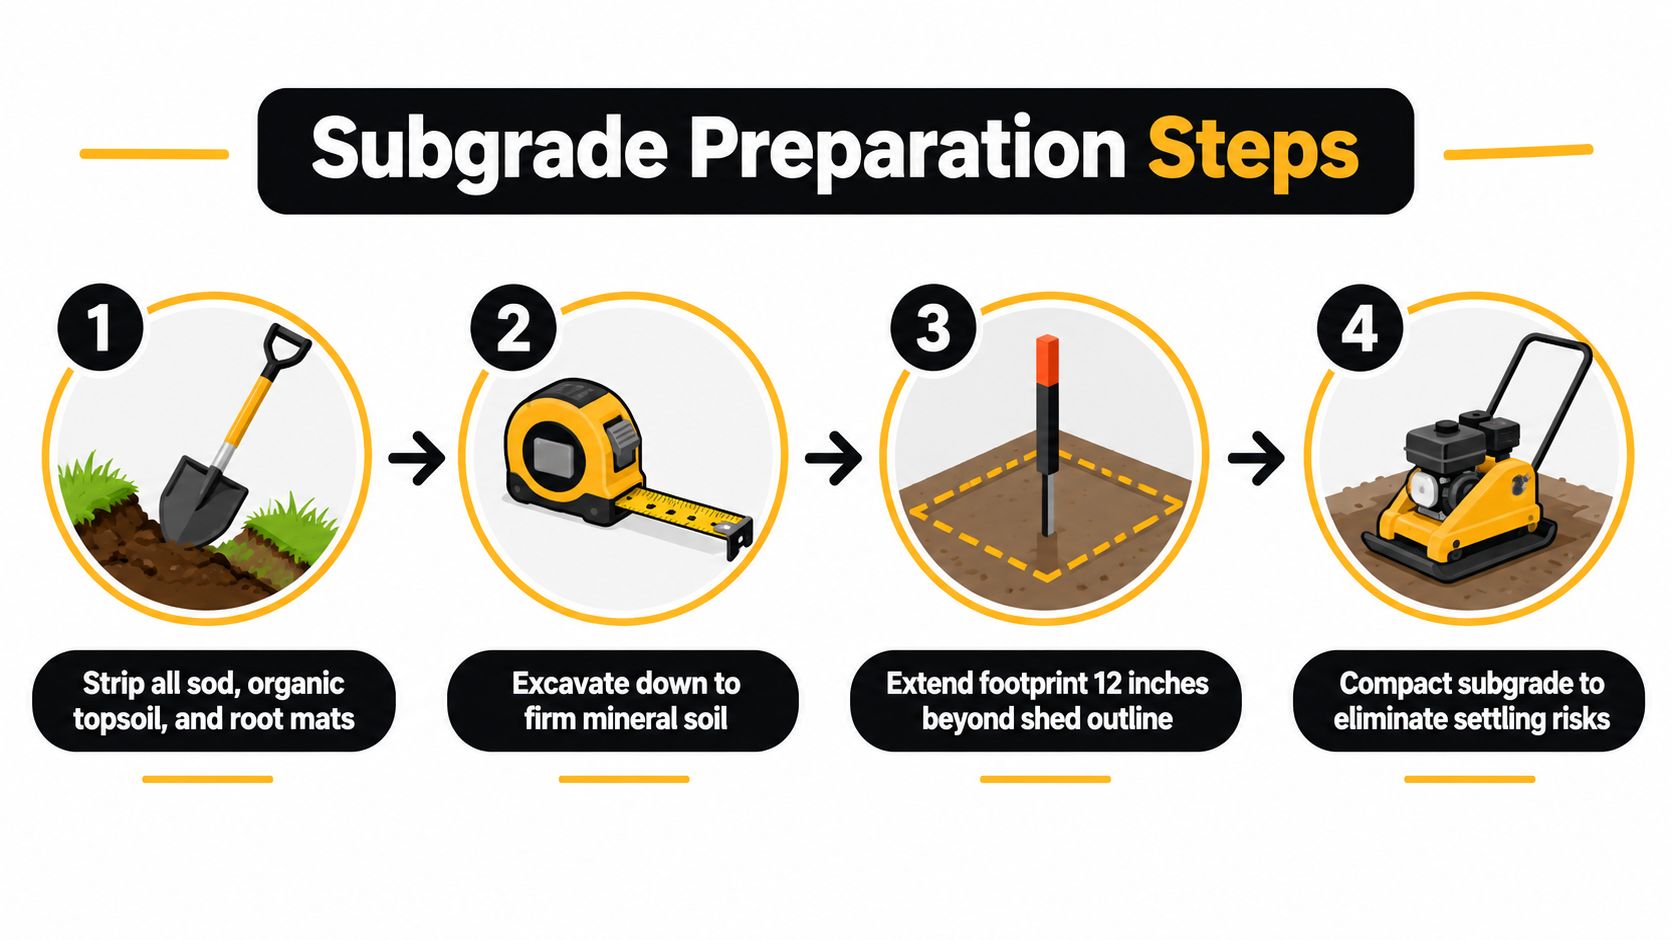
Once the location is approved and utilities are marked, excavation should follow a deliberate sequence. Strip the sod, organic topsoil, and root mat until the exposed surface consists of firm mineral soil. Organic material compresses and decomposes, so leaving it beneath the pad creates a weak layer that gravel can't reliably fix.
Lay out the shed footprint plus at least 12 inches on every side. That extra working area supports the gravel edge and helps prevent the pad from crumbling outward. On a slope, cut into the high side rather than building an unstable mound, and keep the planned fall away from the structure.
Find and correct weak spots
Walk the exposed subgrade after rough grading. Soft pockets, pumping soil, and areas that deform under equipment need attention before aggregate is placed. Remove unsuitable material and replace it with compactable fill in controlled layers. Covering a wet pocket with stone may hide the problem temporarily, but it won't remove the source of settlement.
A federal geotechnical guide emphasizes assessing foundation conditions early so the foundation type matches the soil. That same principle applies to a backyard shed, garage foundation, or house foundation. The Federal Highway Administration geotechnical foundation guide describes the broader engineering practice behind evaluating ground conditions before construction.
Compact the ground beneath the gravel
Compact the native subgrade with a plate compactor, working in perpendicular directions so the machine reaches the soil consistently. Pay particular attention to the edges and any areas disturbed during utility marking or excavation.
On clay or wet ground, non-woven geotextile can separate fine soil from the aggregate. The fabric keeps subgrade fines from migrating upward into the stone, which helps preserve drainage and base strength. A North Carolina erosion-control manual uses the same clear sequence for gravel construction entrances: clear vegetation and roots, grade the site, add aggregate, and use geotextile where seepage or a high water table makes separation necessary.
For broader site planning, Prestonwood Commercial landscape expertise offers useful context on how grading, drainage, access, and finished surface conditions fit together. A shed pad may be smaller than a commercial site, but the ground still needs to be prepared as a system.
Gravel Pad vs Concrete Slab for Your Shed
The right foundation depends on how the shed will be used, how the site handles water, and whether the building may need to move later. Gravel suits storage sheds, garden buildings, and movable structures because it drains freely, tolerates minor movement, and can be reshaped or removed. Concrete provides a permanent, flat floor for a workshop, equipment room, or fixed outbuilding, but it requires more precise forming, finishing, and site drainage.
| Factor | Gravel Pad | Concrete Slab |
|---|---|---|
| Best fit | Storage sheds, garden buildings, movable structures | Workshops, heavy equipment, permanent structures |
| Drainage | Open aggregate drains freely when properly graded | Requires careful surrounding grade and slab detailing |
| Frost behavior | Can rise and settle as a base while tolerating movement | Moves as a rigid unit and may need frost-depth design |
| Installation | Excavation, fabric where needed, stone lifts, and compaction | Stone base, forms, reinforcement, placement, and finishing |
| Future changes | Easier to reshape, enlarge, or remove | More difficult to modify once poured |
| Floor finish | The shed floor remains part of the structure | Provides a hard, flat concrete floor |
A compacted gravel pad commonly finishes at 4 to 6 inches thick. Use 4 inches for a light structure on firm, well-drained soil. 6 inches gives more working depth for a larger shed, softer ground, or modest grade correction. The gravel shed pad installation guide covers practical material and depth considerations.
Concrete preparation typically uses a 4-inch crushed-stone base beneath a 4- to 6-inch slab, with the surrounding grade falling about 1% to 2% away from the foundation. That creates a usable floor, but the forms must be square, the reinforcement must be positioned correctly, and the finish must shed water. In freeze-prone areas, concrete foundations may need to extend 30 to 48 inches below the frost line, subject to local requirements and the design.
Choose gravel when drainage, flexibility, access, and value carry more weight than a finished floor. Choose concrete when the shed will hold heavy equipment, serve as a workshop, or remain in one place for years. Check soil conditions, intended use, local code, and future access before committing to either system.
Building the Gravel Base That Actually Holds Up
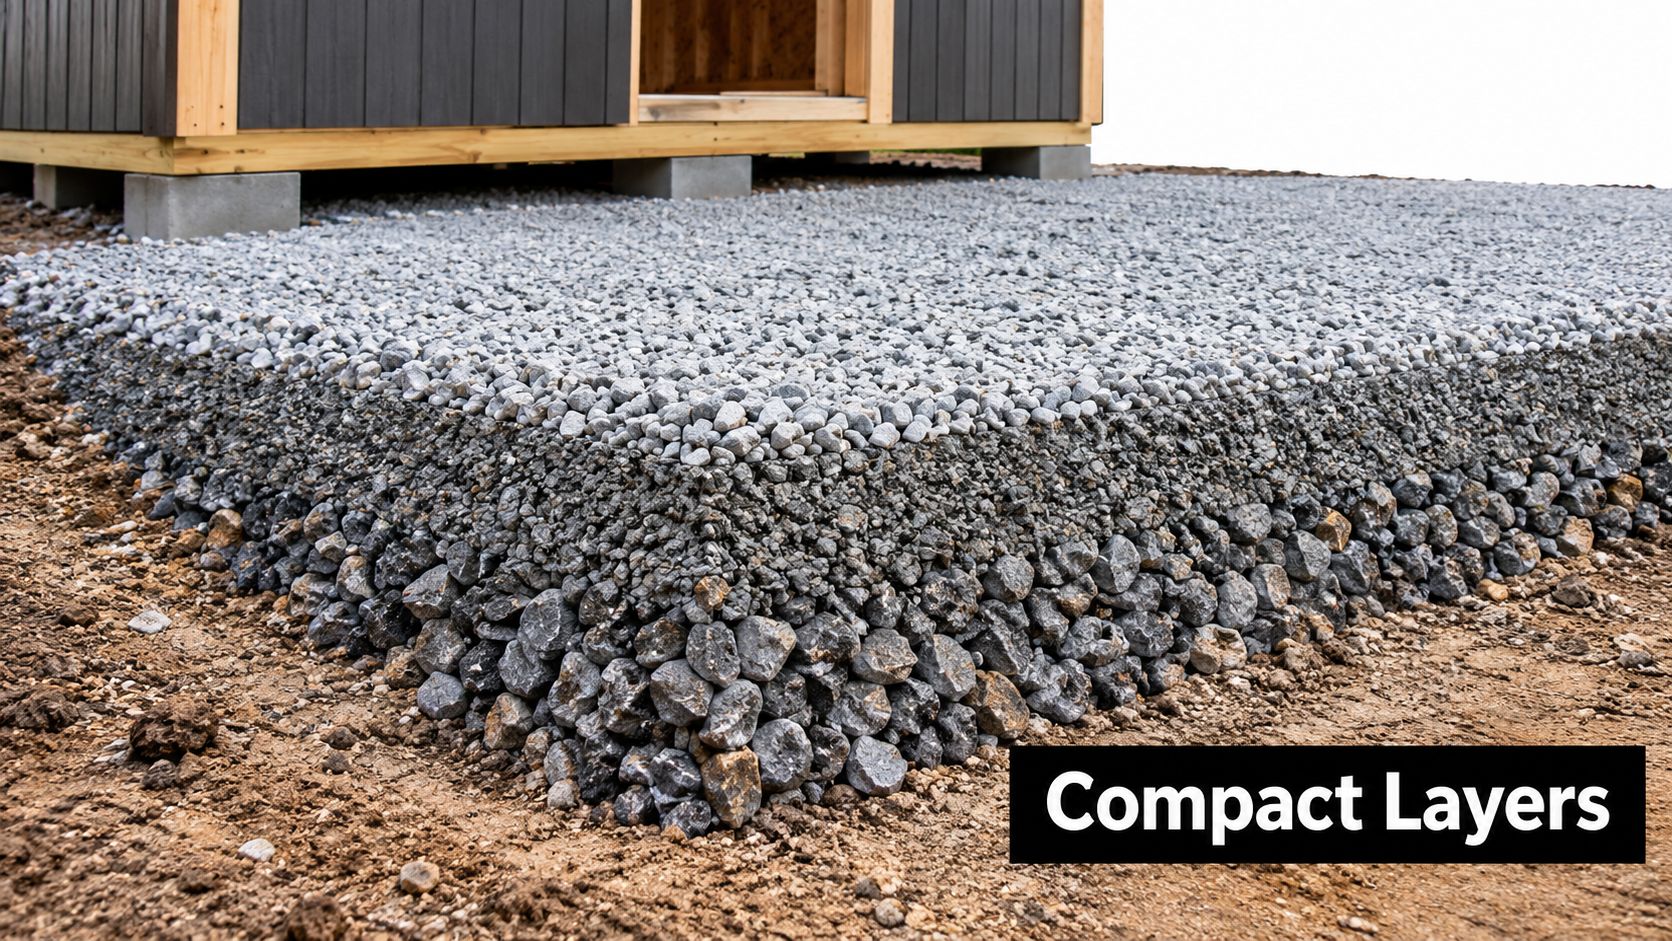
A gravel shed foundation fails most often when the material is dumped in one deep pile and left loose. The base needs angular stone, controlled thickness, and repeated compaction. Rounded pea gravel shifts under load, so use crushed aggregate with faces that lock together.
Build in compacted lifts
Place clean angular gravel across the framed area in lifts of roughly 2 inches, or use broader 3- to 4-inch lifts only when the equipment and material are suitable for that depth. Compact each lift before adding more. A plate compactor should make overlapping passes until the surface feels dense and no longer rolls or ripples underfoot.
The finished compacted pad should generally measure 4 to 6 inches, with the thicker option suited to larger sheds, softer soil, or grade correction. Lightly wetting the stone can help particles settle and lock, but avoid saturating the subgrade or creating a muddy base.
Set edge forms with 2×6 or 2×8 lumber, using stakes at roughly 3-foot spacing to hold the perimeter in position. Forms aren't decorative. They keep the aggregate contained, protect the finished edge, and make it easier to screed the final surface accurately.
Check the finished surface
After the last lift, screed the surface and compact it again. Run a long straightedge across the pad to find humps and hollows, then check the fall away from the shed with a level, laser, or string line. The finished surface should feel firm underfoot and present a consistent platform to the shed floor system.
The video below shows the general sequence of placing and compacting a gravel shed base.
Don't use shed foundation blocks to compensate for a soft or poorly graded pad. Blocks can support a structure only when the underlying ground and base are already stable. Likewise, a shed foundation kit may simplify connections, but it doesn't replace excavation, drainage, or compaction.
Ready to Put a Pad Under Your Shed
The safest time to bring in a site-prep crew is before ordering the shed. Walk the proposed location together, confirm the setbacks and utility clearances, and size the pad for the building footprint, door swing, ramp, and delivery access. That visit helps separate a real excavation and foundation scope from a guess based on a few measurements.
Ask exactly what the quote includes. A useful scope should identify the excavation limits, topsoil removal, gravel type, finished depth, edge treatment, compaction equipment, drainage grade, and whether geotextile is included for soft or wet soil. If you need a concrete foundation for a garage, cement foundations for garage use, garage footings and foundations, or a concrete foundation for a garage workshop, the proposal should also explain forming, reinforcement, slab thickness, and frost-related requirements.
Good project communication is part of the foundation. A written scope, clear schedule, and one point of contact prevent small assumptions from becoming change orders.
Schedule excavation during a dry stretch when possible. Coordinate delivery after the gravel pad has been fully compacted, or after concrete has reached the required condition for construction. The same planning matters for a gazebo foundation, barn shed, shipping container pad, patio, or driveway base.
Firm Foundations offers gravel shed foundations, concrete shed foundations, excavation, grading, and compacted stone base installation across Pennsylvania, Maryland, Delaware, and New Jersey. If you're comparing shed foundations near me, garage foundation contractors near me, or driveway companies near me, request a site-specific quote that accounts for the actual ground conditions and finished drainage.
Firm Foundations can prepare a properly graded gravel shed pad or concrete foundation, from excavation and topsoil removal through compaction, forming, pouring, and finishing. Visit Firm Foundations to request a transparent quote and arrange a site review before your shed, garage, gazebo, or outbuilding is delivered.