
Hot Tub Pad Installation: A Homeowner’s Guide
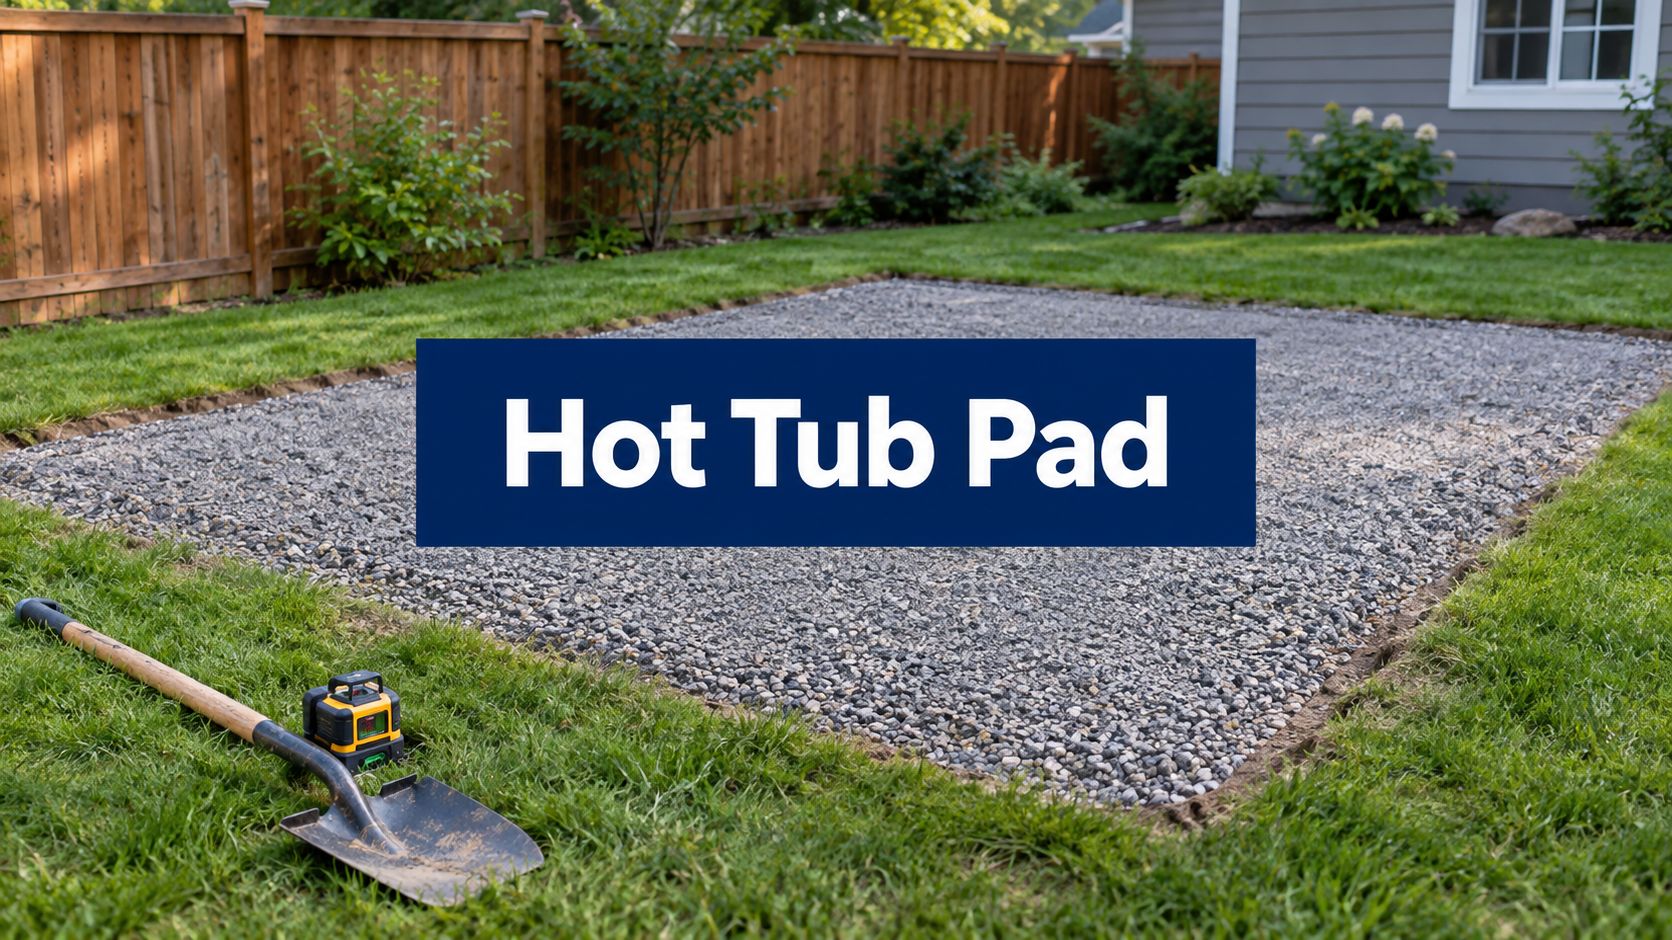
You've chosen the hot tub, cleared a corner of the yard, and started thinking about delivery. Then the manufacturer's filled-weight figure changes the project. A portable spa can place a structural demand of 6,000 to 20,000 pounds before occupants are counted, while other installation guidance places many fully loaded tubs between 5,000 and 8,000 pounds, or roughly 100 to 150 pounds per square foot depending on the footprint (Bullfrog Spas explains the foundation load). That's far more than most homeowners expect from an outdoor fixture.
Good hot tub pad installation isn't about pouring concrete over convenient ground. It's a small foundation project that has to spread the load, stay level, drain properly, and resist soil movement. Whether you're comparing a gravel base with a reinforced concrete pad or looking for local concrete contractors, the decisions below will help you avoid the failures that create expensive service calls.
Why the Pad Matters More Than the Tub
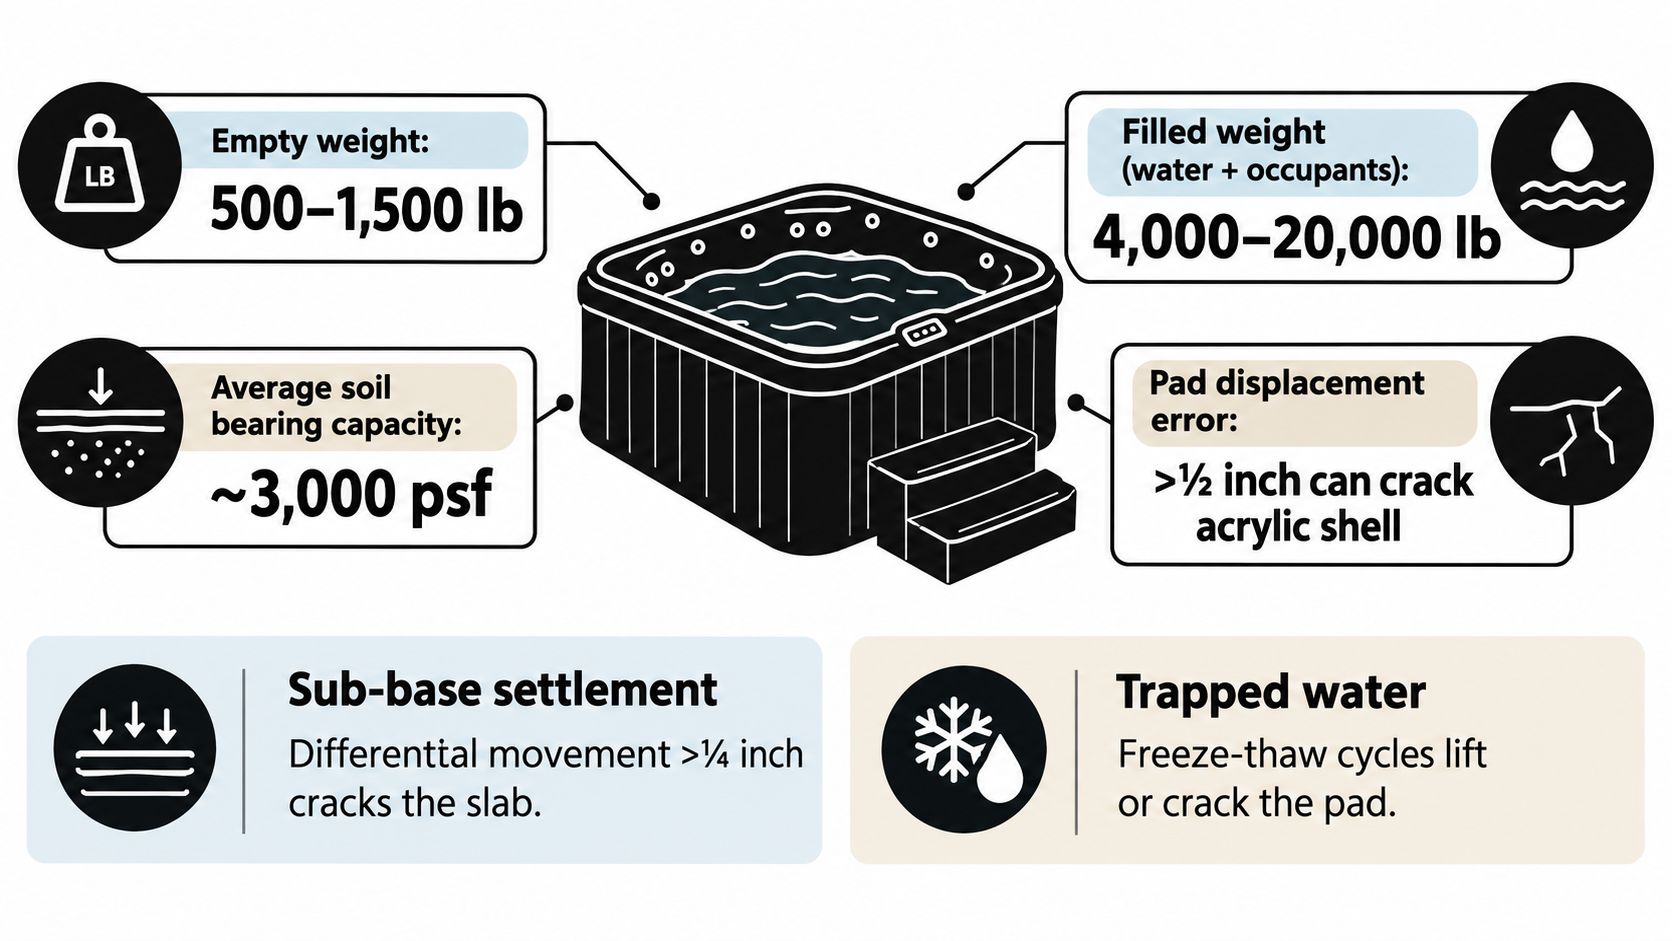
A homeowner may discover the weight problem while reviewing delivery details. The empty shell looks manageable, but water and occupants transform the spa into a concentrated structural load. Industry guidance gives a wide range, from 6,000 to 20,000 pounds for a portable spa before occupants to a more common fully loaded range of 5,000 to 8,000 pounds, depending on the unit and footprint (Bullfrog Spas foundation guidance).
That load doesn't usually destroy the tub shell first. In the field, the more common trouble starts underneath. A poorly compacted sub-base settles unevenly, leaving part of the slab or gravel support lower than the rest. Water then collects around the pad or beneath the base, weakening soil and increasing movement during wet weather and freeze-thaw cycles.
The two failures contractors watch for
Sub-base settlement creates a tilted or unsupported spa. The resulting movement can stress the cabinet, crack concrete, misalign access doors, and leave gaps beneath portions of the tub. One installation reference warns that poor sub-base preparation can produce uneven settling and cracking within 1 to 3 years, while a properly prepared base can last 30 or more years (Nice Guy Concrete explains sub-base performance).
Trapped water creates a different problem. Saturated soil loses stability, runoff can wash material away, and freezing conditions can lift or crack the pad. A thick slab placed over weak, wet ground still has a weak foundation beneath it.
Practical rule: Concrete thickness matters, but the pad's long-term performance starts with the soil, drainage, and compaction underneath.
A shifting pad can also complicate warranty conversations. If the spa manufacturer requires a stable, level foundation and the base moves, responsibility may fall on the property owner or installer rather than the spa dealer. Excavation, sub-base selection, reinforcement, and drainage are responses to the filled-weight calculation, not optional upgrades.
Choosing the Right Spot in Your Yard
The most convenient location isn't always the safest one. A low corner beside an existing patio may seem ideal, but it can become a collection point for stormwater. Start by walking the proposed route and location before ordering materials or scheduling a crew.
Check access before you mark the pad
Measure the full delivery path, including gates, fences, side yards, steps, and changes in grade. A tight approach can force temporary fence removal, specialized handling, or a different placement plan. The spa dealer should confirm the required route, and your concrete or excavation contractor should know whether equipment and materials can reach the site.
Then review the site itself:
- Confirm the footprint: Use the manufacturer's actual dimensions, not a general estimate, and plan a supported margin beyond the shell.
- Review setbacks: Check local requirements for structures, property lines, privacy screens, and access around the equipment cabinet.
- Trace runoff: Watch where water travels after rain. Don't place the pad where water naturally pools or where a downspout discharges.
- Plan electrical reach: The location must work for the dedicated circuit, disconnect, conduit, and service access.
- Consider comfort: Sun can warm the surrounding area, while shade can make the water feel more inviting in summer. Trees also add leaves, roots, and future maintenance.
- Protect service access: Leave room for technicians to reach pumps, controls, and removable panels.
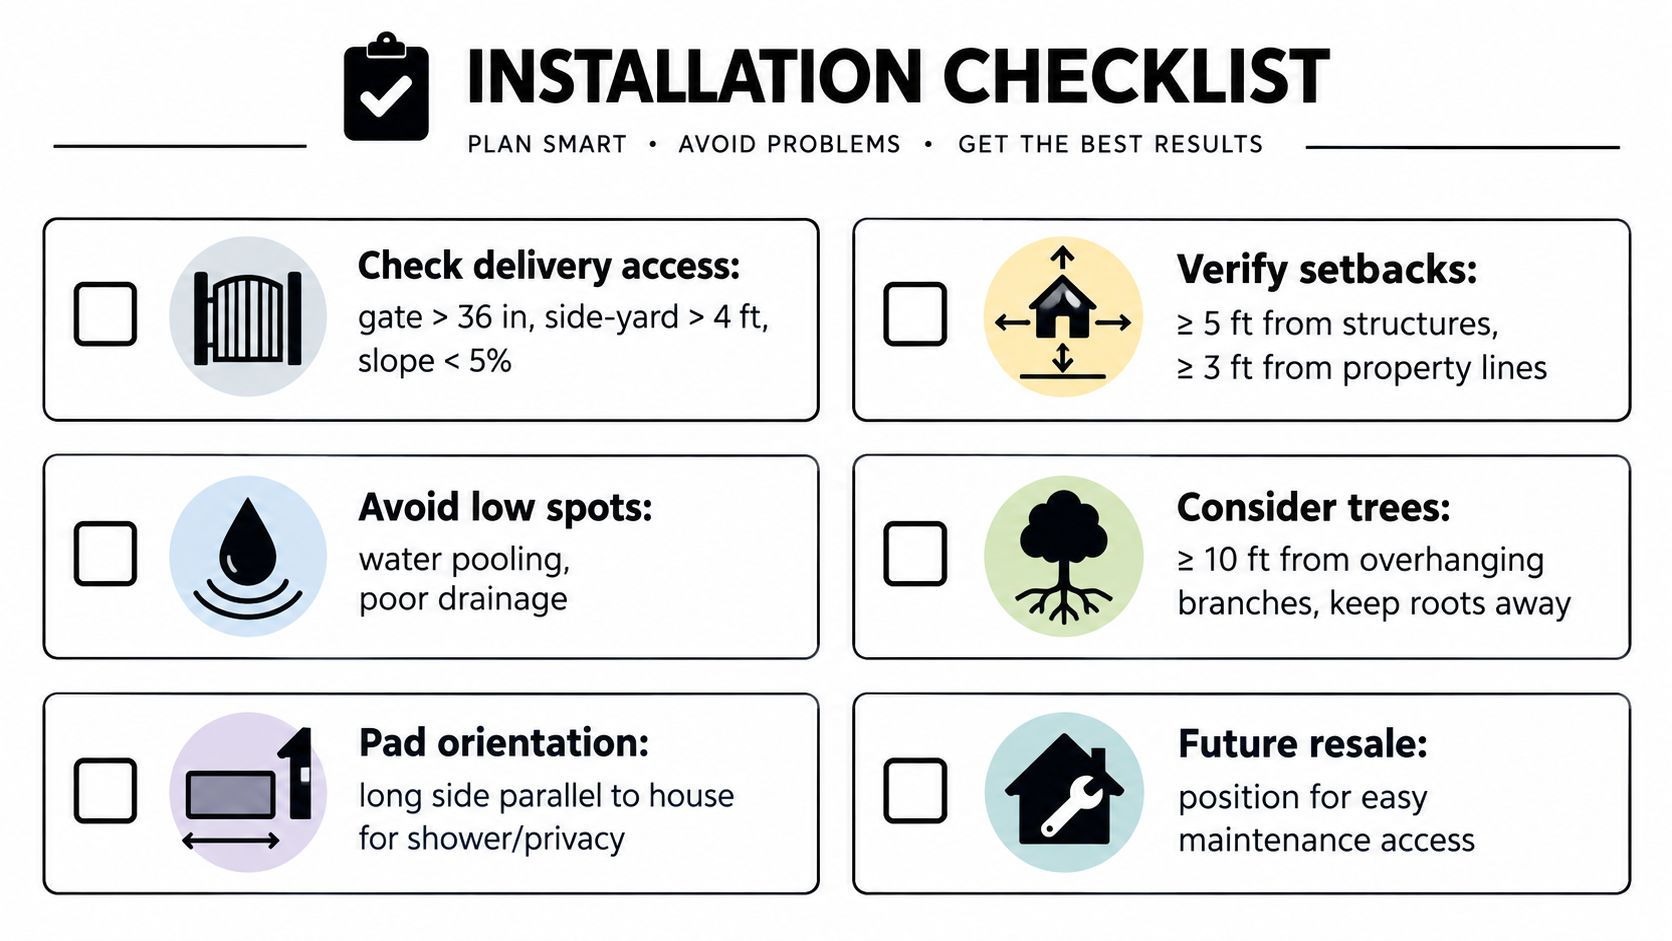
A pad should feel integrated with the house, but it shouldn't depend on the patio's existing slope or drainage. Orienting the spa toward the home can improve privacy and access, while placing it too close to walls can make future repairs difficult. The best location is the one an experienced contractor would choose after considering delivery, drainage, electrical work, maintenance, and local rules.
Excavating and Prepping the Sub-Base
Most failed DIY pads begin with an excavation that looks finished before the soil is ready. Grass, roots, loose topsoil, and buried organic matter compress under load. A hot tub pad needs firm mineral soil or properly engineered fill beneath the base system.
Begin by laying out the footprint with batter boards and string lines. Make the lines square, then add 6 to 12 inches beyond the tub on every side, a dimension supported by installation guidance from Pool Boy's hot tub pad preparation guide. That extra area supports the shell edges and gives workers room around the spa.
Excavate to a controlled depth
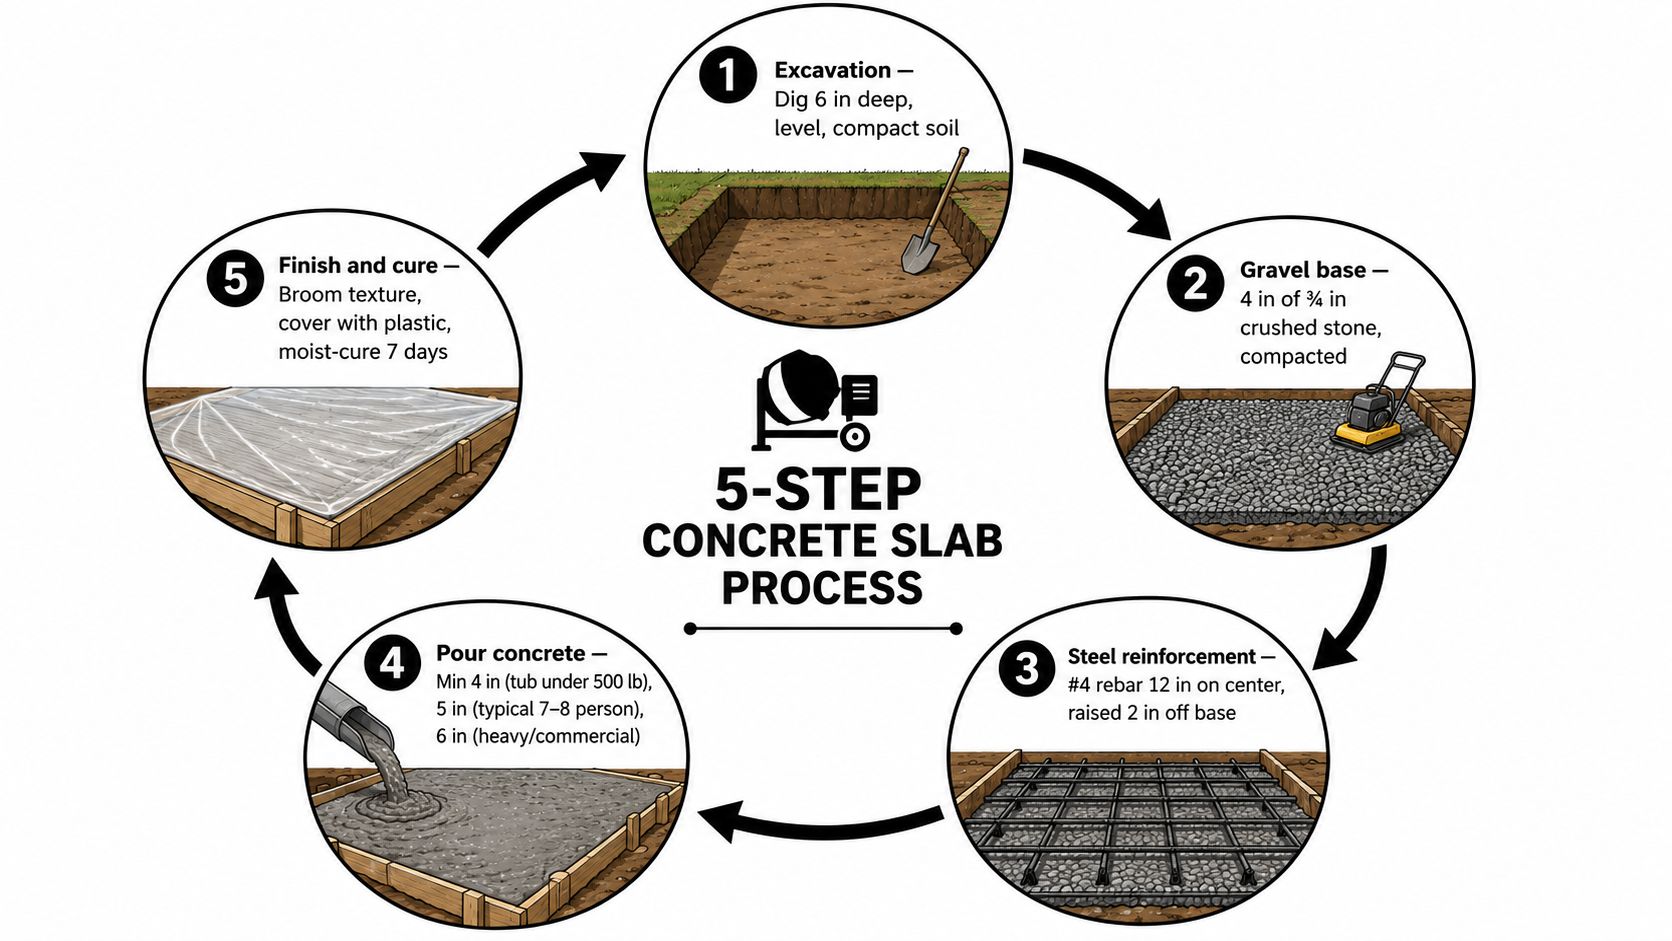
For a gravel system, excavation commonly reaches about 6 to 8 inches below finished grade. A concrete system may require roughly 4 to 6 inches below grade for the slab and prepared base, with the final depth adjusted for site conditions and drainage. Remove topsoil completely, avoid burying sod in the excavation, and keep the bottom as consistent as possible.
Call utility locating services before digging. Even a small pad can cross buried electrical, gas, water, or communication lines, and excavation near those services isn't a safe guessing exercise.
Compact in lifts, not all at once
Place crushed gravel or approved fill in 2 to 3 inch lifts, compacting each layer with a plate compactor before adding the next. Thin lifts allow the machine's vibration to reach the full layer. Dumping a deep pile and compacting only the surface leaves loose material below, which later settles under the spa.
A simple footprint test can expose soft areas. Walk across the prepared soil and watch for pumping, rutting, or visible deflection. If your boots sink or the surface moves under pressure, the base isn't ready. A contractor may remove additional weak soil, improve drainage, or use geotextile stabilization before placing aggregate. Homeowners comparing methods can also review this hot tub base preparation guide before deciding whether the project is suitable for DIY work.
Gravel Pad vs Concrete Pad Compared
The decision shouldn't start with appearance. Start with soil, drainage, spa load, slope, and how permanent you want the finished area to be.
Compacted crushed stone can work well where the ground is stable and the installation team builds the base in controlled layers. Angular aggregate locks together better than loose rounded stone, and the open spaces help water move away from the spa. Gravel is also easier to adjust or remove if the tub location changes.
Concrete offers a more finished surface and a strong, continuous support plane. Industry and manufacturer guidance commonly identifies 4 inches as a minimum concrete thickness, with 5 to 6 inches preferred for larger tubs, heavier loads, weak soil, or challenging frost conditions (Jacuzzi's hot tub pad guidance). Reinforcement and sub-base preparation still matter. A thick slab over settling soil can crack or tilt.
Decision comparison
| Factor | Compacted Gravel Pad | Reinforced Concrete Pad |
|---|---|---|
| Load suitability | Appropriate for many residential tubs when soil and compaction are sound | Suitable for residential spa loads when designed and reinforced correctly |
| Drainage behavior | Naturally allows water to move through the aggregate | Requires grading and surrounding drainage planning |
| Base material | Common guidance recommends about 4 to 6 inches of compacted crushed stone (Custom Concrete and Stone explains gravel bases) | Commonly 4 inches minimum, with 5 to 6 inches often used for larger tubs (Jacuzzi guidance) |
| Installed cost | Often selected for a lower-cost foundation approach | Usually involves forms, reinforcement, concrete placement, and finishing |
| Longevity | Can require periodic leveling on soft or shifting sites | Provides a permanent patio-like surface, but cracks if drainage and soil preparation fail |
| DIY difficulty | Manageable only with proper excavation and mechanical compaction | More demanding because forming, reinforcement, finishing, and curing must be coordinated |
| Repairability | Aggregate can be topped up or re-leveled | Repairs are more involved once the slab has cracked or settled |
A gravel pad makes sense for a budget-conscious project on stable soil, especially when drainage is the primary concern. A reinforced concrete pad is usually the better fit for a larger spa, a sloped site, or a homeowner who wants a clean finished patio surface. Neither option replaces proper excavation.
Pouring and Finishing a Concrete Pad
Give the concrete crew the spa specifications before they build forms. The manufacturer's empty weight, filled weight, footprint, equipment access, and support requirements should determine the pad dimensions and structural details.
For residential planning, a 4-inch slab is commonly treated as the minimum, while 5 to 6 inches is often preferred for larger or heavier tubs. Guidance from Loco Concrete's pad requirements connects the thicker recommendation to larger tubs and harsher soil or frost conditions. The same source emphasizes a compacted gravel base beneath the slab.
Specify reinforcement and materials
A crew may use rebar or welded wire mesh, depending on the design. Common specifications include 1/2-inch rebar on a 12-inch grid, tied at intersections, or 6 by 6 W2.9 welded wire mesh supported at mid-slab depth. Reinforcement must remain inside the concrete, not lie flat on the soil where it contributes little structural value.
For an outdoor slab, request a 3,000 PSI minimum mix with 3/4-inch aggregate, along with a properly compacted crushed-stone base. A 6-mil vapor barrier over the stone can help limit moisture movement into the slab where the site design calls for it.
Forms made from 2×4 lumber establish the perimeter and elevation. Workers then screed the concrete to a consistent plane, bull-float the surface, edge the perimeter, and apply a broom finish for better slip resistance around wet feet. Control joints should be discussed before the pour so cracking is directed to planned locations where appropriate.
Respect the cure
Protect the surface during curing. Guidance commonly calls for keeping concrete moist or using a curing compound for at least 7 days, with a full 28 days before placing the tub, depending on the concrete design and project conditions. Confirm the actual placement schedule with the contractor and spa manufacturer.
Concrete contractors who want a stronger pipeline of qualified local work can also explore this resource on how to attract more concrete jobs. For homeowners, the practical takeaway is simpler. Get the slab details, reinforcement, drainage, and curing plan in writing before signing the work order.
Drainage, Leveling, and Frost Protection
A level slab isn't automatically a successful pad. Rain, splash-out, snowmelt, and groundwater still need a route away from the foundation, or the surrounding soil can soften and move.
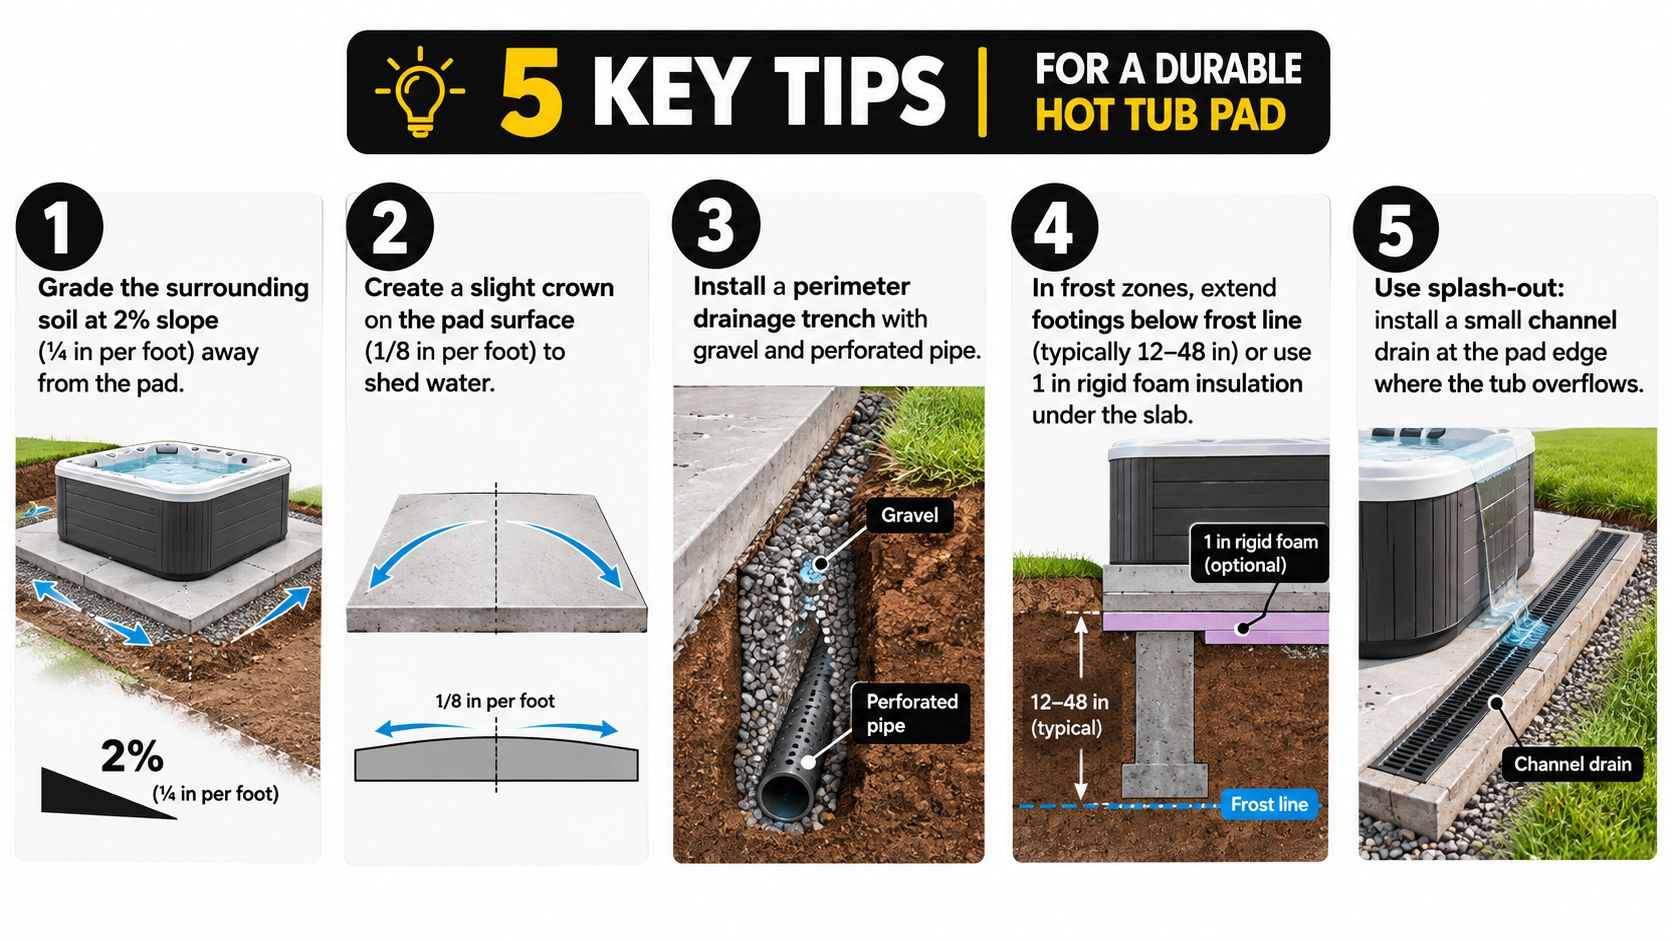
Grade the soil around the pad so water drains away from the dwelling and spa. Guidance for positive drainage often uses a 2% slope, or 1/4 inch per foot, for at least 10 feet around the pad (Building DuPage discusses drainage and frost considerations). If the site collects runoff, a French drain or gravel swale on the downhill side may be more effective than making the slab thicker.
Keep water moving
A perimeter system can include a 4-inch perforated drain tile at the slab edge, connected to a daylight outlet where the site allows it. Don't terminate drainage into an improvised dry well without confirming that the soil and local requirements support that approach. The outlet must move water away from the pad without sending it toward the house, a neighboring property, or an unstable slope.
The pad itself should remain properly supported and level for the spa. On an 8 by 8 foot pad, a 1-degree slope can place the waterline nearly 1 3/4 inches out of level, according to the installation guidance supplied for this project. Use a transit or laser level during concrete forming and placement. A string line and 4-foot level may help with a gravel pad, but they're less reliable for establishing a precise concrete plane.
A flat-looking surface can still fail if water has nowhere to go.
Account for frost movement
Frost conditions vary sharply by location, so local code controls the design. Penn State's frost-protected shallow foundation guidance gives 12 inches as a minimum footing depth in its Pennsylvania guidance example (Penn State frost foundation guidance). Another local code example cited in the supplied research sets footing depth at 42 inches in a cold-weather county (Building DuPage frost guidance).
On frost-susceptible sites, a contractor may recommend frost-depth protection or a floating system supported by a substantial compacted stone base. The right choice depends on soil, drainage, climate, and code. A pad that ignores frost can tilt, crack, or heave after repeated freeze-thaw cycles.
Permits, Electrical, and Next Steps
Treat permits and electrical work as part of the foundation plan. Before excavation, contact the local building department and ask whether the pad, electrical trench, dedicated circuit, fencing, or equipment installation requires approval in your jurisdiction. Requirements vary by municipality, and the safest answer comes from the office that will inspect the work.
Electrical service deserves a licensed electrician. The spa manufacturer's manual controls the circuit size, while common residential installations may involve a 50- or 60-amp GFCI-protected circuit, installed in conduit from the main panel. The disconnect should be visible from the spa and positioned according to the applicable electrical code. Supplied guidance identifies a placement range of 5 to 10 feet from the spa for code compliance, but your electrician must confirm the exact local requirement.
Schedule inspection before delivery
Inspection is easier when the work remains visible. Arrange the inspection before the tub arrives so the inspector can see the pad, conduit, grounding or bonding provisions, and disconnect arrangement. Covering the trench or placing the spa first can create delays if an inspector needs access to concealed work.
Electrical planning for a spa follows the same safety mindset used for other high-load residential projects. Homeowners researching related work can review this practical overview of EV charger installation to understand why dedicated circuits and licensed electrical planning matter.
Prepare a quote-ready checklist
Before requesting bids from concrete contractors or excavation near me providers, gather:
- Manufacturer details: Confirm the exact footprint, filled weight, access panels, and support requirements.
- Site information: Photograph the proposed location, delivery route, gates, slopes, downspouts, and nearby structures.
- Drainage plan: Identify where runoff currently travels and where a contractor could direct it safely.
- Access plan: Clear soft ground and confirm how gravel, forms, concrete, and equipment will reach the work area.
- Electrical coordination: Arrange the electrician and inspection schedule before delivery.
- Foundation choice: Decide whether a gravel shed foundation style, reinforced slab, pavers, or another engineered approach suits the site. A homeowner comparing modular options can review this hot tub foundation kit as part of that discussion.
Firm Foundations serves Pennsylvania, Maryland, Delaware, and New Jersey with site layout, excavation, compaction, drainage planning, gravel pads, and concrete foundations for hot tubs and other outdoor structures. The company also handles foundation builds for sheds, garages, gazebos, barns, houses, driveways, and patios, so the same site visit can address related work when appropriate.
After installation, inspect the pad and surrounding drainage annually. Look for new low spots, standing water, gravel migration, or hairline concrete cracks. In freezing areas, small cracks can spread through repeated freeze-thaw exposure, so early repair is easier than waiting for the spa to shift.
Firm Foundations can evaluate your yard, confirm the hot tub footprint, prepare the sub-base, and build a properly drained gravel or reinforced concrete pad for your site. Visit Firm Foundations to request a transparent quote and schedule a foundation or excavation consultation.