
Concrete Joint Spacing Rules for Durable Slabs
You've invested in a new shed pad, garage floor, or patio, and then a crack appears before the project even feels finished. Some cracking is a natural part of concrete curing, but random cracking often points to a layout that didn't give shrinkage a controlled path.
Concrete joint spacing gives the slab planned weak planes so cracking is directed into clean, intentional lines. Firm Foundations designs slab layouts for homeowners and builders across Pennsylvania, Maryland, Delaware, and New Jersey, accounting for the structure, slab thickness, site conditions, drainage, and visible features. Whether you're comparing shed foundations contractors near me, garage foundation contractors near me, or concrete contractors for a patio, joint planning deserves the same attention as excavation and finishing.
Why Concrete Joint Spacing Matters for Your Slab
A new slab can look perfect on pour day. The surface is smooth, the edges are sharp, and the shed or garage frame is ready to go. As the concrete cures, however, moisture leaves the mix and the slab shrinks. Internal restraint can then create cracking, especially where the layout leaves large panels, narrow sections, inside corners, or transitions around doors and posts.
That doesn't mean every crack signals a failed foundation. The practical question is where the crack forms and whether the contractor planned for it. A properly placed contraction joint creates a weakened line that encourages shrinkage cracking to follow the joint rather than crossing the middle of a panel.
Why random cracks cause concern
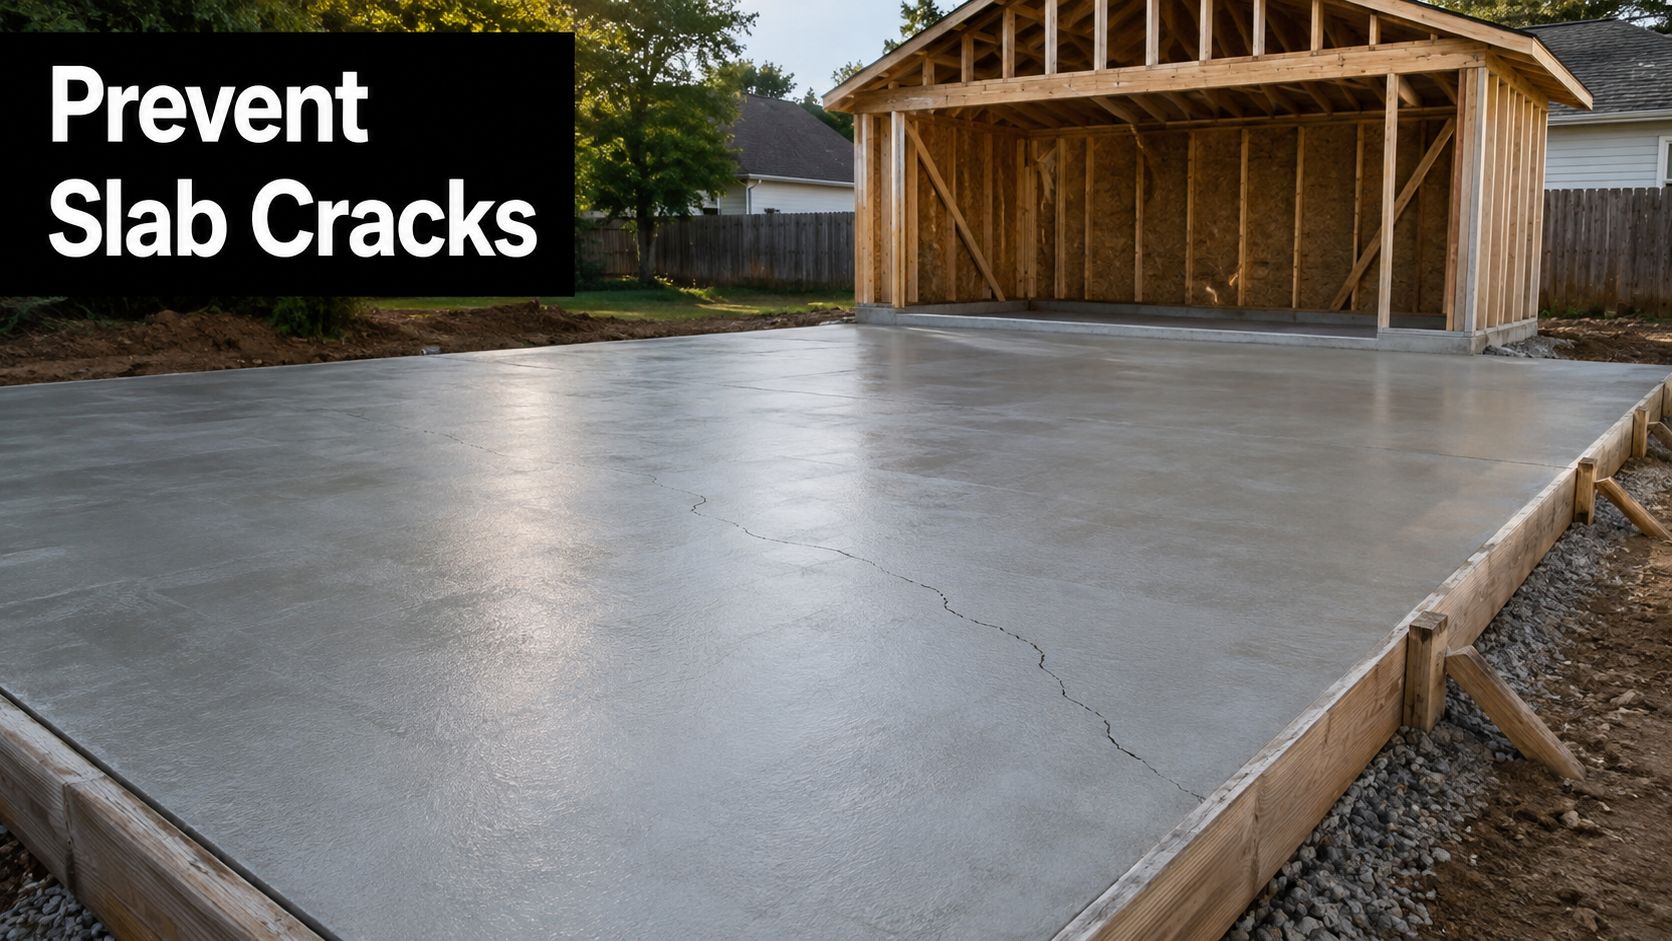
A random crack can be unsightly, but its location also matters. Cracking near a doorway, shed wall, garage threshold, post, or reentrant corner can become more noticeable and may allow water to reach areas that should stay protected. Poor drainage, movement in the supporting base, and unsuitable joint placement can compound the problem.
For homeowners planning a base for a storage shed, a gazebo foundation, or a concrete foundation for a garage, joint layout should be considered before the concrete arrives. Forms, reinforcement, openings, and finished dimensions all influence where joints can go.
Practical rule: A joint should look intentional on the finished slab and serve a purpose inside the concrete.
Firm Foundations approaches each pad or slab as a complete foundation system. That includes excavation, subgrade preparation, a suitable gravel shed foundation when appropriate, forming, reinforcement decisions, placement, finishing, and joint layout. Homeowners looking for guidance on preventing a concrete slab from cracking can use that planning perspective before choosing between shed foundation blocks, a gravel shed foundation, or a poured slab.
Good care after installation matters too. For broader maintenance considerations, homeowners may also find this concrete driveway care advice useful, particularly when a slab is exposed to changing weather and surface water.
Understanding Joint Types and the Spacing Formula
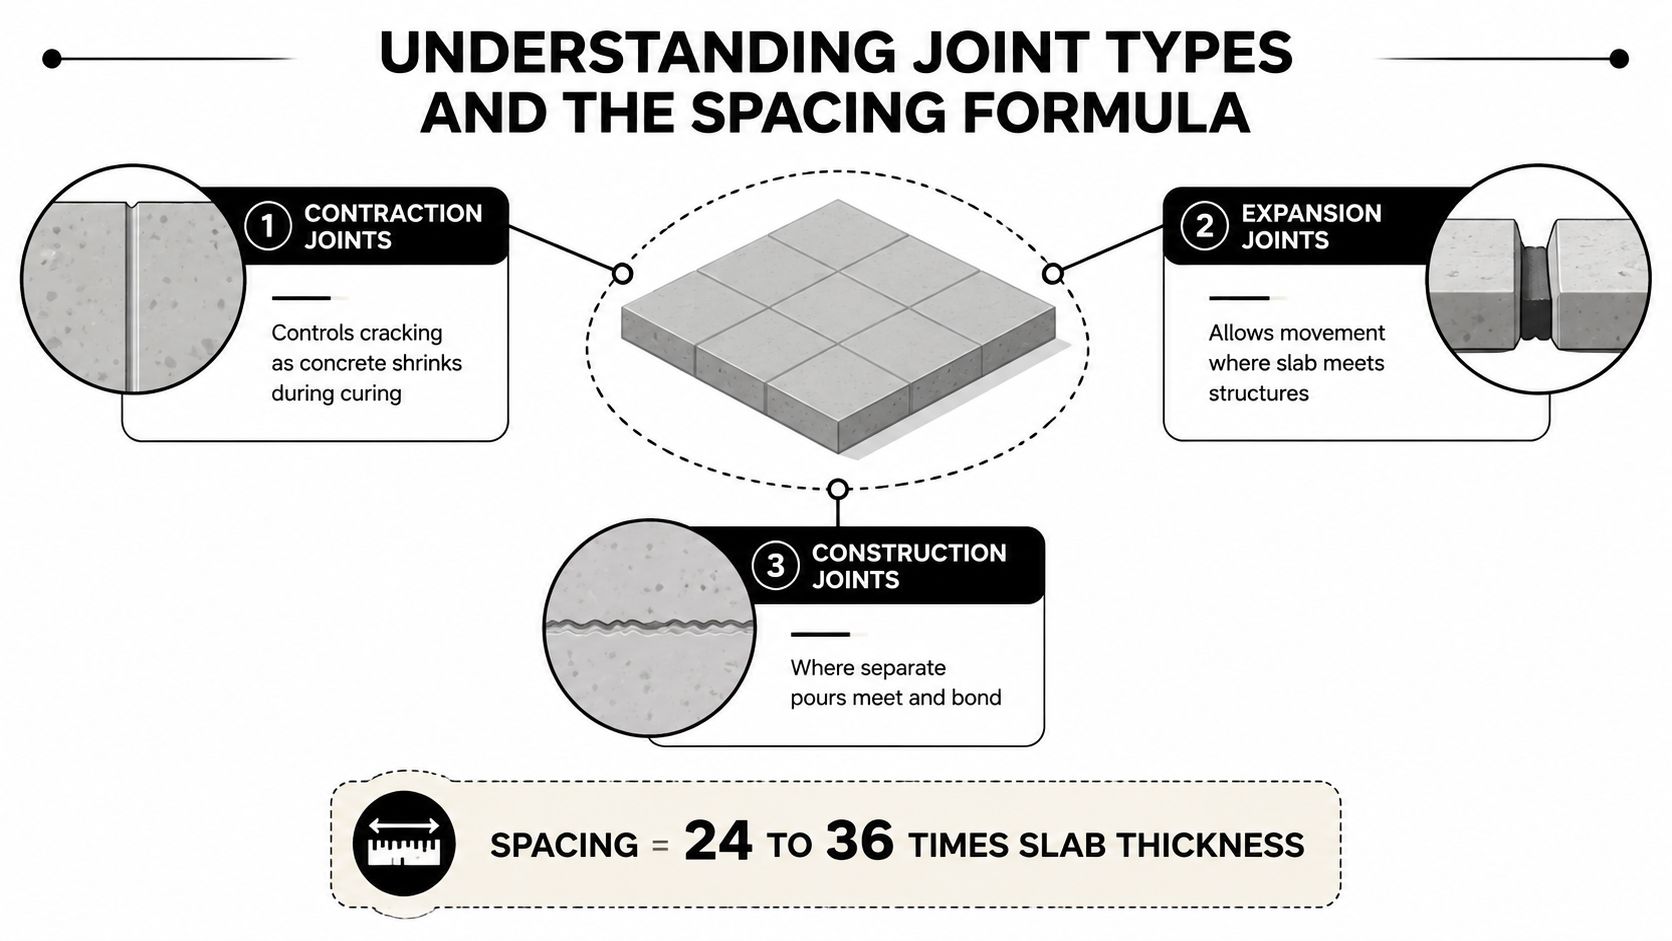
Concrete joints serve different purposes, and confusing them can lead to the wrong layout. The three types most homeowners should recognize are contraction joints, expansion joints, and construction joints.
Three joints with three jobs
Contraction joints, also called control joints, guide shrinkage cracking. Think of a chocolate bar scored across its surface. The score creates a preferred breaking line. A concrete joint works in a similar way, creating a planned plane of weakness so the slab can relieve shrinkage stress in a predictable location.
Expansion joints separate concrete from a fixed structure or another slab. They allow movement where a slab meets a wall, footing, column, curb, or other element that won't move in exactly the same way. They aren't decorative gaps, and they shouldn't be substituted casually for control joints.
Construction joints occur where separate concrete placements meet. A long project may require more than one pour, leaving a planned seam between placements. The contractor has to prepare and locate that seam so the pours bond and perform as intended.
The thickness-based calculation
A widely cited ACI-based rule places contraction joints at 24 to 36 times the slab thickness, as described in ACI joint construction guidance.pdf). For a 4-inch slab, that produces practical joint spacing of roughly 8 to 12 feet. The calculation matters because a thicker slab behaves differently from a thinner one as it cures and responds to restraint.
The National Ready Mixed Concrete Association also describes a 4-inch slab as typically using about 10 feet between joints, with spacing limited to a maximum of 15 feet for many slab applications, as outlined in its concrete contraction joint guidance.
That's more reliable than applying one fixed distance to every project. A 4-inch shed slab, a thicker garage floor, and a broad patio may need different layouts even when they occupy similar areas. The formula gives the contractor a starting point, while panel shape, openings, reinforcement, aggregate, drainage, and site conditions refine the final plan.
For homeowners comparing foundation options, Firm Foundations also provides information about concrete pad reinforcement. Reinforcement helps manage crack behavior, but it doesn't eliminate the need for properly planned joints.
A visual explanation can help first-time owners understand the difference between joints and reinforcement. This residential poured concrete resource from Atlanta Concrete Solutions offers another trade-oriented reference point for common slab work.
How Thickness and Panel Shape Affect Joint Layout
Thickness sets the spacing range, but panel geometry determines whether that spacing works cleanly across the actual slab. A contractor can follow a thickness formula and still create a poor layout if the resulting panels are long, narrow, or forced around corners.
A technical note associated with ACI 224.5-22 lists 8- to 10-foot spacing for a 3.5-inch slab, 10- to 13-foot spacing for a 4.5-inch slab, and 12- to 15-foot spacing for a 5.5-inch slab. The table appears in the ACI 224.5-22 technical note.
| Slab Thickness | Joint Spacing Range | Common Applications |
|---|---|---|
| 3.5 inches | 8 to 10 feet | Light slabs and smaller exterior pads |
| 4.5 inches | 10 to 13 feet | Sheds, patios, and similar residential slabs |
| 5.5 inches | 12 to 15 feet | Heavier residential and light-use slabs |
Square panels distribute restraint
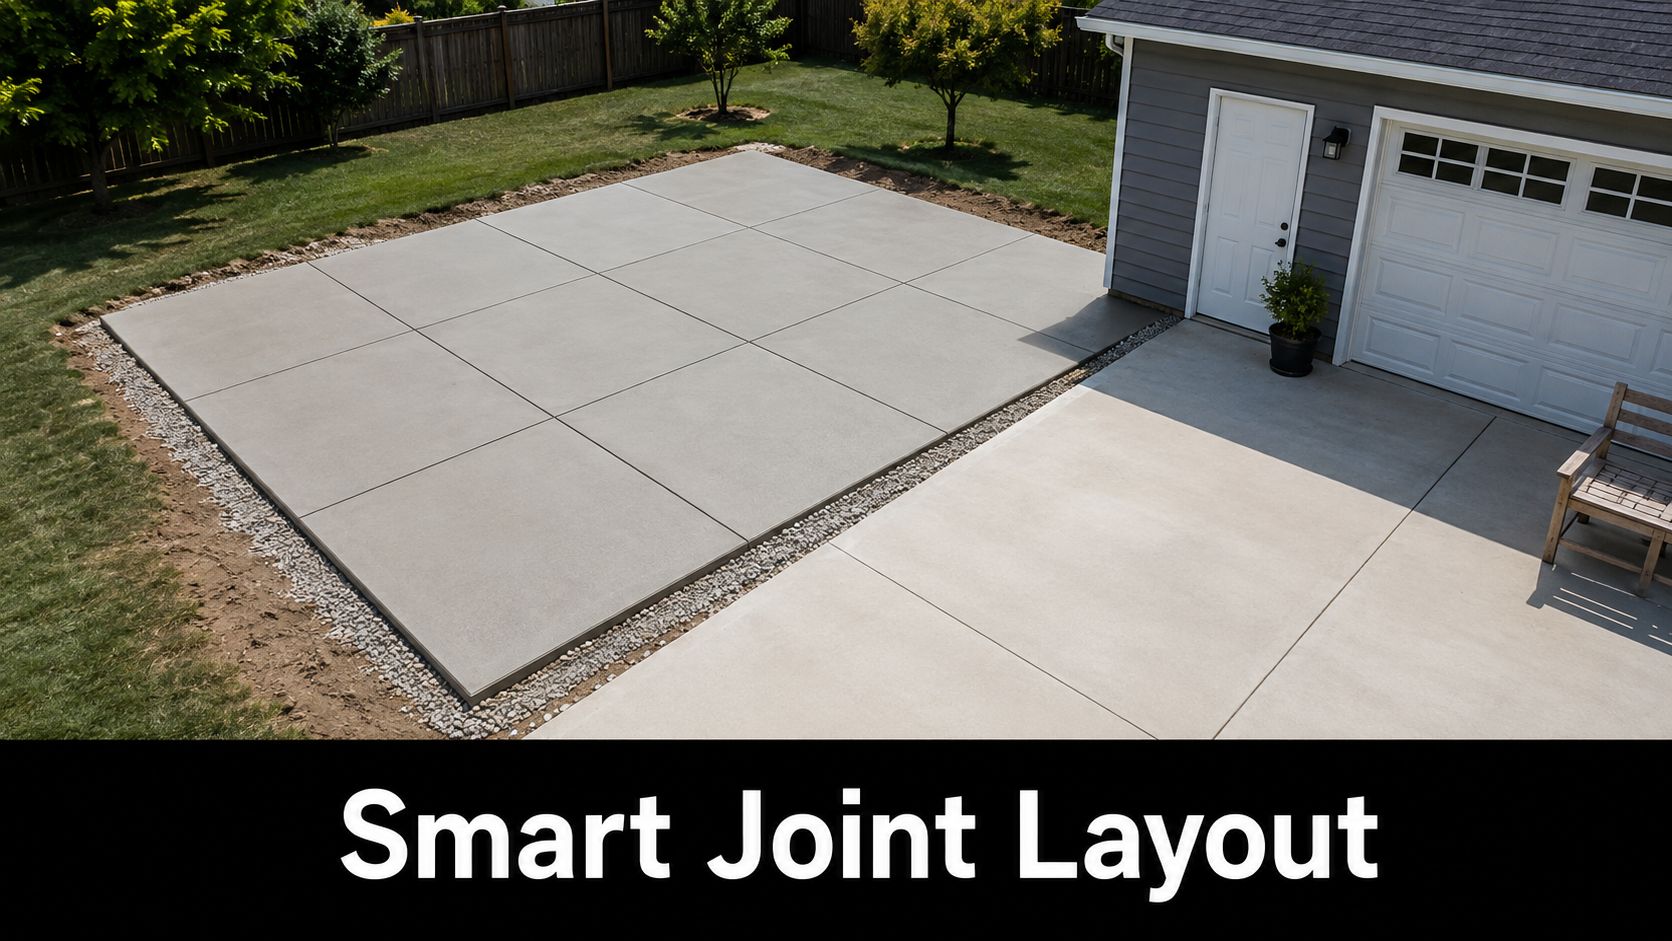
Industry guidance recommends keeping jointed panels close to square, with length-to-width ratios commonly targeted near 1.25:1 and generally not exceeding about 1.5:1, as summarized in this concrete jointing presentation. A long, narrow panel experiences restraint primarily along its longer direction, which increases the chance of a crack forming away from the intended joint.
For example, a layout that leaves one very long strip beside a garage wall may technically fit within a broad spacing range, yet still perform poorly. Additional joints can divide that strip into balanced panels. Symmetry also matters on visible patios, where a grid aligned with the house, steps, and doors looks deliberate rather than patched in.
Reinforcement supports the plan
Rebar or wire mesh can help hold cracked concrete together and manage crack width, but reinforcement doesn't replace contraction joints. The reinforcement must also be positioned correctly within the slab rather than left on the subgrade, where it can't perform as intended. Joint cuts still need to interrupt the slab in planned locations so shrinkage stress has a preferred path.
The practical trade-off is straightforward. More joints can improve crack control and panel proportions, but too many visible lines may affect the appearance of a patio or garage floor. The contractor has to balance structural behavior, access, door locations, posts, edges, and the finished look instead of forcing a repetitive grid across every project.
Timing and Placement Best Practices for Clean Joints
A well-designed layout can fail if the crew creates the joints at the wrong time. Concrete has to be firm enough to support cutting without tearing, yet the crew must work before shrinkage stress produces random cracks.
Choosing the cutting method
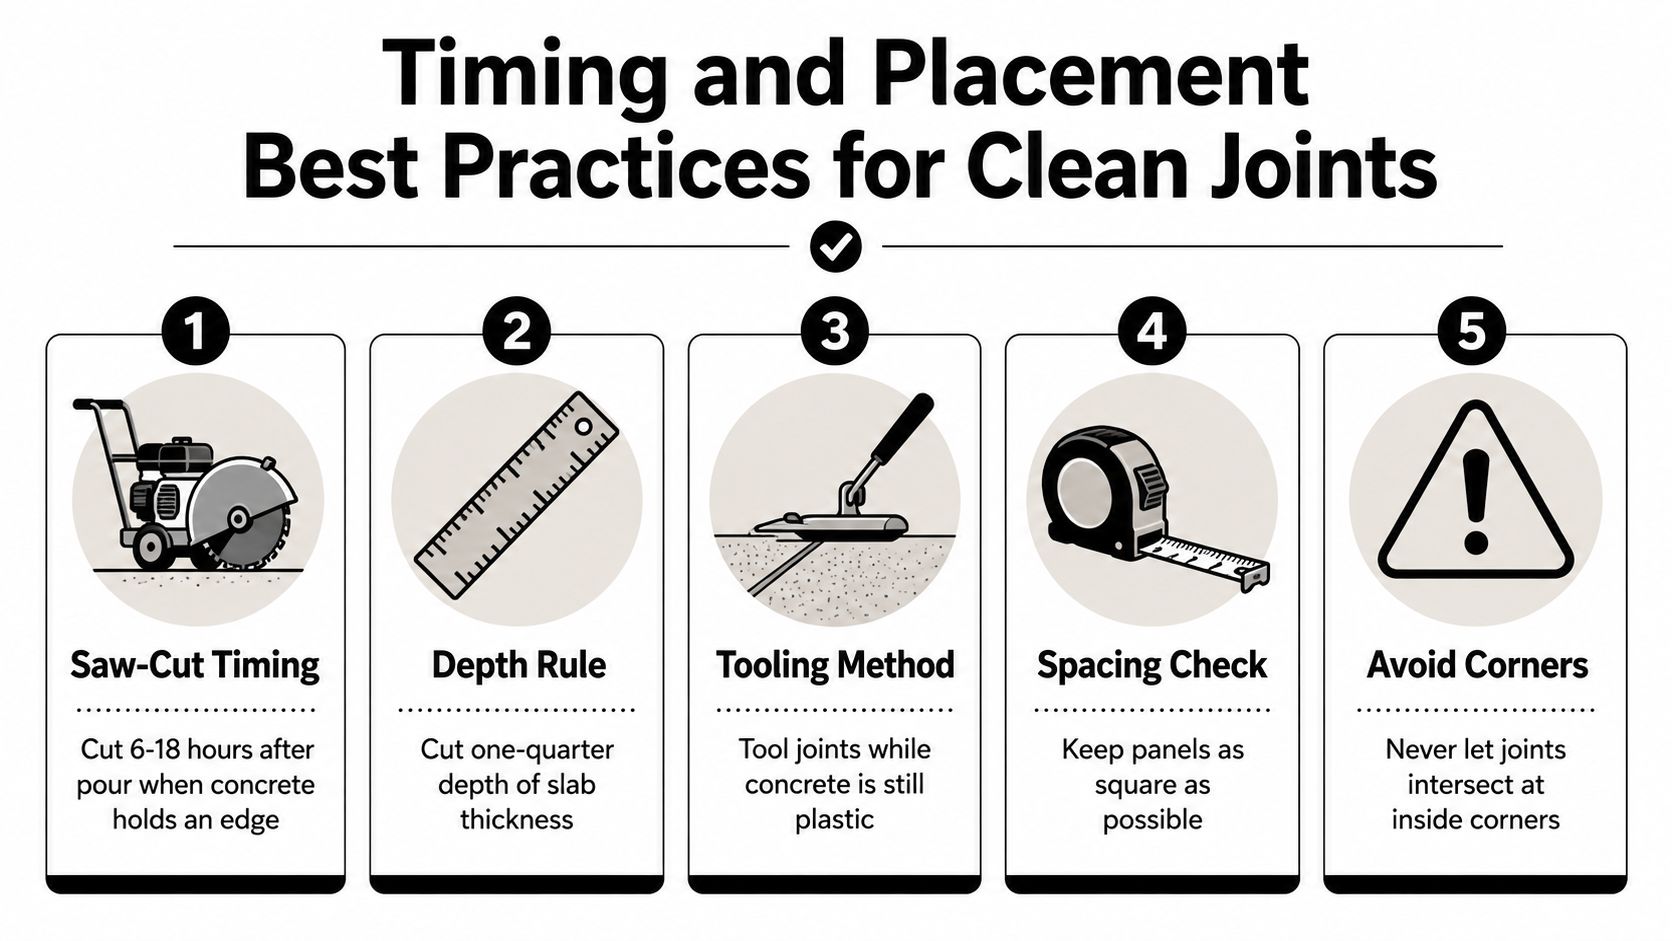
Saw-cut joints are created after the surface has set sufficiently to hold a clean edge. The crew follows straight layout lines with a concrete saw and diamond blade, checking the cut for consistent depth. Tooled joints are formed while the concrete is still plastic, using a groover during finishing. Tooling can work well on smaller residential slabs, while saw cutting gives a more reliable crack plane on larger or thicker work.
Temperature, humidity, wind, slab thickness, concrete mix, and direct sun all influence the cutting window. Firm Foundations crews monitor those conditions instead of treating every pour as if it will set at the same rate.
Depth and line quality
A contraction joint should typically reach one-quarter of the slab thickness, according to the Concrete Network field guidance. On a 4-inch slab, that means the cut needs to reach the required fraction of the slab rather than merely marking the surface.
Straight lines matter for both performance and appearance. Crews mark the layout before cutting, maintain consistent depth, and avoid letting a joint stop at a vulnerable inside corner. A wobbly cut or shallow section can give the crack an easier path somewhere else.
DIY errors usually come from waiting too long, cutting inconsistently, using a small saw that wanders, or laying out joints after the pour. Professional installation coordinates the formwork, reinforcement, finishing, and saw work before the concrete begins to cure. That preparation is especially useful when a slab includes a garage doorway, shed anchor points, patio steps, or a transition to a driveway.
Joint Layout Examples for Sheds Garages and Patios
A formula becomes easier to understand when it's applied to familiar projects. The final plan still depends on the structure and site, but these examples show why a custom layout works better than a single fixed distance.
A 10 by 12 shed pad
A 10 by 12 shed pad with a 4-inch slab falls within the commonly used 8- to 12-foot spacing range for that thickness. A practical layout might use one joint across the shorter direction, positioned to create balanced panels, while keeping the longer dimension from becoming an unbroken strip.
The joint should also respect the shed's door and wall layout. A line that aligns with a doorway or a planned division can look intentional, while a joint running directly through a high-visibility threshold may be distracting. A gravel shed foundation may be more suitable for some sites, but a concrete shed foundation offers a different surface and anchoring approach that should be selected based on drainage, use, and structure requirements.
A 24 by 24 garage slab
A 24 by 24 two-car garage slab needs a grid that keeps its panels manageable. With a 5-inch or 6-inch slab, the spacing ranges commonly land around 10 to 15 feet or 12 to 18 feet, respectively, under the thickness-based guidance from the National Ready Mixed Concrete Association.
The layout should account for the garage door openings, interior posts, vehicle paths, and any thickened edge or footing detail. Joints that align with architectural breaks can be less noticeable and easier to coordinate with the apron or driveway.
A 16 by 20 patio
A 16 by 20 patio slab presents a visual challenge because the joints remain part of the finished design. A balanced grid can divide the broad area into panels that stay close to square while aligning with steps, the house wall, or a change in paving direction. The contractor may use a slightly different pattern around posts or a fire feature rather than allowing a joint to terminate awkwardly at an inside corner.
Homeowners comparing a poured slab with other surfaces may also benefit from this discussion of concrete slabs versus pavers. The choice affects appearance, maintenance, drainage, and how visible the joint layout will be.
Regional Considerations and Getting Your Free Quote
Concrete slabs across Pennsylvania, Maryland, Delaware, and New Jersey face changing moisture and temperature conditions. Freeze-thaw cycles can stress both the concrete and the supporting base, so joint spacing has to work alongside reliable drainage and a properly prepared gravel base.
Soil conditions vary across the region. Clay-heavy areas can hold water and move as moisture changes, while sandy coastal zones may require a different approach to excavation, compaction, and edge support. A shed foundation, garage footings and foundations, gazebo foundation, or patio slab should start with an evaluation of the site rather than a copied plan from another property.
Firm Foundations has delivered foundation and excavation work since 2011, including gravel pads and concrete foundations for sheds, garages, houses, gazebos, horse barns, playsets, hot tubs, shipping containers, driveways, and patios. The process begins with choosing a foundation type, followed by a free detailed quote and construction to the project's specifications.
A durable result depends on more than the visible slab. Proper excavation, forms, base preparation, reinforcement where needed, concrete placement, curing, and joint layout all work together. That's why a homeowner searching for shed foundations near me, gravel shed foundation contractors near me, garage foundation contractors near me, or excavation near me should ask how the contractor plans the entire foundation system.
Firm Foundations provides site preparation, gravel shed foundations, concrete foundations, garage footings and foundations, patios, driveways, and excavation services across Pennsylvania, Maryland, Delaware, and New Jersey. Visit Firm Foundations to request a free detailed quote and discuss the right joint layout for your shed, garage, or patio project.