
Winter Concrete Pouring Guide: Cold Weather Tips
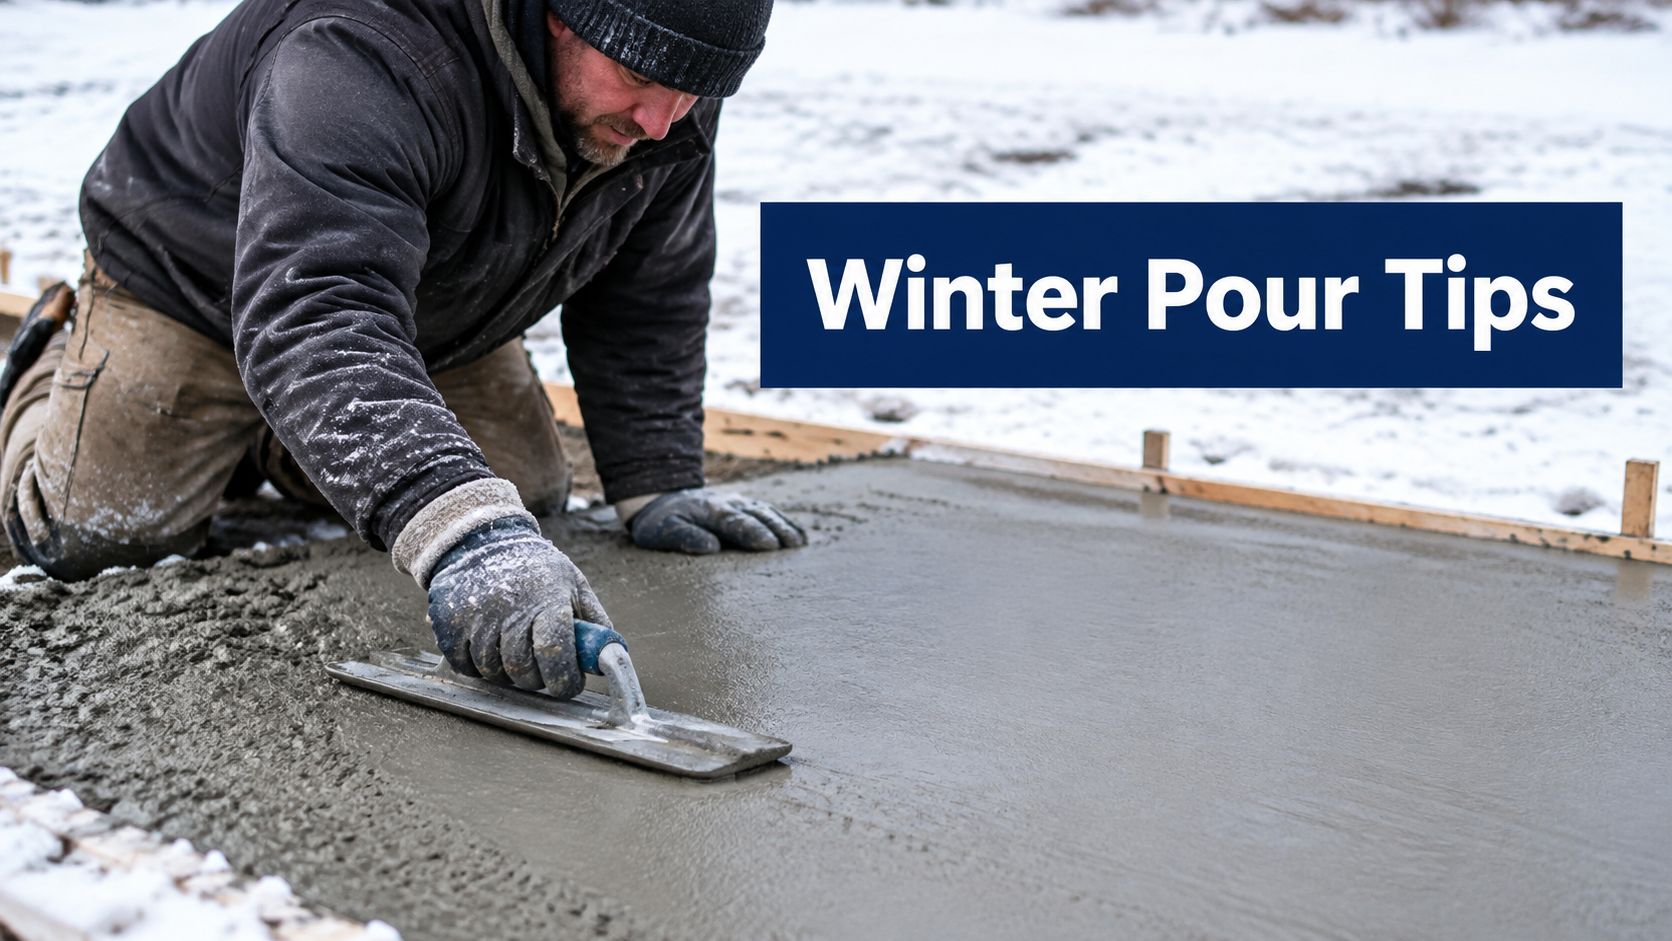
A winter pour often starts with a weather app, a delivery time, and a difficult decision. You may have a shed excavation open in the yard, a garage project waiting on footings, or a patio scheduled before the ground hardens. Then the forecast drops below freezing, frost appears on the forms, and you're left wondering whether to pour, postpone, or call a crew.
Winter concrete pouring can work in Pennsylvania, Maryland, Delaware, and New Jersey, but cold weather removes the margin for casual preparation. Concrete needs protection from freezing, a thawed and stable base, a suitable mix, and temperature monitoring after placement. The same principles apply whether you need a shed foundation, a base for a storage shed, a gazebo foundation, garage footings and foundations, or a larger concrete foundation.
When Winter Concrete Pouring Works
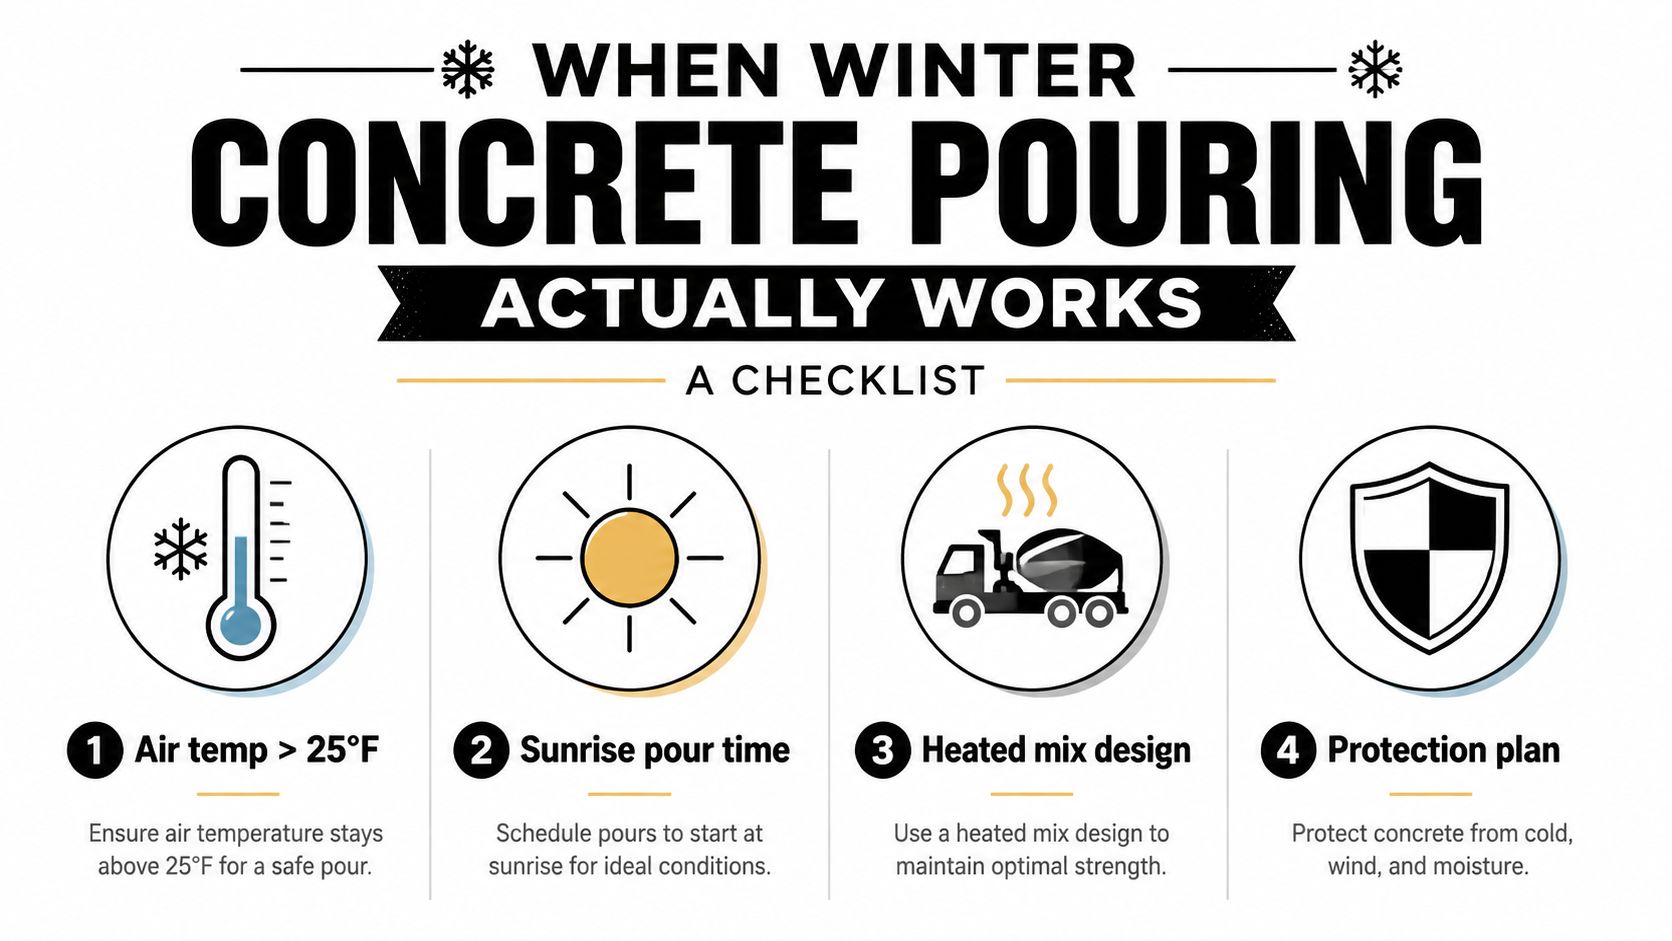
At 6:30 a.m. on a Lancaster County site, the air may be 22°F, frost may cover the ground, and the ready-mix truck may still be due at 9 a.m. That schedule is workable only if the site and forecast support the protection plan. Four field conditions should be confirmed before concrete leaves the chute.
The air should be above 20°F and rising during the planned work window. Falling temperatures increase heat loss from the slab and can turn a manageable morning into an overnight protection problem. ACI treats expected air temperatures below 40°F during the protection period as cold-weather conditions. The concrete must remain protected from freezing until it reaches about 500 psi, as explained in the ACI cold-weather guidance.
The subgrade also needs to be thawed at least 4 inches, with no frost crystals. Frozen soil can soften and settle as it thaws, leaving a shed pad, garage slab, or patio supported unevenly. A firm-looking surface does not prove that frost is absent below it. Test the base rather than trusting its appearance.
Do not pour when precipitation is expected within 24 hours of the work window. Rain or melting snow can dilute the surface cement paste, complicate finishing, and create another rapid temperature change. A forecast that looks acceptable at delivery time may still be poor for the protection period.
Concrete should arrive between 55°F and 90°F, consistent with cold-weather placement guidance. Heated mix water, a plant-controlled mix design, or an accelerator can provide enough internal heat for hydration to begin properly. Those choices add cost and coordination, but skipping them can cost far more through scaling, weak surfaces, or early freezing. The ACI cold-weather preview document outlines the broader planning requirements.
For Mid-Atlantic scheduling, a practical window often comes after the first hard freeze and before deep January conditions, when daytime highs may still reach the mid-30s. That timing is not a guarantee, but it can provide more daytime heat and fewer severe overnight transitions. When the base, delivery temperature, forecast, and protection crew do not line up, postpone the pour or bring in a professional crew.
Preparing the Site Before the First Drop
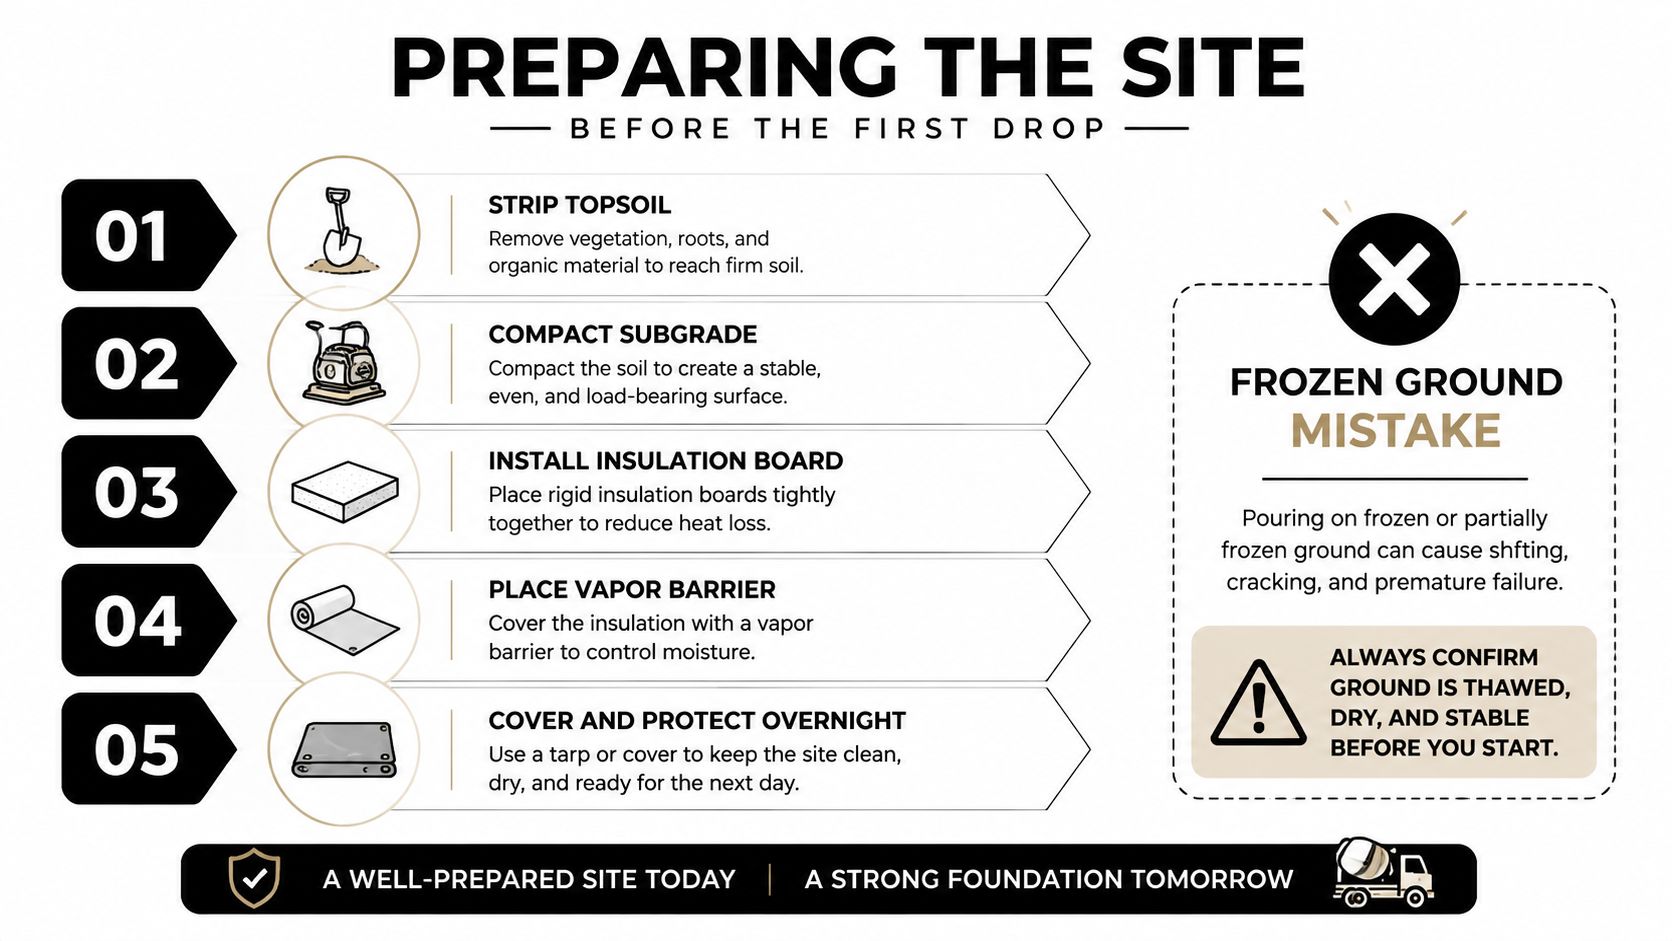
The most damaging winter mistake is pouring over frozen ground. A slab can finish smoothly, look acceptable, and still develop settlement or cracking when the base thaws underneath it. The preparation sequence matters more than a last-minute application of blankets.
Build from the soil upward
Start by stripping topsoil, roots, and organic material. Probe the exposed subgrade with a rebar or similar tool. A crystalline crunch or unusually hard refusal can indicate frost. If the subgrade is frozen, cover it with 6 mil black poly and use ground heaters to thaw it over 24 to 48 hours. Don't place concrete over isolated frost lenses and assume the surrounding soil will hold everything in place.
Once the subgrade is workable, install at least a 4-inch compacted crushed-stone base, such as PennDOT 2A or an equivalent material. Compact the base in controlled lifts so it supports the slab consistently and helps separate the concrete from cold, wet soil. This matters for a shed pad just as much as it does for a garage slab.
Set forms plumb, brace them firmly, and oil them before placement. On frost-susceptible sites, drive stakes below the frost line so thawing soil doesn't push the forms out of alignment. Reinforcement belongs on chairs or dobies, not on the frozen base. Wire mesh only works as intended when it remains positioned within the concrete during placement.
Practical rule: A shed foundation gravel base isn't an optional upgrade. Skipping it to save a Saturday can create a much more expensive correction after the soil thaws.
The same preparation logic applies when you're comparing shed foundation blocks with a poured slab, planning a 4×8 shed with foundation, or hiring gravel shed foundation contractors near me. A compacted base, proper drainage, and stable forms determine whether the structure remains level.
For a project-specific preparation sequence, review this shed and garage foundation preparation guide. If excavation, drainage, or frost removal is beyond your equipment or experience, search for excavation near me and involve a contractor before the concrete is ordered.
Choosing the Right Heating and Admixture Strategy
Cold-weather protection usually combines three tools, accelerators, heated mix water, and insulation. Each addresses a different problem. An accelerator helps the concrete set sooner, heated water raises the starting temperature, and blankets retain the heat generated during hydration.
Accelerators are often the simplest option for a modest shed pad or patio. Calcium chloride can be used in non-reinforced concrete, while a non-chloride accelerator such as calcium nitrate is the safer choice when rebar or mesh is present because chloride can contribute to reinforcement corrosion. Accelerators don't replace curing protection. They change the setting and early-strength behavior, but the slab still needs to stay above freezing.
Heated mix water requires coordination with the ready-mix plant. The supplier must batch the mix to the agreed specification, and the water temperature must remain within the plant's limits. This option is useful when the delivery arrives cold or when the crew needs more initial heat throughout a garage slab or foundation.
Insulating blankets retain heat after placement. Use blankets rated for the expected conditions, overlap seams, extend them beyond slab edges, and secure them against wind. A blanket that lifts at the corner creates a cold strip exactly where the concrete is most vulnerable.
| Method | How It Works | Best Project Size | Cost Impact | Limitations |
|---|---|---|---|---|
| Accelerators | Speeds setting and early strength development | Shed pads, patios, and small flatwork | Usually the least expensive adjustment | Must match reinforcement and mix requirements |
| Heated mix water | Raises the concrete's starting temperature | Garage slabs, footings, and foundation work | Adds plant coordination and mix cost | Requires a ready-mix supplier that can batch to specification |
| Insulating blankets | Holds hydration heat in the concrete | Small to medium slabs and foundations | Adds blanket rental or purchase cost | Doesn't correct frozen soil or protect uncovered edges |
For a 12×12 shed pad, an accelerator paired with blankets will often be a practical protection approach when the site is thawed and the weather window is stable. A garage slab or structural foundation generally deserves a combined plan using heated mix water, an appropriate accelerator, and insulation. The exact selection should follow the project's reinforcement, thickness, exposure, and inspection requirements.
Pouring, Finishing, and the First 72 Hours
A shed pad can look ready while the slab edge is still losing heat to frozen forms or exposed ground. Winter placement works when the crew has the sequence, tools, protection, and temperature checks arranged before the truck arrives.
Before the truck arrives
Confirm the mix requirements with the ready-mix supplier. Keep slump at a 4-inch maximum, and have any accelerator blended at the plant. For exposed flatwork, request 5% air entrainment when the design calls for freeze-thaw exposure. Coordinate delivery so the concrete remains above 50°F during placement, even when outdoor air is below freezing.
Place the load continuously. Long pauses let one area cool while another remains workable, creating joints and uneven finishing conditions. Vibrate edges carefully, keeping the vibrator moving instead of holding it against the forms. That consolidates the concrete without leaving excessive voids or bug holes. Cold concrete may finish differently from a warm mix, and an accelerator can change the timing and amount of bleed water.
Finishing and protection
Follow the surface condition, not a preset clock. Accelerated concrete may reach finishing stage sooner, while cold conditions can delay visible bleed water. Do not finish over standing bleed water. Working that water into the surface can leave a weak, dusty layer.
Begin protection once the final finish can accept covering without being marked. Install insulating blankets with full edge coverage, overlap seams, and anchor them against wind. A lifted corner can expose the slab edge to freezing temperatures. Use a heated enclosure when temperatures are especially low, precipitation threatens, or blankets alone cannot retain enough heat.
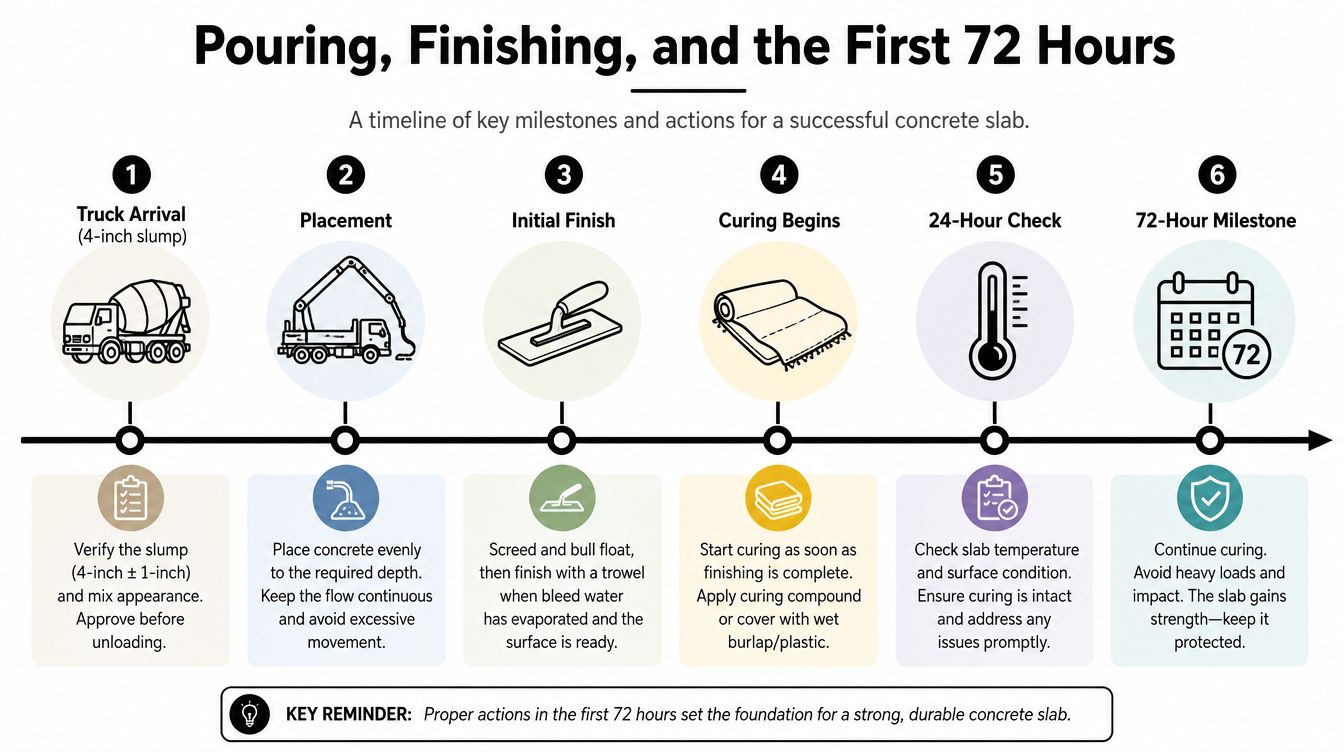
Track the initial protection period for 72 hours on ordinary cold-weather work. ACI guidance calls for protection until the concrete reaches about 500 psi. Conventional mixes commonly need 48 to 72 hours of protection, depending on temperature and mix design. The ACI cold-weather requirements also call for protection against unexpected freezing during at least the first 24 hours when conditions are not formally classified as cold weather.
Use temperature logs or sensors beneath the insulation. Outdoor air readings do not show the concrete's actual condition. Remove insulation only after the concrete has developed sufficient strength, and reduce the temperature difference gradually. Before stripping forms, check surface hardness and confirm the recorded concrete temperatures support removal.
This video provides a visual reference for the placement and curing sequence:
Costs and When to Hire a Pro Crew
Winter work costs more when the protection plan is real. A homeowner may need accelerator admixtures, a hot-water heater rental, insulated blankets, propane for ground thawing, and enclosure materials. Those items can make a small pour look affordable on paper but less attractive once equipment rental, delivery coordination, labor, and weather delays are included.
Professional pricing usually reflects the concrete volume plus cold-weather requirements, including accelerated mix designs, heated enclosures when needed, temperature monitoring, and additional protection labor. Exact pricing depends on access, excavation, reinforcement, thickness, drainage, inspection requirements, and whether the project is a shed pad, garage foundation, or structural house foundation.
| Cost Category | DIY Approach | Pro Crew |
|---|---|---|
| Mix adjustments | Purchase or request accelerator and coordinate heated water | Crew specifies the mix with the ready-mix supplier |
| Ground thawing | Rent heaters and supply propane | Contractor plans thawing, protection, and monitoring |
| Insulation | Buy or rent blankets and enclosure materials | Contractor supplies, installs, anchors, and checks protection |
| Labor | Homeowner manages placement and finishing | Experienced crew coordinates the full pour |
| Risk control | Limited equipment and no formal temperature log | Documented process, inspection coordination, and corrective planning |
The decision rule is straightforward. DIY may be reasonable for a small, accessible, non-structural pad when the ground is fully thawed, the weather window is stable, and the homeowner has concrete-finishing experience. A structural foundation, garage footing, reinforced slab, inspected project, or any work requiring significant thawing should go to a professional crew.
Firm Foundations handles excavation, forming, concrete foundations, shed pads, garage slabs, and related site work across Pennsylvania, Maryland, Delaware, and New Jersey. If you're comparing regional construction information, this guide to San Antonio patio concrete companies also shows how service buyers evaluate concrete contractors outside the Mid-Atlantic.
A professional quote should identify excavation, base material, forms, reinforcement, concrete specification, admixtures, heating, blankets or enclosure, temperature monitoring, finishing, cleanup, and weather-related scheduling terms. Ask for those details before comparing one price with another.
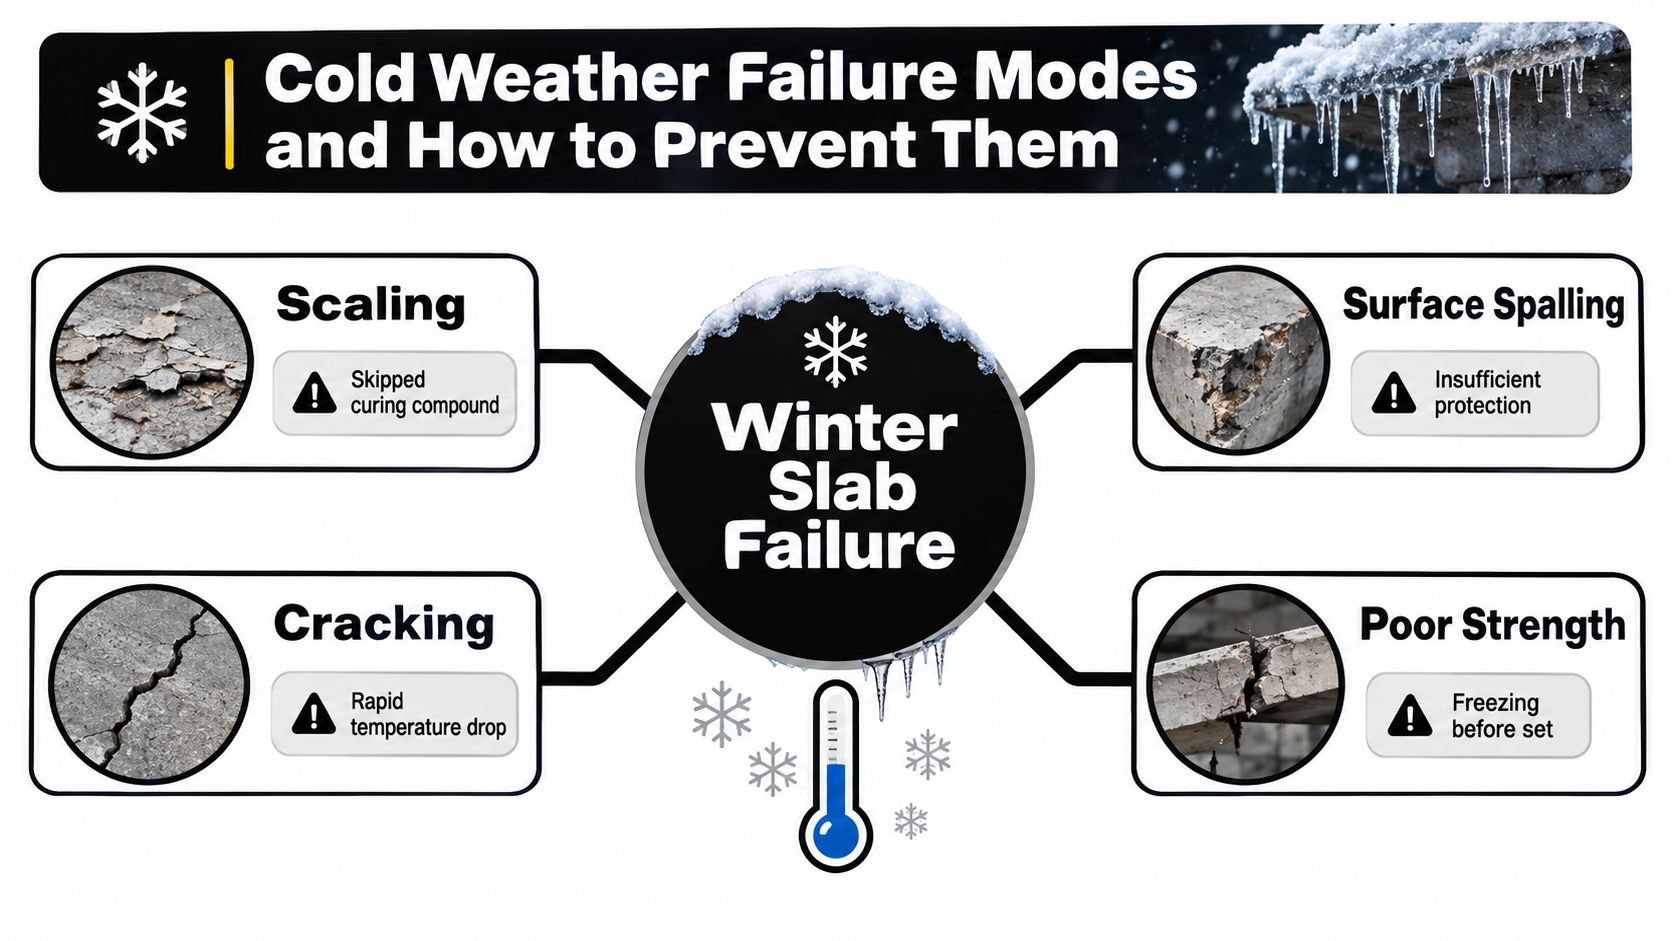
Cold Weather Failure Modes and How to Prevent Them
Spring thaw is the critical inspection. A slab can look sound on pour day, then reveal damage after the base shifts or repeated freezing opens weak surface zones. Most failures trace to a frozen subgrade, thin insulation, early exposure, or finishing before the concrete is ready.
Scaling and surface spalling start when the surface freezes before the paste has developed enough strength. Wind, uncovered edges, and late curing protection make that risk worse. Judge protection by the concrete's temperature and strength, not by a warmer afternoon. Keep the slab covered until the planned protection period is complete, and do not treat a brief thaw as permission to uncover it.
Random cracks usually follow uneven cooling. Open blanket seams, wind under the covering, and early removal can cool the top faster than the interior. Secure coverage immediately after finishing, record temperatures beneath the insulation, and remove protection in stages so the slab can adjust gradually.
Soft or dusty surfaces show that hydration slowed in cold conditions or that the surface lost moisture before it hardened. Accelerator alone cannot correct a slab placed on frost or exposed to drying wind. The fix requires a stable base, a mix suited to the conditions, and uninterrupted protection.
Edges and corners lose heat faster than the middle of a slab. Extend insulation past the concrete, anchor every side, and inspect corners during temperature checks. A small opening under a blanket can create a narrow but serious weak zone.
Uneven thawing can also move a shed pad or slab after the surface appears acceptable. Review this foundation frost protection resource for practical guidance on limiting frost-related movement around outbuildings. If cracks widen, corners settle, or the base was frozen during placement, stop guessing and have a qualified concrete contractor assess the work before loading it.
Your Winter Pour Checklist and Next Steps
Use this checklist before approving a winter concrete pour. It's designed for a homeowner, builder, or property manager walking the site with the crew.
Before the pour
- Review the forecast: Confirm air temperatures are expected to stay above the project's protection limits and avoid a precipitation window.
- Test the subgrade: Remove snow, ice, and frost. Confirm the placement area isn't frozen.
- Thaw the ground: Use ground heaters and protective covering when frost remains. Don't pour over frost lenses.
- Compact the base: Install the specified crushed-stone base and verify that it supports the forms evenly.
- Secure the forms: Brace forms, oil contact surfaces, and protect them from ice and displacement.
- Position reinforcement: Keep mesh or rebar on chairs or dobies, never directly on the base.
- Confirm the mix: Coordinate slump, air entrainment where required, accelerator selection, and heated mix water with the supplier.
On pour day
- Check delivery temperature: Confirm the concrete arrives within the specified placement range.
- Place continuously: Keep the truck and crew coordinated so cold joints don't form.
- Finish by surface condition: Don't trowel standing bleed water into the slab.
- Protect immediately: Install blankets or a heated enclosure as soon as finishing allows.
- Secure the edges: Overlap coverings, anchor them against wind, and insulate corners.
During the first 72 hours
- Log concrete temperature: Monitor beneath the insulation instead of relying only on air temperature.
- Maintain protection: Keep the concrete above freezing until it reaches sufficient early strength.
- Inspect the covering: Check for wind gaps, wet insulation, and exposed edges.
- Remove gradually: Strip insulation and forms only after the concrete is hard enough and temperature changes can be controlled.
- Document the work: Retain mix details, temperature readings, and protection notes for inspections and future construction.
A small base for a storage shed may be manageable with the right preparation, but garage footings and foundations, concrete foundations, and large slabs carry consequences that aren't worth a rushed shortcut. A local crew can also coordinate related excavation, driveway work, patios, and foundation builds when the project extends beyond a simple pad.
Firm Foundations provides excavation, gravel pads, concrete shed foundations, garage slabs, gazebo foundations, and other foundation work across Pennsylvania, Maryland, Delaware, and New Jersey. For a winter project that needs a thawed base, protected placement, and monitored curing plan, visit Firm Foundations to request a free quote and discuss the site before scheduling the pour.